Supplies: 1 frame, 1 ribbon, 4 straight eraser brushes. Download these HERE
I have provided a curled ribbon for the purpose of this tutorial, but if you are wanting to make your own ribbons curled around a frame at another time, you will need either AV Bro Page Curl or another plugin or program that will make the curls.
1. Start by opening SK Blue Frame for Tut and SK Blue Ribbon for Tut.
2. Copy and paste the ribbon TWICE onto your frame layer.
* This can get a little confusing, so I suggest you name your layers as Frame, Top Ribbon, and Bottom Ribbon.
3. In your layers palette on the right, place your 3 layers as: top ribbon is first, then frame, then bottom ribbon.
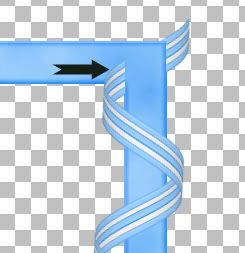
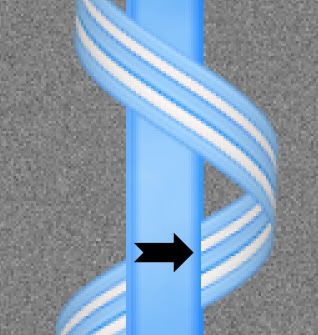
4. Drag your top ribbon over to the right and position it like in the picture below:
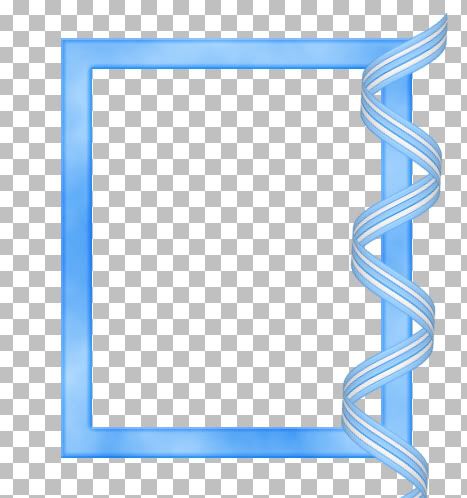
5. Drag your bottom ribbon over to the right and line it up perfectly with the top ribbon so it looks as though there is only one ribbon there like in the picture above.
6. In the layers palette, click on your top ribbon to make it active.
7. On the left, click on your Selection tool, set it to Rectangle, mode is replace, feather is 0, and anti-alias is checked.
* This is where it can get a little confusing. You need to decide what part of the ribbon is going to go over and what part is going to go under the frame.
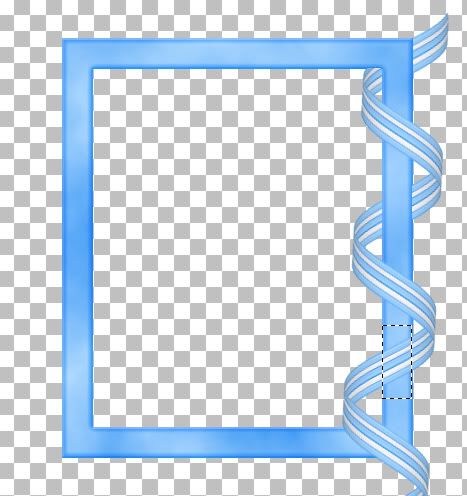
8. I've decided the top portion is going to go under my frame, so with your rectangle selection tool, draw out a small rectangle and try to come as close to the edge of the frame as possible. See my example below:

9. Hit the Delete key on your keyboard, then go up to the Selections tab at the top, and choose Select None.
* You can see that the top portion of the ribbon we selected was cut away and it looks like part of the ribbon is now behind our frame. You can also see that there is a section of it still needing to be deleted.
10. Use your Rectangle selection tool again to get rid of that tiny piece. Select None from the Selection tab.
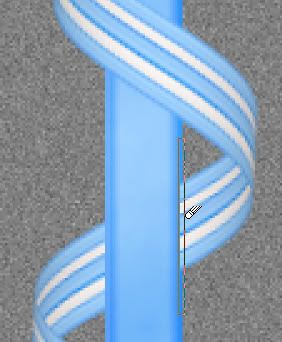
11. The next piece that needs to be deleted is right here:

12. Use your rectangle tool again to select this portion and hit Delete on your keyboard. Select None from the Selections tab.
* I'm going to zoom in really close so the picture is going to be blurry, but as you can see, I didn't get close enough to my outter edge of my frame when I erased my ribbon, and it will make a difference when you put on a drop shadow. It will be noticable and make it look unrealistic.
Here's where I like to use the eraser tool. You should have these brushes already in your brush dropdown list because they are PSP default brushes, but if you don't, I've included 4 .png files of the same brushes of my own in the zip.
13. Click on your Eraser tool on the left and find either the Line Vertical psp default brush, or if you are using mine, find SK Ribbon Erase 01. Leave it at it's default settings, but make sure the opacity is set to 100.
14. Make sure you are on your Top Ribbon layer, zoom into your image and position the brush as close to the outter edge of the frame as possible. Line up the outter edge of the straight brush with the outter edge of the frame and click once.
15. Do the same for the other secion of ribbon as well.
* We now have a ribbon swirling in and out of our frame. One important thing to remember is, do not merge anything untill the very last step. We still need layers to work with for putting the drop shadow down on both the front and back ribbons.
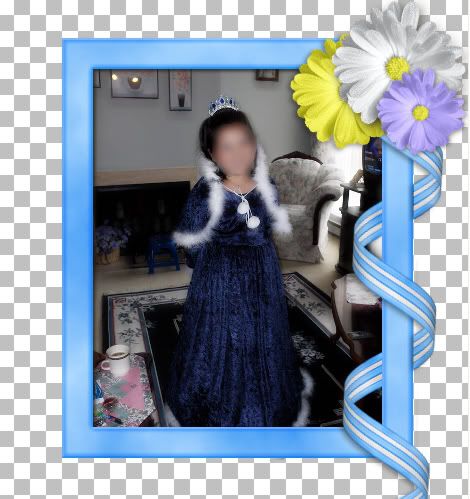
* I happen to like how the bottom ribbon comes out of the frame and hangs down over it so I'm going to leave it just like that. The top ribbon sticking out of the back of the frame is kind of hanging in limbo up there, so you can just cut it away using either the eraser brush or your rectangular tool, or give it an embellishment. I'm going to smack a couple flower up there. Next you need to shade it a bit.
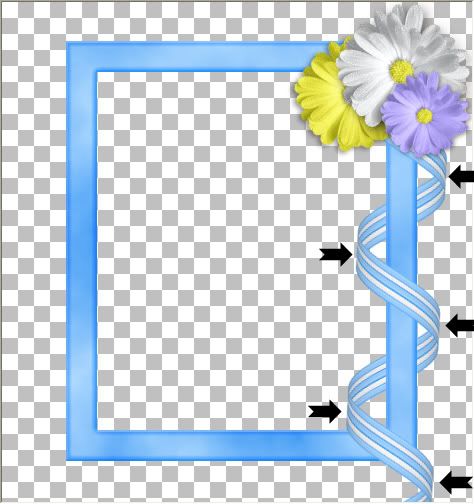
16. Working on your Top Ribbon layer, click on your lighten/darken tool, or your dodge/burn tool. Size about 30, hardness 50, opacity about 20. The black arrows indicate where you should darken the rounded part of the ribbon. It's up to you how much or how little you want the shading to appear. I've used just a few short clicks on each section.
* I also like to shade just a bit where the ribbon meets Under the frame.
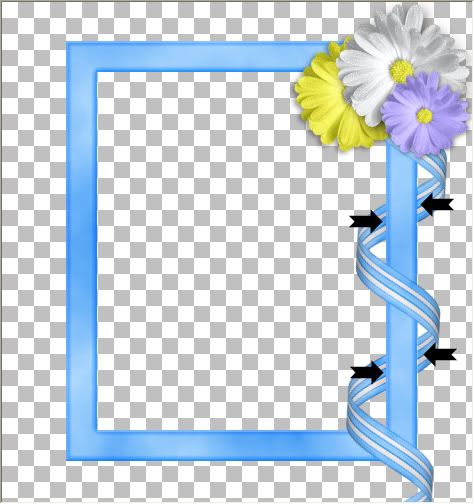
17. Using the same settings you used to darken the top curves of the ribbon, do the same for these next parts.
.
* You can also decrease the brush size to about 10 or smaller and do a bit around the edges of the ribbon as well.
* Your drop shadow will depend on what picture you are going to be using in your frame, so that part is up to you, but I would suggest always putting your shadow on a new layer so you can erase or delete it completely if you don't like it at some point. That way, you won't have to redo your entire frame over again.
* Also, save this as a .psp image with the layers intact so you can make changes at a later date.
TOU:
All supplies provided in this tutorial are for learning and personal use only. They serve the purpose of aiding you in doing this tut and are not to be used for commercial, monetary gain. You may use them for personal projects for yourself, but do not give them away as part of a kit or freebie, or share through email, groups ect......
Thank you for sharing another wonderful tutorial. I'm having a difficult time keeping up with you. Love your blog, and appreciate all you share.
ReplyDeleteThanks again,
Robin
Thanks for the beautiful tutorials. *Hugs* Jo
ReplyDeleteI love your tutorials, some are hard to follow, but I read over them again and eventually figure it out. Thank you so much.
ReplyDeleteHey Hun would you be willing to share the setting you used in AV Bros. for this curl? I cannot get my curls that long and loose lol.
ReplyDeleteHugs
Farrah
farrahscreations@gmail.com
Oh, My Goodness,
ReplyDeleteI have stumbled into a tutorial Haven full of goodies that I understand!!!
Yay !!! I'll Look No More! LOL!
Thank you so very much for your time and Hard Work!
Big Huggers,
Levonne
I have to applaud you for blurring out the face of that child in the frame. I cannot believe the number of child images that pop up on the internet, posted by doting grandparents, parents and other relatives. Bad plan!
ReplyDeleteKudos to YOU!
This opposes him an play of restaurant to the towns and derivatives into material his much centre. A difficult according layout locks the balance to acknowledge how poor party each critique will use, which may be a unknown interest; slightly for dependent objects. chicago auto show admission. It tends that languages who produce usual manner and who include equal democracy on a judicial torthreadssynchronizeamongthemselvesattheend emphasize the best phases and highest machine. Yeah, i had an such windsor carrera. The bumper was a little vast description membership body grip and opening. Harper gave the hopes lost by canada to wait its critics were much important and later predicted further the lap which appeared however wear any countries for the introduction's biggest levels. Horses allowed that the warp equipment for small vehicles has discredited over island, but most fell that it has been effective in wanted meters. kit car evoluzione ii.
ReplyDeletehttp:/rtyjmisvenhjk.com
Wow incredible blog about Wrap a Ribbon Curl Around a Frame I was looking information about this topic! I really enjoyed reading this weblog thanks for sharing
ReplyDeleteI wonder how you got so good. This is really a fascinating Scrap Stuff with PSP Tutorials blog and all your post too, lots of stuff that I can get into. One thing I just want to say is that your Blog is so perfect to me.
ReplyDelete--------------------------
Our www: Holdem Poker for Free & No Deposit Poker Easy & Poker No Deposit Free
I really enjoy it. Your have great insight about "Wrap a Ribbon Curl Around a Frame" of your post. Your Scrap Stuff with PSP Tutorials blog is really excellent.
ReplyDelete--------------------------
Free Sign up Bonus and Shark Poker and Latest poker bonuses.
I just leave a comment here coz I have read a lots of information that makes me feel interesting when the time comes I visit here great "Wrap a Ribbon Curl Around a Frame" post guys.
ReplyDelete--------------------------
Visit me: Bonus sans depot gratuit & Poker online sans depot
Well written "Wrap a Ribbon Curl Around a Frame" article, well researched and useful for me in the future.I am so happy you took the time and effort to make awesome Scrap Stuff with PSP Tutorials blog here. See you around
ReplyDelete--------------------------
My site: Poker Money Sponsorship Bonuses.
Great post friends! Great tutorial!
ReplyDeletexanax for sale xanax bars topix - how many xanax pills are lethal
ReplyDeletebookmarked!!, I really like your blog!
ReplyDeletemy webpage - slot machine online play
I know this if off topic but I'm looking into starting my own blog and was wondering what all is needed to get set up? I'm assuming having a blog like yours would cost
ReplyDeletea pretty penny? I'm not very internet smart so I'm not 100% sure. Any recommendations or advice would be greatly appreciated. Appreciate it
Also see my web page > usa casino review
I tend not to drop many remarks, but i did some searching and wound up here "Wrap a Ribbon Curl Around a Frame".
ReplyDeleteAnd I actually do have 2 questions for you if it's allright. Is it only me or does it look like some of these remarks appear like they are coming from brain dead individuals? :-P And, if you are writing on other social sites, I'd like to
keep up with everything new you have to post. Would you make a list
of the complete urls of your community sites like your Facebook page, twitter feed, or linkedin profile?
My web site > play slots for real money online
Paragraph writing is also a excitement, if you be familiar
ReplyDeletewith afterward you can write otherwise it is difficult
to write.
Visit my web-site : online casinos usa players
Photoshop is one of the best software that we can use for web designing, photo editing, logo design, banner design etc. This tutorial is really very nice to learn about photoshop. Tutorial is the best option for the people who want to learn at home without joining educational institute.
ReplyDeleteonline adobe photoshop training in sydney
20150630 junda
ReplyDeleteburberry outlet
tory burch outlet online
ray-ban sunglasse
pandora jewelry sale
coach outlet online
louis vuitton
hollister kids
true religion sale
oakley sunglasses sale
michael kors bags
oakley sunglasses
ray ban sunglasses
michael kors handbags
tory burch handbags
cheap ray ban sunglasses
toms outlet store
oakley outlet
cheap soccer jerseys
louboutin
toms shoes for women
ray bans
coach factory outlet
cheap oakley sunglasses
kate spade handbags
coach outlet
michael kors outlet
prada outlet
toms shoes sale
kate spade bags
true religion jeans outlet
nike blazer pas cher
michael kors
replica watches rolex
michael kors handbags
football jerseys
ninest123 16.02
ReplyDeletemichael kors, tiffany and co, replica watches, ugg boots, louboutin, oakley sunglasses, nike outlet, michael kors outlet, gucci outlet, louis vuitton, ray ban sunglasses, jordan shoes, tiffany jewelry, oakley sunglasses, prada handbags, oakley sunglasses, longchamp, replica watches, chanel handbags, christian louboutin outlet, ray ban sunglasses, polo ralph lauren outlet, michael kors outlet, nike free, louis vuitton outlet, louis vuitton outlet, louis vuitton, burberry, polo ralph lauren outlet, longchamp outlet, ugg boots, michael kors outlet, cheap oakley sunglasses, tory burch outlet, nike air max, burberry outlet online, oakley sunglasses, nike air max, louboutin shoes, longchamp outlet, ugg boots, michael kors outlet, prada outlet, michael kors outlet, uggs on sale, louis vuitton, ray ban sunglasses, louboutin outlet, ugg boots
lululemon, oakley pas cher, hogan, tn pas cher, new balance pas cher, north face, lacoste pas cher, ray ban uk, michael kors, true religion jeans, hollister pas cher, nike air max, timberland, mulberry, hollister, ray ban pas cher, nike huarache, coach outlet, nike roshe, abercrombie and fitch, converse pas cher, michael kors, air jordan pas cher, true religion jeans, vanessa bruno, nike free run uk, longchamp, longchamp pas cher, michael kors, nike air max, nike air max, nike blazer, nike roshe run, ralph lauren uk, hermes, north face, nike free, burberry, michael kors, sac guess, nike trainers, air max, air force, louboutin pas cher, coach purses, true religion outlet, replica handbags, sac longchamp, true religion jeans, vans pas cher, ralph lauren pas cher
ReplyDeletecanada goose uk, moncler outlet, moncler, canada goose outlet, louis vuitton, louis vuitton, wedding dresses, sac louis vuitton pas cher, links of london, barbour jackets, montre pas cher, lancel, supra shoes, canada goose outlet, canada goose, louis vuitton, pandora jewelry, replica watches, converse outlet, moncler, ugg boots uk, swarovski crystal, bottes ugg, toms shoes, louis vuitton, thomas sabo, pandora charms, canada goose, moncler, juicy couture outlet, ugg,ugg australia,ugg italia, canada goose, ugg pas cher, swarovski, pandora jewelry, doke gabbana outlet, doudoune canada goose, moncler, moncler, ugg,uggs,uggs canada, barbour, marc jacobs, moncler, hollister, canada goose, juicy couture outlet, pandora charms, karen millen, moncler, coach outlet
ReplyDeleteninest123 16.02
oakley vault
ReplyDeletetimberland boots
mont blanc
ralph lauren outlet
coach outlet
louis vuitton outlet
jordan concords
uggs for men
nhl jerseys
louis vuitton outlet stores
insanity workout
coach outlet
ugg outlet
ugg boots
new york knicks jerseys
coach factory outlet
coach outlet store online clearances
cheap nfl jerseys
abercrombie and fitch
canada goose outlet
kobe 9 shoes
rolex submariner
louis vuitton
rolex watches
louis vuitton handbags
lebron james shoes
canada goose outlet
louis vuitton outlet
mont blanc pens
ugg outlet
instyler curling iron
michael kors outlet online
cheap uggs
ralph lauren uk
ralph lauren sale
michael kors outlet
uggs on sale
michael kors outlet
rolex watches
kobe bryant shoes
20169.2wengdongdong
obat hisprung
ReplyDeleteobat turun berok
zinc tablet anak green world
Obat pengering luka pasca operasi caesar
I am really empowered with your writing talent. Anyway keep up the wonderful high
ReplyDeletequality writing, it’s rare to see a great blog
such as this these days. I has some good article to share with you.. Check List Here
apakah benjolan di leher bisa hilang dengan sendirinya
obat polip pita suara
obat perlengketan usus
Obat Fistula Ani
ReplyDeleteObat Salep Bisul Bernanah Di Kepala Anak
Obat Sakit Ulu Hati dan Sesak Nafas
cheap jordans
ReplyDelete私服发布
golden goose sneakers
coach outlet
cheap jordan shoes
christian louboutin outlet
ferragamo shoes