Supplies Needed: Paint Shop Pro, EyeCandy5 Impact, My Snowflake Tubes, Font
PSP8 Trial Version: Download Here
EC5 Impact Trial Version: Download Here
Supplies Zip: Download Here
Although, this is written for PSP, I'm sure it can also be done in Photoshop as well. If you are making an alpha, you need to choose a fat font, as skinny ones do not show very well. Keep in mind, that this tutorial is to show you a "technique" and can be done on any shape, not just fonts. See examples at the end of this tutorial. You can download this already made alpha, caps and lowercase on my blog Here
1. Open up a 500 by 500 transparent image. When drawing your text or shape, be sure to leave extra room all around, as we need to move it around the canvas.
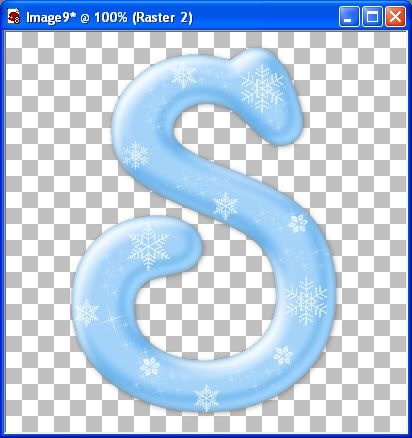
2. Set your foreground and background to #69BAFB. Open up your font in PSP, Size 350, Stroke width 1, Anti-alias is checked. Type out your S on your canvas.
3. In the layer palette to the right, right click on Vector 1 and from the flyout choose Convert to Raster Layer, then rename it to S.
4. Go up to the "Selections" tab, choose "Select All", then to the "Selections" tab again, choose "Float", back up to the "Selections" tab and choose "Defloat".
5. Go up to the "Layer" tab and choose "New Raster Layer", then name this layer Light Blue.
6. With the Blue layer active (it should be highlighted blue), Go up to the "Selections" tab, choose "Modify" then choose "Contract". Set the number of pixels to 4 and hit ok.
7. Change your foreground colour to #A1D6FF, and flood fill this layer with the lighter blue. It should look like the picture below

8. Now switch to your mover tool. Place your cursor on the light blue layer, and move it downwards just a bit like in the picture below.
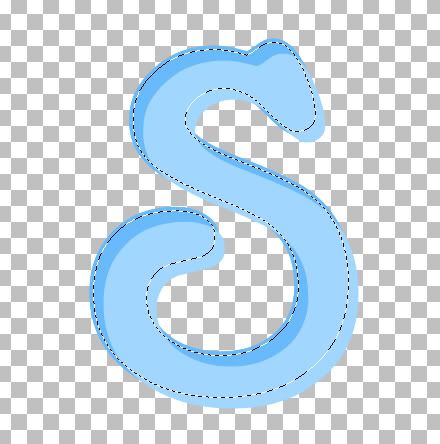
This is a bit confusing to look at, but your marching ants will stay in place, but the light blue that is OUTSIDE of the march ants is going to be our blue highlight.
9. Hit the delete key on your keyboard. Everything that was INSIDE the marching ants should have disappeared and left just what was OUTSIDE.
10. Go up to the "Selections" tab and choose "Select None".
11. Place your cursor on the light blue layer and push it back into place in the S. Because we've contracted the image by 4 pixels, it will be slightly smaller than the darker blue S, so place it like in the picture below, leaving a bit of darker blue showing around the edges.

12. With your Light Blue layer active, go up to the "Adjust" tab and choose "Blur", then choose "Gaussian Blur". Set the radius number to 3 and hit OK.
13. In the layer palette to the right, click on the S layer to make it active. Go up to the "Selections" tab, choose "Select All", up to the "Selections" tab again, choose "Float", back up to the "Selections" tab and choose "Defloat".
14. Next, go up to the "Layers" tab and choose "New Raster Layer". Name this layer White and move it to the top above the other layers.
15. Go up to the "Selections" tab and choose "Modify" then choose "Contract". The number should still be set at 4, so hit OK.
16. Change your foreground colour to white, and flood fill this layer with white.
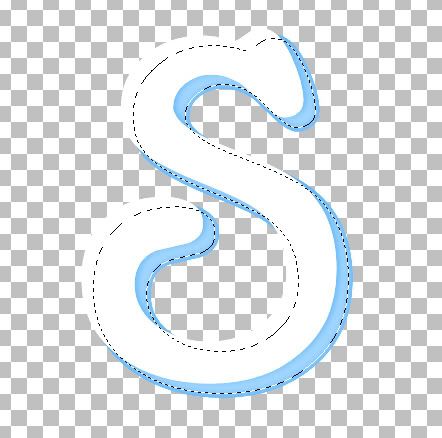
17. Switch to your mover tool, and move this layer upwards a bit like in the picture below. This is going to be what give the image it's shine, so we want to make it a bit bigger than we made the light blue highlight layer.
18. When you've done that, hit the delete key, and move it into place in the S like we did before.
19. Go up to the "Selections" tab and choose "Select None".
20. With the "White" layer active, go up to the "Adjust" tab then to "Blur" then to "Gaussian Blur", and change the number to 3.50, and hit OK.
This is what you should have so far

21. In the layer palette, click the Eye icon next to the S layer to turn it off and right click on any of the other layers and choose "Merge" then "Merge Visable" to merge the 2 highlight layers together.
22. Click the X over the S to make the layer visable again, and this time, click the Eye icon over the "Merged" layer to hide that one.
23. Click the S layer to make it the active layer.
24. Here's where EC5 Impact comes in. Go up to the "Effects" tab, then down to "Plugins", then find your "Alien Skin Eye Candy 5 Imapct" from the flyout and choose "Bevel". Use the settings below:
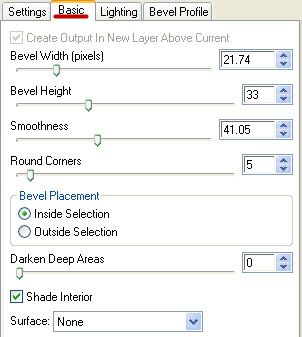
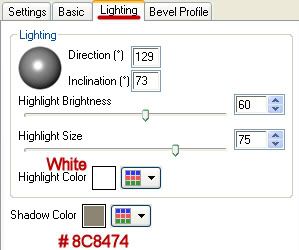
In the "Bevel Profile" tab, the bevel I used was "Button".
25. Unhide your Merged layer in the palette, and merge your 2 layers together using the "Merge Visable" command.
26. Now create a new layer, and with the snowflake tubes from the zip file, start placing them on your image as you like.
That's it, we are done :) It was kind of a long tut, but worth the effort I think.
Hearts and Swirls

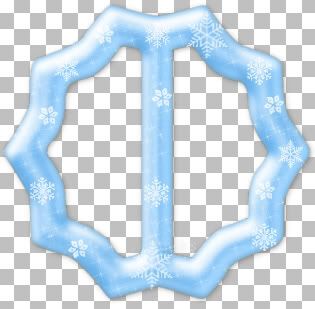
Buckles
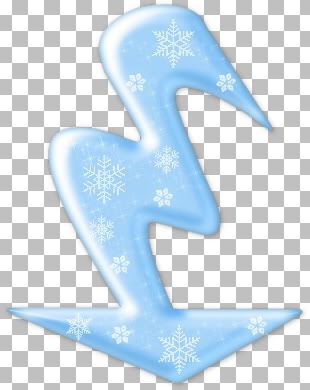
Arrows
TOU:
If you do this tutorial, your end result is yours to do whatever you wish; give it away as a freebie, use it as part of a kit, or sell it for profit. You may not make this into an action or script to give away as a freebie or to sell for a profit. A mention or a link back here would be appreciated but is not mandatory. Please do not share the supplies or tut through email or any other means, send them here to my blog to get the supplies and tut for themselves.
Hmmm. Think I'm going to have to give this a try. Thank you for the detailed instructions!
ReplyDeleteYou're welcome :) Any questions or problems, just let me know.
ReplyDeleteShawna
This tutorial is just what I've been looking for. I got this program as a gift over a year and a half ago (PSP X) and I really need help learning how to use it. Thanks ever so much. Hope you'll be making more tutorials soon, too!
ReplyDeleteThanks a lot!!
ReplyDelete22. Click the X over the S to make the layer visable again, and this time, click the Eye icon over the "Merged" layer to hide that one.
ReplyDeleteHi i copied the bit i dont get, in here hope you dont mind.
I can't find what X you mean over the letter, as i dont see a X, can you please help me out, as i am loving this tutorial and would like to get an end result. Many thanks
Thank you for this tut! I am designing my first digital scrap kit and I will use this technique for my alpha!!
ReplyDeleteThank you for all your tuts. You don't know how wonderful they are to me!!
ReplyDeleteHugsss
what a beautiful and easy tut
ReplyDeletethank you so much for creating
Thank you for this tut, I love the look you have created
ReplyDeletechenlina20151203
ReplyDeletelouis vuitton outlet
michael kors outlet
michael kors handbags
oakley sunglasses cheap
air max uk
fake oakley sunglasses
cheap ray ban sunglasses
coach outlet
tory burch sale
louis vuitton
tory burch outlet
hollister co
coach factory outlet
louis vuitton outlet online
official coach factory outlet
coach factory outlet
michael kors outlet online
ugg boots outlet
coach outlet
marc jacobs handbags
adidas uk
coach outlet online
ugg boots outlet
ray ban sunglasses outlet
running shoes
louis vuitton outlet
michael kors outlet stores
canada goose outlet
canada goose outlet online
tod's shoes
nike free runs
louis vuitton outlet
coach factory outlet
coach outlet
ray ban sunglasses
kids uggs on sale
jordan 11s
cheap oakley sunglasses
air max 90
cheap air max
as
air jordan,jordan pas cher,air jordan pas cher,nike air jordan,air jordan france, hermes,sac hermes,hermes pas cher,sac hermes pas cher, hogan,hogan outlet,scarpe hogan,hogan sito ufficiale,hogan interactive, coach outlet,coach factory outlet,coach outlet store,coach factory,coach outlet store online,coach factory online,coach factory outlet online,coach outlet online, michael kors, coach purses,coach handbags,coach bags, converse pas cher, nike air max, burberry pas cher, nike free,free run,nike free run,nike free pas cher,nike free run pas cher,nike free france, true religion, north face, michael kors canada, nike blazer, nike air max, hollister uk, nike free run, lululemon,lululemon canada,lululemon outlet canada,lululemon outlet online, hollister,abercrombie,abercrombie fitch,hollister france,hollister pas cher,abercrombie and fitch,hollister pas cher, mulberry,mulberry handbags,mulberry outlet,mulberry bags,mulberry uk, kate spade handbags,kate spade,kate spade outlet,katespade, louboutin,chaussure louboutin,louboutin pas cher,chaussures louboutin,chaussure louboutin pas cher,louboutin france, north face,the north face,north face pas cher,north face soldes,north face france, true religion, tn pas cher,nike tn,nike tn pas cher,nike tn requin,tn requin,tn requin pas cher, longchamp,sac longchamp,longchamps,longchamp pas cher,sac longchamp pas cher,longchamp pliage,longchamp soldes,sac longchamps,longchamp france, new balance pas cher, air force,nike air force,air force 1,air force one,nike air force 1,nike air force one,air force one nike, ralph lauren,polo ralph lauren,ralph lauren pas cher,polo ralph lauren pas cher,ralph lauren france, replica handbags,coach factory outlet,coach factory,coach factory outlet online,coach factory online, oakley pas cher,oakley,oakley soldes,lunette oakley pas cher,oakley france
ReplyDeletecanada goose uk, moncler outlet, moncler, canada goose outlet, louis vuitton, louis vuitton, wedding dresses, sac louis vuitton pas cher, links of london, barbour jackets, montre pas cher, lancel, supra shoes, canada goose outlet, canada goose, louis vuitton, pandora jewelry, replica watches, converse outlet, moncler, ugg boots uk, swarovski crystal, bottes ugg, toms shoes, louis vuitton, thomas sabo, pandora charms, canada goose, moncler, juicy couture outlet, ugg,ugg australia,ugg italia, canada goose, ugg pas cher, swarovski, pandora jewelry, doke gabbana outlet, doudoune canada goose, moncler, moncler, ugg,uggs,uggs canada, barbour, marc jacobs, moncler, hollister, canada goose, juicy couture outlet, pandora charms, karen millen, moncler, coach outlet
ReplyDeleteninest123 16.02
Thanks for sharing this post.Nice post.
ReplyDeleteVisite Ezmove Mumbai
Thank you very helpful article. allow me to join to share health articles with your article hopefully useful.
ReplyDeleteObat Keloid Terampuh
Obat Kaki Bengkak Alami
Cara Mengobati Kaki Gajah Dengan Bahan Alami Paling Ampuh
Cara Cepat Untuk Menghilangkan Panu
Cara Menghaluskan Wajah Seperti Sudah Operasi
Cara Mengobati Tumor Otak Dengan Daun Dewa
Interpages
ReplyDeleteGuest Blogger
Guest Blogging Site
Guest Posting Site
Guest Blogging Website
Thanks for sharing the post it was really nice. I always like to read your post. There are very easy and simple steps for HP printer paper jam issue by our expert. For more detail visit our website or call our toll-free anytime 24X7.
ReplyDeleteYou are sharing such an awesome and fantastic post with us. I appreciate your effort to share the knowledge. I am so happy to find this Blog which has informative and quality content for reading. Thanks for sharing. If it doesn’t work then, you have to read about the nitty gritty about Roku com link code from the Internet. Hopefully, then, you can connect the device with the Roku activation code accordingly.
ReplyDelete