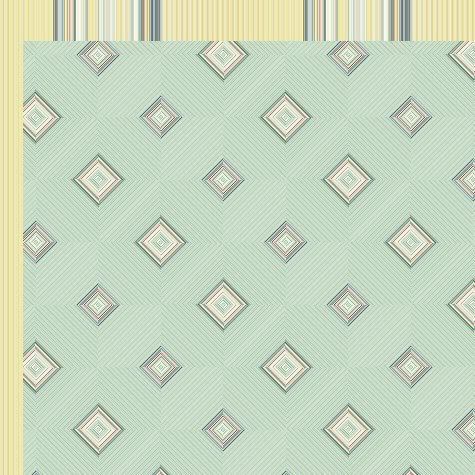
First thing you need to do before anything else is find out what size of canvas width your blog or site will allow, without it overlapping into the sides of your blog. My width limit is 550 pixels, but my length can be anything I choose. I'm going to be using my Spring Kit for this tut.
Normally, I use all my papers as my background for the preview, so open up all of your papers in PSP and duplicate each one (hold down your Shift key on your keyboard and hit the D key to duplicate) then close out the originals. We are going to be cutting these so we don't want to wreck the one's you are going to be giving away.
1. Select one of your duplicated background papers to start working with. Click on your Crop tool on the left.
2. Up at the top, you will see Width and Height.
 . Type in the amount of pixels that your preview canvas is. Mine was 550 x 550.
3. Place your cursor on your paper somewhere inside your crop box and then move the crop box to a section of your paper that you want displayed as part of your preview background. When you've got that set as you like it, just double click inside the crop box. This will be your main canvas you will be working on.
This is the cropped version of my first background paper that I chose:

4. Choose another background paper and crop it to the same Width and Height as you did with the first paper.
* Now we are going to either drag and drop or copy and paste this second paper onto your first paper that is on your main canvas.
5. Make sure your second paper is the active one, and go up to the Edit tab, then to Copy. Click on your main canvas ( which is what your first cropped paper is on) to make it the active one. Then go back up to the Edit tab and over to Paste, then to Paste as New Layer.
* Your second paper will be covering your first, so we need to move that down.
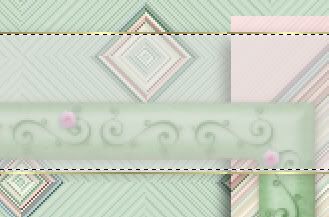
6. Click on your Mover tool on the left and shift your second paper down a little bit so that you can see both of them. Here's what mine looks like at this point:
* All drop shadows will be left untill the end so don't put any on just yet.
* I actually have 10 papers in this preview, but becase it's very early in the morning and I'm lazy, I'm only going to be doing 3.
7. Repeat theses steps for as many papers as you have in your kit. Use your mover tool to shift each one downwards and make them evenly spaced with each other. Here's mine with 3 papers:

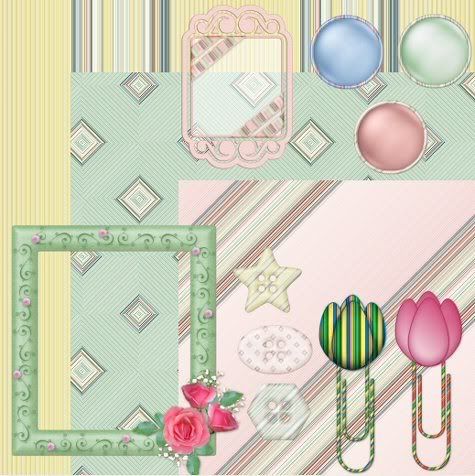
* Now that we've got our papers displayed as we want them, it's time for the elements. I always tube my elements when doing preveiws. I do this because it is much easier to resize them down this way than just duplicating them, then resizing. Also, I find that they come out nicer without the distortion and sometimes jagged looking edges.
8. Start by opening up some of the elements you want to use in the preview. If you have a ton of them in your kit, you may not be able to display them all, so open up the ones you like the best. I'm going to use a few of the paperclips I had made for this kit.
9. I always name my preview tubes starting with the word Temporary so that I can find them easily when I am done my preview and delete them so it doesn't clog up my tube section. So for example, I have my first paperclip ready to tube. Duplicate it and close out the original. Crop out all the unneccissary space around your first element, and make sure it doesn't have more than 1 layer.
10. Go up to the File tab, down to Export, then over to Picture Tube. Give your tube a name such as temporary spring 01 ( or whatever your kit is called) and then click the OK button.
11. Do this for each of the elements you are going to be using for your preview. It doesn't matter if it is a really big element either, such as a frame, it can still be tubed.
12. When you've finished your tubing, on your background main canvas, create a new layer. (Layers tab at the top, choose New Raster Layer).
13. The placement of your elements is all up to you, but you need to get the sizing of them appropriately for your preview. What I do is, make a duplicate of your main background canvas to use as a test run. Click on your Tube tool and choose your first element.
14. Plop it down on your test run canvas to see how big it is. More than likely it will be too big for your preview, but it gives you an idea of how much you need to scale it down. Go up to the Edit tab and click undo to get rid of it, then scale it down a bit and plop it back onto your test run canvas. ( to scale down, look up top for the section labled Scale and under it will be 100. Use the down arrow next to it to scale it down to a lower number. This will decrease your tube's size) Do this untill you find a size that looks good. Then go back to your main canvas and put your tube down there. Remember to always put each tube on a new layer so that you are able to move it around and to apply your drop shadow to a single item.
* Tip: Don't make everything the same size, vary it up. Here's mine. I've added a few elements and have not yet put a drop shadow on anything.
15. When you have it all placed and it looks good, then you can click on each item seperately and put on a drop shadow of your choice. I can't tell you what that is because your shadow will depend on your own elements. If it is a light colour, you will not be using the same very dark shade of a shadow that you would on a dark coloured element. So that part is all up to you.
* When your shadows are finished, you need to put your blog address and title on your preview kit. This is up to your own imagination and likes and preferences. Most times, I just use a simple partially opaque ribbon going across the preview pic, and I add my blog address and the name of my kit.
16. I've set my forground to a gold pattern, turned off my background so that I will just be getting an outline of a rectangle and not a filled one. Line style is solid, and a width of 1. Draw out your rectangle straight across your preview canvas. Right click and convert to raster layer.
17. Click on your Magic Wand tool, and click once inside your rectangle that's on your canvas. You should have marching ants all around inside the rectangle.
18. Go up to the Selections tab, down to Modify then over to Expand. Expand by 1 pixel.
19. Go up to the Layers palette and make a new raster layer and drag it under your rectangle you just drew.
20. Click on your Flood Fill tool on the left and fill your blank layer with white, then lower the opacity to about 45.
* The lowered opacity of the white lets you have the appearance of a label ribbon, but still lets you see what is beneath it.
21. Go up to the Selections tab at the top and choose Select None. Here's where I'm at right now.

22. In the layers palette, turn off all of your layers except the outline of the gold rectangle and the lowered opacity white layer. Then right click on one of those still visable layers and choose Merge, then Merge Visable.
* You can now move this down to the middle of your preview canvas.
* You need to put a slight drop shadow on your ribbon label and with white opaque items, that's a bit tricky. This is my way of doing it.
23. Make your label ribbon acitve by clicking on it on your canvas or in the layer palette. Go up to the Effects tab, then to 3D Effects, then over to Drop Shadow. Use these settings:
Vertical: 1
Horozontal: 1
Opacity: 32
Blur: 7
Colour: #221D12
Shadow on a New Layer is CHECKED. << Very important that it is on it's own layer.
* You'll notice that your white had turned darker because of the shadow we just put on it. We are going to get rid of most of it with our rectangle tool.
24. Click on your Selection tool and set it to rectangle. We want to get our rectangle as close to the top and bottom gold outlines as possible. Try not to go outside of the gold oulines because then you will be deleting part of your shadow. You may want to zoom in closer for this step. See my example below:
25. Once you are satisfied with your results, make sure you have the shadow layer of your label ribbon as your active layer in the layer palette. Hit the delete key on your keyboard. By doing so, you have just deleted all the shadow from inside your white label but still have the shadow showing only on the outsides of your label.
26. Choose a nice font and colour for your text. Normally, I choose a darker shade for the foreground and a lighter shade of the same colour for the background. In this case, I'm going to use #2E9ED2 for my foreground outline, and #A6D9F0 for my background fill of my text.
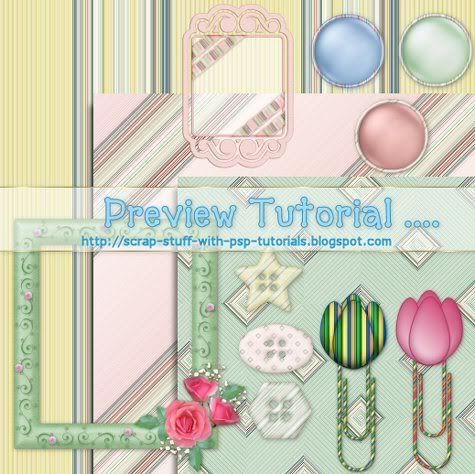
27. Type out the name of your kit, your blog name/address and any other information you want on there.
28. All that's left to do is to save it as a .jpg and you're ready to upload it to photobucket or some other photo hosting site.
Thank you for this tutorial. I really needed this one!
ReplyDeleteCathy
This comment has been removed by the author.
ReplyDeleteThanks so much for your help hun! my first paper pack is up come check it out!
ReplyDeleteMisty aka MissT
http://misstpsp.blogspot.com/
Thanks a lot for this tutorial although I'm no where's near ready to post anything I've made...lol. But one of these days, I will. Thanks again for sharing your wonderful talents. God bless you.
ReplyDeleteThank you for sharing your tut onkit preview. I think I can do this. I will have fun learning. Thanks again.
ReplyDelete[url=http://community.bsu.edu/members/buy+online+Viagra.aspx]canadian pharmacy Viagra[/url]
ReplyDelete[url=http://eterporno.ru/seks-znakomstva-v-tobolske.php]секс знакомства в тобольске[/url]
[url=http://eterporno.ru/prostitutki-mulatki-negrityanki.php]проститутки мулатки негритянки[/url]
[url=http://pc.eterporno.ru/prostitutki-saratova-engelsa.php]проститутки саратова энгельса[/url]
[url=http://pc.eterporno.ru/prostitutki-g-voronezha.php]проститутки г воронежа[/url]
[url=http://pv.eterporno.ru/intim-novoslobodskaya.php]интим новослободская[/url]
[url=http://pv.eterporno.ru/blyadi-magnitogorsk.php]бляди магнитогорск[/url]
[url=http://px.eterporno.ru/2-mohnatye-blyadi.php]2 мохнатые бляди[/url]
[url=http://px.eterporno.ru/znakomstva-gorod-buy.php]знакомства город буй[/url]
[url=http://px.eterporno.ru/bdsm-znakomstva.php]Bdsm-знакомства[/url]
[url=http://pz.eterporno.ru/znakomstva-vzlomat.php]знакомства взломать[/url]
[url=http://pz.eterporno.ru/tolstye-blyadi-moskvy.php]толстые бляди москвы[/url]
lululemon, oakley pas cher, hogan, tn pas cher, new balance pas cher, north face, lacoste pas cher, ray ban uk, michael kors, true religion jeans, hollister pas cher, nike air max, timberland, mulberry, hollister, ray ban pas cher, nike huarache, coach outlet, nike roshe, abercrombie and fitch, converse pas cher, michael kors, air jordan pas cher, true religion jeans, vanessa bruno, nike free run uk, longchamp, longchamp pas cher, michael kors, nike air max, nike air max, nike blazer, nike roshe run, ralph lauren uk, hermes, north face, nike free, burberry, michael kors, sac guess, nike trainers, air max, air force, louboutin pas cher, coach purses, true religion outlet, replica handbags, sac longchamp, true religion jeans, vans pas cher, ralph lauren pas cher
ReplyDelete2016-06-10keyun
ReplyDeletelouboutin shoes
supra footwear
toms outlet
mont blanc pen
coach outlet store online clearances
michael kors outlet online
michael kors handbags
hollister shirts
christian louboutin wedges
louis vuitton outlet
oakley outlet
fitflop clearance
coach factory outlet online
ray bans
michael kors outlet online
burberry sale
longchamp handbags
christian louboutin outlet
timberlands
michael kors outlet
ralph lauren sale
jordan retro 8
adidas originals
coach outlet online
michael kors bags
giuseppe zanotti outlet
louis vuitton handbags
fitflop shoes
michael kors outlet
coach outlet online
christian louboutin shoes
michael kors handbags
louis vuitton purses
basketball shoes
oakley outlet
michael kors outlet
ray bans
ray ban outlet
louis vuitton outlet
ReplyDeleteشركة مكافحة حشرات
تهتم شركة قمم التميز باعمال الرش والقضاء على الحشرات المنزلية فمهما كانت المعاناة ومهما كانت كمية الحشرات التى تعانى منها فتعاون مع افضل شركة تهتم بهذه الخدمة الان شركة مكافحة حشرات بالباحة
الحشرات المنزلية من المشكلات التى تعانى منها البيوت ، وخصوص فى المناطق المرتفعة فيها الحرارة ، وحيث تنشر الحشرات فى المنزل وقد تسبب متاعب كثيرة وأمراض خطيرة .
وللحماية منزلك من الحشرات ومنع دخولها ويمكن ان نطرح بعض النصائح :
*الحرص على النظافة الدائمة للمنزل ،
*التهوية الجيدة لغرف المنزل ودخول أشعة الشمس لقتل الحشرات التى لا ترى إلا بالعين المجردة .
*التخلص من القمامة أول بأول حتى لا تكون عرضه للأنتشار الحشرات .
نتظيف خزانات الطعام وتهويتها جيدة، والتخلص من الفضلات ، وغلق المحكم للبرطمانات للطعام التى تواجد فى خزانة حتى لا تكون مصدر لتسرب الحشرات .
*وضع سلك شبكة صغير الحجم على النوافذ والأبواب ، وسد الثقوب والشقوق بالأسمنت اوجبس ،لكى لا تتسرب الحشرات منها . شركة رش مبيدات بالباحة
*تنظيف الأطباق وأوانى الطعام بعد استعمالها مباشرة ، لأنها قد تسبب فى خروج الحشرات من المكان التى تعيش فيه .
*عدم ترك فضلات الطعام على مائدة الطعام ، وتنظيف بصفة دورية تمنع من أنتشار الحشرات والوقاية منها .
وهناك حشرات متعددة قد تسبب للأنسان أزعاج دائم ومنها : النمل والصراصير والبق والذباب والناموس والفئران .
النمل نوعان * النمل عادى مصدر غذائه فضلات الطعام ويعيش فى ثقوب وشقوق المنزل مكافحة النمل الابيض بالباحة
والنمل الأبيض يسمى ( العتة) وهو يحتاج إلى طعام الدائم لكى يبقى على قيد الحياة ، مصدر غذائه السكر (الجلكوز) الموجود فى الخشب ، و المتواجد فى الأبواب والنوافذ والأثاث ، وقد يسبب خطر كبير على منزلك فالنمل الأبيض يعمل ممرات ويقوم بتأسيس بيت له أسفل المنزل ، ويكون دمار بمرور الوقت وأضرار فادحة لايمكن اصلاحها إلا بعد فوات الآوان .
ويمكن التخلص من النمل الأبيض برش مبيدات كيمائية مخصص لها أثناء بناء الأثاث فى الأرض ، وعند تركيب الأبواب التأكيد من أغلاق جميع الفتحات فى جوانب الباب وألأفضل تركيب الأبواب بالمفاصل وليس بالمواد اللزقة ، وعند شراء الأثاث الضغط على الخشب وتأكد مدى قوتها وعدم أصابتها بالنمل الأبيض .
أما النمل العادى التى يتواجد المطبخ يمكن التخلص منه بقليل من الصودا المخلوطة بالسكر وضعها فى الثقوب والفتحات التى تخرج منها فالنمل يموت فى الحال .
فى خزانة الطعام نضع فيها قليل من القهوة المرة أو الفلفل غير المطحون فهو يخلصك من النمل نهائيا وكذلك الحشرات الأخرى .
والصراصير لمنعها من أنتشارها فى المنزل يمكن سد البالوعات والمراحيض فى الليل ، صب المحاليل السامة أو مشتقات البترول القتلة فى فتحات المراحيض والبالوعات ثم صب ماء عليها فى الصباح.
ممكن عمل كرات من الدقيق بها مواد سامة أى معجونة بالمبيدات الحشرية ووضعها فى المكان الذى تكثر فيه الصراصير .... وتكون بعيده عن منتاول الأطفال .
العثة تكثر فى فصل الشتاء بسبب الرطوبة العالية وفيجب تهوية المنزل ، و تهوية الغرفة من المفروشات والوسائد ، والشمس لها أثر فعال على قتل الجراثيم والميكروبات شركة جلي بلاط بالباحة
وللمحافظة على الملابس من العتة تنظيفها بالفرشاة لأزلة ما يعلق من بويضات أوديدان صغيرة الحجم ، وضع معها قليل النفتالين او الصابون المعطر.
Bạn có thể tham khảo 1 vài thông tin liên quan có thể tốt cho bạn dưới đây:
ReplyDeleteđệm vạn thành unique demvanthanh.com
đệm lò xo liên á lienahanoi.vn
đại lý đệm cao su liên á tại hà nội lienahanoi.vn
bài viết rất hay, rất hữu ích cảm ơn bạn đã chia sẻ
ReplyDeletemọi người tham khảo thêm các mẫu ghế massage mới nhất ở đây nhé
giá ghế matxa
giá ghế mát xa
yeezy 350
ReplyDeletekyrie 5 shoes
supreme new york
cheap jordans
chrome hearts outlet
yeezy shoes
off white
yeezy 350
hermes birkin
kyrie irving shoes