Supplies: SK Suede Ribbon Greyscaled, SK Perfect Stitch. Download Here
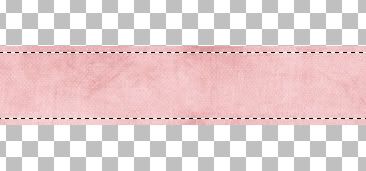
This tutorial will teach you how to make the ribbon in the above picture. It is for psp users. This tut is done in PSP 8, but can be done in any version as well, although my screenshots will look different than yours, and some of your tools may be in a different loction in your version of PSP. I originally did this ribbon mainly in photoshop, but will do my best to duplicate it using PSP.
1. Open up SK Suede Ribbon Greyscaled from the supplies zip. Hold down your Shift key on your keyboard and hit the D key. This will duplicate our ribbon so that we are not working on the original and you can reuse it later for another ribbon. Close out the original ribbon.
* Next, we need to recolour this by using the Manual Colour Correction function.
* If you are using PSP version 9 and above, for whatever reason, corel has decided to hide this feature. Go to Khiba's site and scroll down till you see the heading Customize! Retrieve PSP 9 Unused Tools". Watch her little viewlette on how to unhide this feature.
2. Go up to the Adjust tab at the top, over to Colour Balance, then down to Manual Colour Correction. You will see this box pop up.
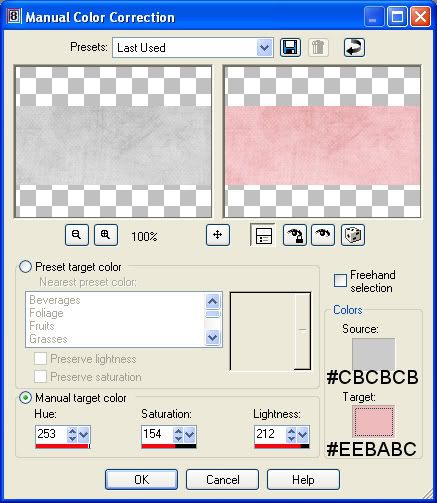
Where it says Source, you are going to put in a medium shade of grey that you choose from your greyscaled ribbon. I choose to use #CBCBCB.
Where it says Target, that is where you put in a colour that you want your ribbon to change to. I chose a light shade of pink #EEBABC. Hit OK when you are done.
3. In the layers palette on the right, right click on your ribbon layer and from the flyout choose Duplicate.
* You should now have an exact copy on top of your original pink ribbon.
4. Hide the duplicated ribbon layer. Click the eye icon next to it to hide it.
* We are going to be doing the background pleats of the ribbon.
5. Click on your ribbon layer (the one that is not hidden) in the layer palette to make it the active layer.
Go up to the Effects tab at the top, then down to Texture Effects, and over to Blinds and use these settings:
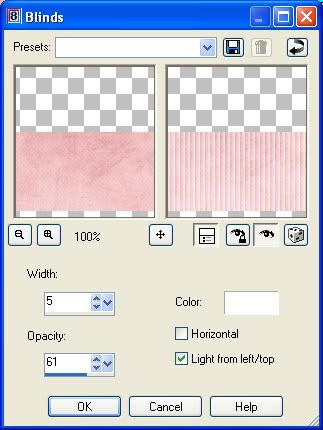
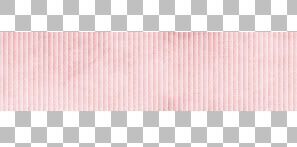
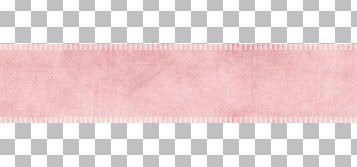
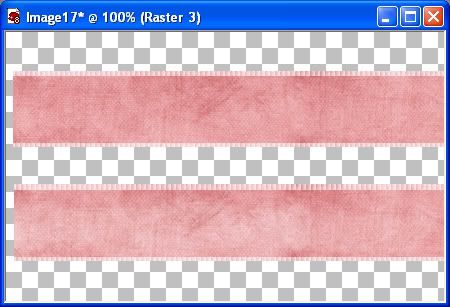
* You should have something that looks like this:
6. Unhide the duplicated ribbon layer from the layer palette and click on it to make it our active layer.
* Now we are going to work on the top part of our ribbon.
7. Go up to the Selections tab at the top, click Select All, then back up to the Selections tab again, and click Float, then back up to the Selections tab and click Defloat.
* You should have marching ants all around your ribbon.
8. Go up to the Selections tab again and down to Modify, then over to Contract and put 6 in the Number of Pixels section and hit OK.
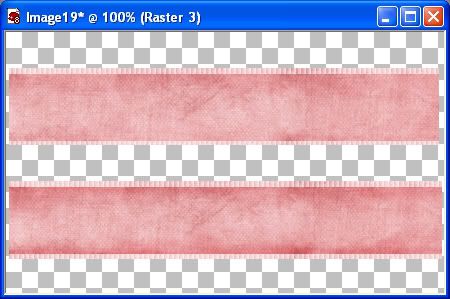
* Your marching ants should have contracted inward by 6 pixels like the picture below:
* Now we need to get rid of the parts of the ribbon that is outside of our marching ants so that we can see our pleated edge on the layer below.
9. Go up to the Selections tab at the top, and click Invert. Now hit the delete key on your keyboard.
10. Go up to the Selections tab and choose Select None.
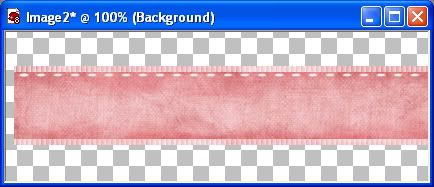
* This is what you should have so far:
11. In the layer palette, right click on your top ribbon layer (not the pleated one) and choose duplicate.
* You should have in your layer palette, 2 copies of your plain ribbon and one copy of your pleated ribbon.
12. Make sure you have the copy of your duplicated ribbon as our active layer ( it should be highlighted blue in the layer palette and it should be the one on the top of the other 2) now, change the blend mode to Multiply. See pic below:
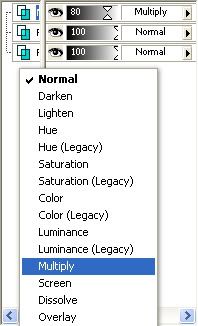
* Yours should have changed from the lighter pink to a darker pink like the picture below:
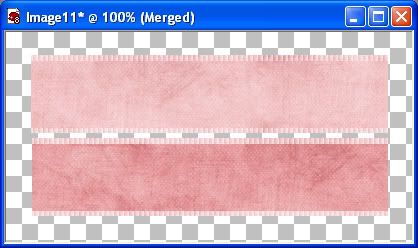
13. Now use the sliders and lower the opacity of that layer to 80%.
14. Hide the pleated layer in the layer palette and right click on one of the remaining layers and from the flyout choose Merge, then Merge Visable. Unhide the pleated layer.
* Now we need to lighten the top ribbon in places and darken it in others.
15. Make sure you are working on the unpleated layer and click on the lighten/darken tool. Choose the default, soft round brush,
Size 33
Hardness 50
Density and Thickness 100
Opacity 18
Mode Lightness
*** With the lighten/darken tool, if you click with your left mouse button it will lighten, and if you click with your right mouse button it will darken.
16. Using your left mouse button to lighten, run your brush down the middle of the ribbon in strokes rather than one continuous line. Try not to hit the top and bottom edges of the ribbon, lighten around them. We want those to stay darker than the middle. That's what gives the ribbon it's shape. We're going to do this several times, so don't worry if you think you aren't doing it right, or it's not lightening enough. Here's what mine looks like after the first pass. It's just a very subtle lightening.
* Now we are going to darken it around the edges. Like i explained earlier, if you use your right mouse button, it will darken the image, but i find that very awkward to keep it clicked down and use it that way. So, up at the top you will see Swap Mouse Buttons. Put a check in there. With that check in there, it is going to allow you to use your left mouse button to darken instead of the right mouse button.
17. Keep the settings the same on your lighten/darken tool and just brush around the edges using short strokes. Go farther down into the ribbon near the middle in some places just to give it a bit of dimension. Also, mix some diagonal strokes in there rather than using all straight across strokes, but be sure to keep the middle the lightest part of the ribbon. You can also increase the Opacity to about 25 if you feel you need to.
* See how the 2 effects makes it look like the ribbon is puffed up and curved a bit?
Continue to switch back from light to dark to achieve a look that you like. Don't forget when you are going back to lighten to uncheck the Swap Mouse Button.
18. You can also go back to an opacity of 18 and darken the pleated parts of the ribbon as well, but not too much.
19. When you are satisfied with how it looks, in the layer palette, right click on one of the layers and from the flyout choose Merge, then Merge Visable.
20. Open up in your psp, SK Perfect Stitch.jpg from the supplies zip. Click on the File tab at the top of your psp and go to Export, then to Custom Brush. In the box that pops up, give your brush a name and hit ok. You can name it the same as mine SK Perfect Stitch if you want so that it will be easy to find if you do this tut again.
21. Change your foreground colour to the slightly off white colour #EFEFEF.
22. Click your paint brush tool on the left hand side and leave all settings at it's default, except change the rotation to 90, and the Step to 35.
23. Create a new layer by going up to the Layers tab at the top and coose New Raster Layer.
24. Place your cursor at a point near the beginning top edge of the ribbon and just click once.
* You will see just one small stitch.
25. Scroll to the very end of your ribbon, hold down your Shift key on your keyboard and position your cursor where you want the very last stitch to appear and click once.
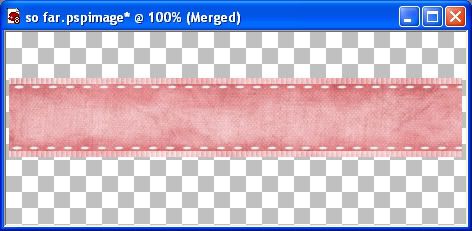
* You should now have a straight line of evenly spaced stitches. You can change the spacing of the stitches by changing the number in the Step section. The higher the number the more space between stitches you will have, the lower the number the closer together the stitches will be to each other. Here's what my first line of stitches looks like:
26. In the layer palette, click on the stitches layer to make it active if it isn't already. Now, right click on it and choose Duplicate. Use your mover tool to drag the second stitch layer down to the bottom portion of the ribbon and line it up with the top stitches.
27. Turn off your ribbon layer in the layer palette and right click on one of the stitches layers and choose Merge, then Merge Visable.
28. Turn your ribbon layer back on.
29. We need a slight drop shadow under the stitches so, go up to the Effects tab, then to 3D Effects, then over to drop shadow and use these settings:
vertical and horozontal is 0
opacity is 25
blur is 7
colour is #221D12
30. Right click on one of the layers and choose Merge, then Merge Visable and you are done. Here's what mine looks like:
TOU:
If you do this tutorial, your end result is yours to do whatever you wish; give it away as a freebie, use it as part of a kit, or sell it for profit. You may not make this into an action or script to give away as a freebie or to sell for a profit. A mention or a link back here would be appreciated but is not mandatory. Please do not share the supplies or tut through email or any other means. If you are using this or any of my tutorials for your groups or as part of your own tutorial, please post a link to the tut on my blog and let your members download the supplies from my blog for themselves.
Hi
ReplyDeleteYou have an award in my blog!
Hugs xx
I'm jumping on this tut ASAP ;)
Hey Sweetie
ReplyDeleteI just gave you an award! When you see it, you'll know why I wanted to give it to ya...Head on over there to get it!!
LOL (Lots of Luv)
hi, i m happy to know that there is someone from where i live, i m from canada also, Montreal.
ReplyDeleteJust a question, do i need to change the size??
thanks.. iM your fan #1
I am so thrilled that these tutorials are here! These are exactly what I wanted to learn to do.. Thank you, thank you!!
ReplyDeleteNo need to change the size, but you can if you want a smaller ribbon or stitches.
ReplyDeleteShawna
Glad you like them Mommarock. Have fun :)
ReplyDeleteShawna
Oh I'm just so excited.. I just actually DID this tutorial.. yes.. I did it! Whooo hooo! It is wonderful, I am so proud of myself. I didn't REALLY think I could finish a tutorial, but it is done so nicely for me to follow. Thank you SO much!
ReplyDeleteYayyyyy mommarock lol. Hope you had fun doing it too.
ReplyDeleteShawna
Thank you so much! You're directions are so clear! You have been so helpful!
ReplyDeleteThank you so much sweetheart for this & the other tuts you've set out to help us newbies......really appreciate all your time & effort here. Brilliant instructions, very easy to follow. ((hugs)) Funky xx
ReplyDeleteWonderful tutorials, Shawna - thank you so much! God bless...Diana
ReplyDeleteTnx for share with us these wonderful tuts!
ReplyDeletethis tut worked fantastic in PSP X2 for me. Thank you so much Shawna! Off to try another!
ReplyDeleteThanks so much for posting these tutorials. I used to photographh or scan in bits of ribbon and then mask out the background - but this way is so much quicker and easier :)
ReplyDeleteThank you for your tut. I love it.
ReplyDeletethanks so much for your tutorials, it is really helping me a lot !
ReplyDeleteHi Shawna :-)
ReplyDeleteI am so happy that these tutorials are here! These are exactly what I wanted to learn to do,and bought your tuts .. Thank you so much for write them fo us!!
Much hugs Ellie xx
Thank you for such a fantastic blog. Where else could anyone get that kind of info written in such a perfect way? I have a presentation that I am presently working on, and I have been on the look out for such information.
ReplyDelete20150630 junda
ReplyDeleteburberry outlet
tory burch outlet online
ray-ban sunglasse
pandora jewelry sale
coach outlet online
louis vuitton
hollister kids
true religion sale
oakley sunglasses sale
michael kors bags
oakley sunglasses
ray ban sunglasses
michael kors handbags
tory burch handbags
cheap ray ban sunglasses
toms outlet store
oakley outlet
cheap soccer jerseys
louboutin
toms shoes for women
ray bans
coach factory outlet
cheap oakley sunglasses
kate spade handbags
coach outlet
michael kors outlet
prada outlet
toms shoes sale
kate spade bags
true religion jeans outlet
nike blazer pas cher
michael kors
replica watches rolex
michael kors handbags
football jerseys
20150728 junda
ReplyDeletecoach outlet
ed hardy clothing uk
coach outlet online
ralph lauren uk outlet
gucci sito ufficiale
true religion
kate spade bags
michael kors handbags
christian louboutin shoes
fitflops sale
coach outlet store online
coach outlet store online
air max uk
louis vuitton sacs
kate spade outlet
coach factory outlet
louboutin pas cher
michael kors
pandora charms
nike air force 1
kate spade handbags
ray ban wayfarer
true religion jeans outlet
ed hardy clothing outlet
chanel online shop
ray ban sunglasses
hollister outlet
michael kors outlet
michael kors purse
mcm backpack
gucci handbags
michael kors handbags
louboutin
burberry scarf
oakley sunglasses outlet
tn pas cher
michael kors outlet
pandora charms
ray bans
air jordan uk
Thank you for sharing the tutorial is very easy to follow and was easy to do in paint shop x5
ReplyDeleteDebbie Wells ( DKK )
151212meiqing
ReplyDeletecanada goose jackets
louis vuitton outlet
christian louboutin outlet
ugg boots
north face jackets
uggs on sale
uggs for sale
hollister uk
michael kors uk
timberland boots
ugg outlet
louis vuitton handbags
burberry outlet
oakley sunglasses
nike air max
michael kors outlet
polo ralph lauren
ugg outlet
true religion jeans
cheap jordans
marc jacobs
ugg australia
hollister kids
louis vuitton
christian louboutin outlet
nike air max
louis vuitton handbags
gucci handbags
coach outlet store online
oakley sunglasses
hollister clothing
ray ban outlet
michael kors outlet online
canada goose jackets
prada outlet
ray ban sunglasses outlet
jordan retro
ray-ban sunglasses
prada uk
louis vuitton outlet stores
0616jejetods outlet
ReplyDeletecanada goose jackets
football pas cher
ray ban eyeglasses
moncler jackets
tn pas cher
canada goose
ferragamo outlet
prada handbags