


I'm assuming you already have your copy of Paint Shop Pro for this tutorial. You also need Mura's Meisters copies plugin, which you can get Here, and Nanson's mqc snow gradient which you can get at her site Here. Place the gradient in your gradients folder, and the mm copies in your plugins folder.
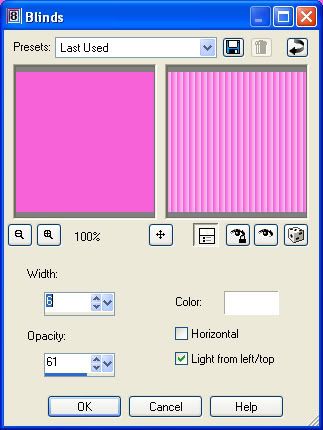
Start by opening a new, transparent image with whatever dimensions you want for your ribbon. Add 10 extra pixels to the width because we are going to crop a little bit off when we are finished. For this tutorial, we are going to be using 1810 x 140. Set your foreground to #F761D9, and fill your transparent layer with this. Go up to the "Effects" tab, and choose "Texture Effects", then choose "Blinds". Put your settings to the following, and click ok.
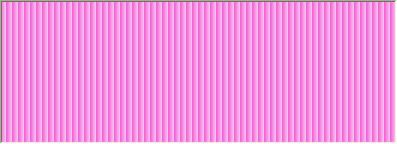
Your solid image should have changed to look like this:
We want just a small corrugated edge surrounding our ribbon, so go up to the "Selections" tab and choose "Select All", "Selections" tab again and choose "Float", "Selections" tab again and choose "Defloat", then back up to the "Selections" tab and choose "Modify", then choose "Contract" and in the number of pixels box choose 5 and hit ok.
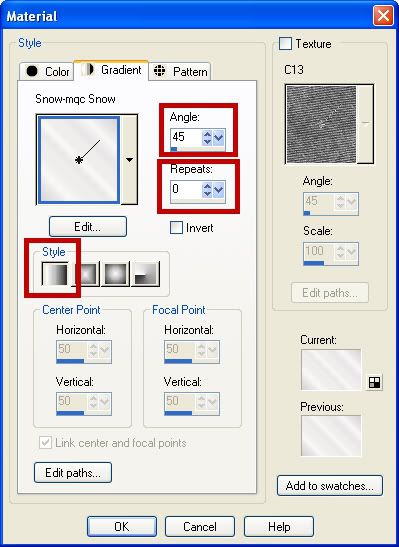
Set your foreground to the mqc snow gradient with these settings:
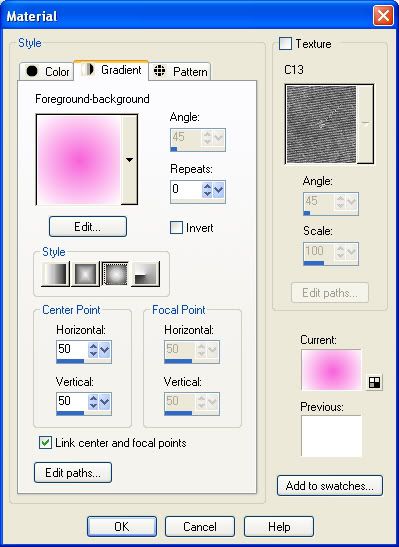
Flood fill your contracted layer with the gradient. Go up to the "Selections" tab and choose "Select None". In your material palette to the right, set your foreground back to our original colour of #F761D9, and your background colour to white. Click on your background again and select the "Gradient" tab and change it to foreground-background, with the following settings:
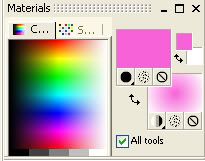
Your materials palette should now look like this:
Select your preset shapes tool, and put it at ellipse, Anti-alias checked, Create as vector checked, Line style is solid, and a line width of 1. Hold down your shift key, and draw out a small dot shape on your layer. If satisfied with your dot, In the layer palette, right click on your dot vector layer and choose "Convert to raster layer".
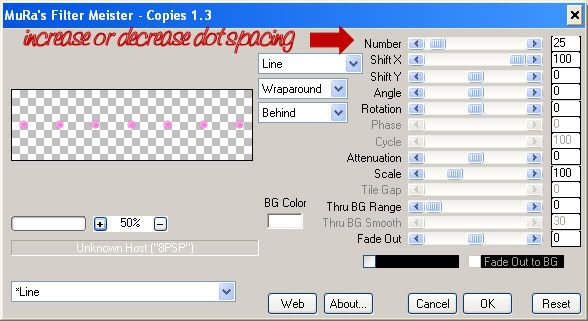
Now, we want this one dot to be perfectly centered on our ribbon, so go up to the "Edit" menu and select "Cut". Then, back up to the "Edit" menu and choose "Paste as new layer". This will center our dot evenly in the middle of our ribbon but on a new layer. Make sure your dot layer is active. Next, go to the "Effects" tab, then to "Plugins" and from the flyout, choose "Mura's Meister" then "Copies". Choose the following settings: (You can play with the spacing of your dot line by increasing or decreasing the digits in the "Number" box.)
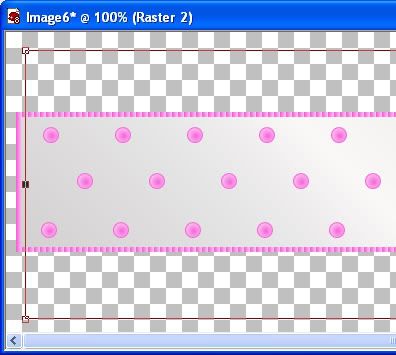
Your image should now have a line of dots from end to end. Select your mover tool and move that line of dots up to the top of the white part of your ribbon. Make sure that line of dots is active, and go to the "Edit" tab, and select "Copy". Go back to the "Edit" tab and select "Paste as new layer" and move that layer down to the bottom of your white ribbon. Make sure the dots are even in line with the top layer. Go back to the "Edit" tab and choose "Paste as new layer" again and move that line to the right and position it so that the dots are staggered between the top and bottom lines.
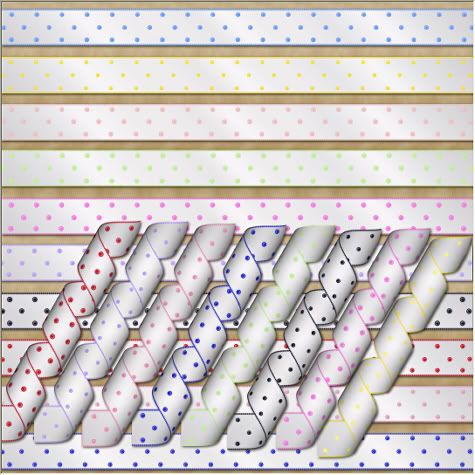
When satisfied with the placement of your dot lines, in the layer palette to the right, right click on a layer and choose "Merge" then "Merge Visable". I had you add 10 extra pixels to the width of your transparent layer when we first started out because now we are going to crop off the edges for a more realistic look. To finish up, crop a little bit off each of the ends of your image, a bit past the white part like the finished picture below:
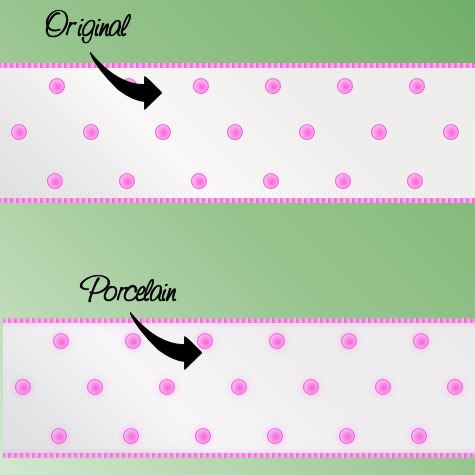
Extra Tip: To give it a little bit of a satin sheen, use the Xero porcelain plugin on the finished ribbon.
TOU:
If you do this tutorial, your end result is yours to do whatever you wish; give it away as a freebie, use it as part of a kit, or sell it for profit. You may not make this into an action or script to give away as a freebie or to sell for a profit. A mention or a link back here would be appreciated but is not mandatory. Please do not share the supplies or tut through email or any other means, send them here to my blog to get the supplies and tut for themselves.


very nice thank you for the tut