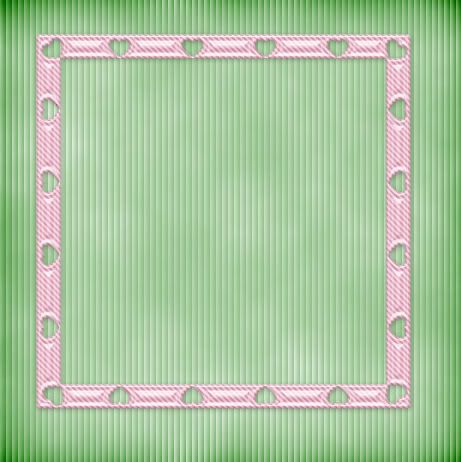
Supplies Needed:
Eye Candy 5 Impact: Download Trial Version Here
MuRa's Copies: (optional) Download MM Copies Here
1. Start out with a 500 x 500 transparent image.
2. Set your foreground and background to #F5C1D2 or whatever colour you choose.
3. Click on your preset shapes tool and choose the rectangle. Create as vector and Anti-alias are both checked, line style is solid, line width of 1.
4. Hold down your shift key and draw out your square.
5. In the layer palette to the right, right click on Vector 1 and from the flyout choose convert to raster layer.
6. Go up to the Selections tab at the top, then to Select all, then to Float and then to Defloat. Marching ants should now appear all around your square image.
7. Go up to the Selections tab and choose Modify, then Contract, and set the number to about 25. The part of the square that is OUTSIDE of the marching ants is going to be how thick your frame is, so you may want to adjust the number to something higher for a thicker frame or to a lower number for a thinner frame. Yours should look like this so far.
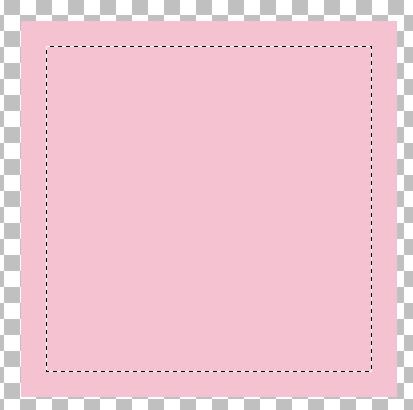
8. Now hit the Delete key on your keyboard. The middle of the square should now be transparent.
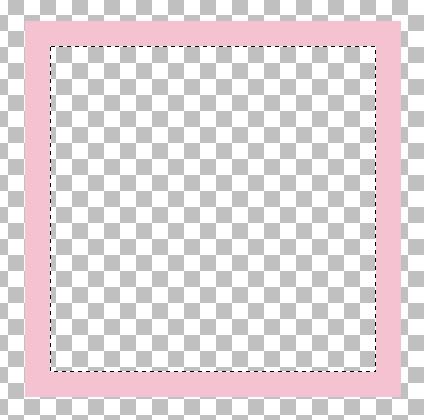
9. Go up to the Selections tab and choose Select None.
10. Set your foreground and background to black.
11. You can use any shape you want here, but I'm going to be using hearts since it's close to valentines day. Click on your preset shapes tool and choose your shape.
12. Hold down your Shift key and draw out your shape. Make sure it isn't too big and doesn't come too close to the top and bottom line of your frame because when we use the plugin on it, it gives it a bevel and the shape will cut right through like in the picture below.
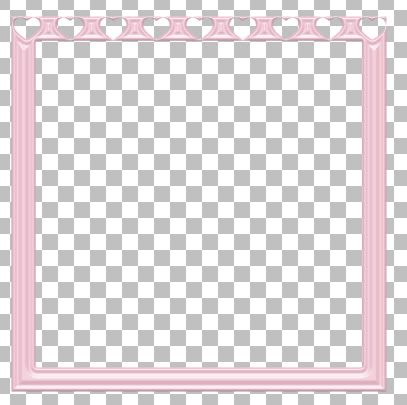
13. Right click on Vector 1 in the layer palette, and choose Convert to Raster Layer.
14. I'm going to use a repeating shape for this. Place your new shape near the center of your canvas so you can see it in the preview window in the next plugin we are going to use.
15. Go to the Effects tab, down to Plugins, and choose MuRa's Meister, then to Copies. These are my settings, yours may be different, depending on what shape you chose to use.
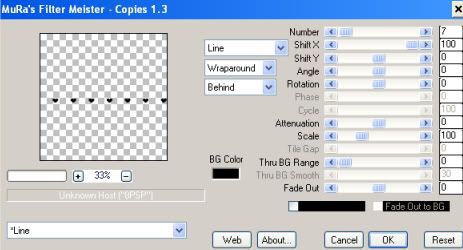
I ended up with a straight line of 7 hearts, but I only want 4 of those in a row, so I took my Selection tool, and drew a rectangle around 3 of the hearts then hit my delete key to get rid of them.
16. Place your 4 hearts centered along the top of your frame like this:
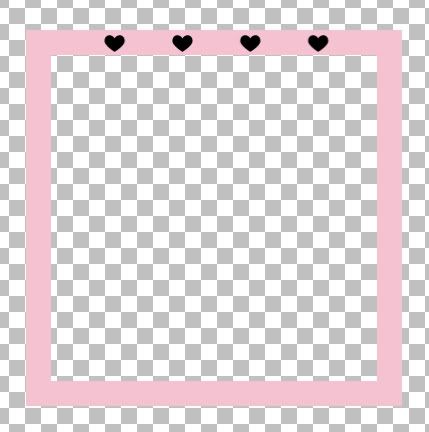
17. Make sure your 4 hearts layer is the active layer and go up to the Edit menu, choose Copy, then choose Paste as New Layer. You should have a second row of hearts on your canvas.
18. Go up to the Image tab, choose Flip. The second row should have now turned upsidedown.
19. Place your second row of hearts evenly along the bottom of the frame. You may want to turn on your Grid to get the top, sides, and bottom even with each other. (View tab, then Grid)
20. Go up the Edit tab again and choose Paste as New Layer. A third set of hearts is now on your canvas.
21. We need to turn these sideways, so now go up to the Image tab, choose Rotate, then choose Free Rotate.
22. Put the green dot beside the word Right, a green dot beside the word Free, and change the number to 90.00. At the bottom, make sure All Layers and Rotate Single Layer Around Canvas Center is not checked off. Now hit OK.
23. Your third layer of hearts should now be running vertical. Place them on the right side of the frame.
24. Go up to the Edit tab, select Copy, then select Paste as New Layer. A duplicate of the third layer of hearts should now be on your canvas.
25. Go up to the Image tab and choose Mirror. Place those hearts on the left side of your frame.
So far you should have something similar to this:
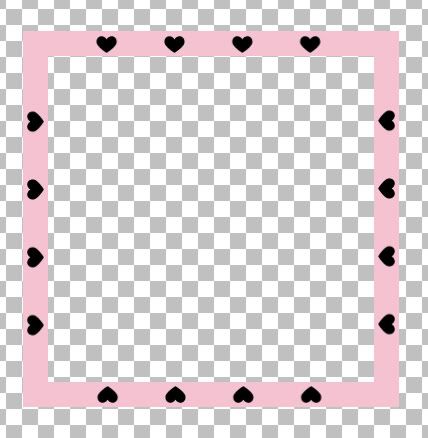
26. The corners look a little bare. Make your heart layer at the top of your frame active. Click on your Selection tool and set it to rectangle.
27. Choose one of the hearts, and make a rectangle selection around it. Don't get any of the other hearts in your selection.
28. Go up to the Edit tab, choose Copy, then choose Paste as New Layer. One single heart should be in the middle of your canvas.
29. Go to the Selections tab and Deselect.
30. Next we need to rotate this to fit into the corners of the frame. Go to the Image tab, choose Rotate then Free Rotate.
31. Leave the settings as they were before but now change the number to 35.00 and hit ok. Move your single heart into the top right hand corner.
32. With that new heart layer active, go up to the Edit tab, choose Copy then choose Paste as New Layer.
33. It should be a duplicate of the heart in the top right of the frame we just did. Go up to the Image tab and choose Flip. Place this heart in the bottom right hand corner of the frame.
34. Go up to the Edit tab, choose Paste as New Layer.
35. Go up to the Image tab and choose Flip, then back up to the Image tab and choose Mirror. Place that new heart into the bottom left corner of the frame.
36. Go up to the Edit tab and choose Paste as New Layer, then to the Image tab and choose Mirror. Place that new heart into the top left corner. You should have what looks like this now:
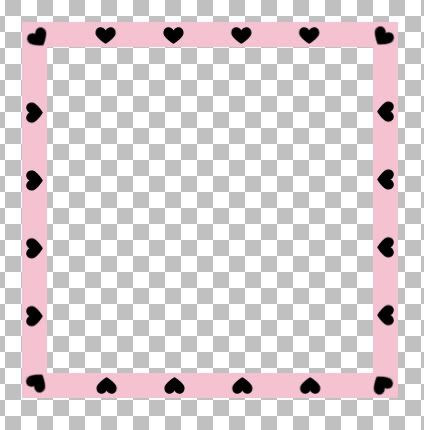
Now at this point, I would hit your Ctrl and D key to duplicate your image just incase something doesn't go right and you won't have to use your undo key 20 times to get back to this point to fix it. Minimize your duplicate.
37. Now we need to merge all the black hearts together into one layer. Turn off your pink frame layer (hit the little EYE icon next to the pink frame in the layer palette to the right). Make sure you have your hearts placed how you want them.
38. Right click on one of the other layers in the palette and choose Merge, then Merge Visable.
You should now only have 2 layers in there, one called Merged and another called Raster 1 or 2.
39. Make sure your layer named Merged is active, and go up to the Selections tab, choose Select All, then Float, then Defloat.
All of your little black hearts should now have marching ants around them.
40. Hit your delete key, and the little black hearts should now be gone. Don't worry if there's a black outline showing, we will get rid of that soon.
41. Click on your other layer named raster 1 or 2 to make it active in the layer palette. Now hit your delete key again. You should now have all little heart holes in your frame like in the picture below:
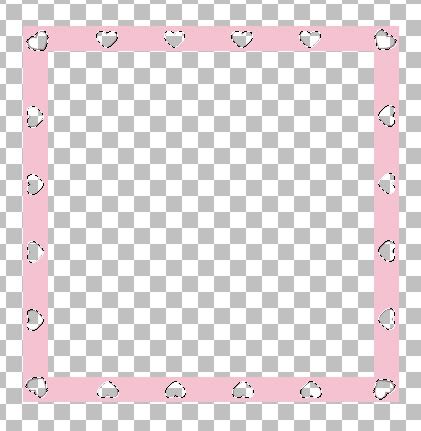
42. Click on the layer named Merged and right above it and to the right is the delete icon (looks like blue square and a white overlapping square with a red X through it). Hit that button to delete the Merged layer. It had those little black outlines on them.
43. Go up to the Selections tab and hit Select None.
Next we are going to put a texture on it.
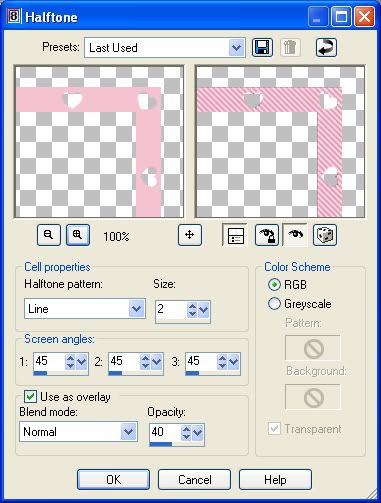
44. Go up to the Effects tab, choose Artistic Effects and then choose Half Tone and use these settings:
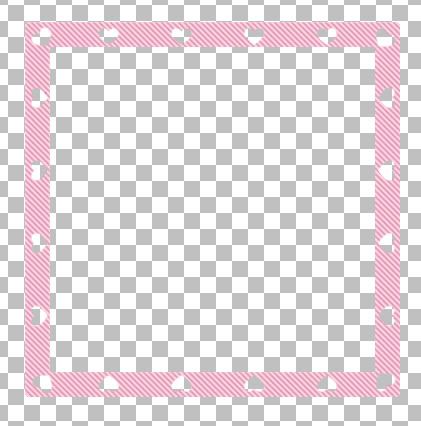
This is where you should be right now:
Now we are going to put the tin effect on it with EC5 Impact. Are you still with me? I bet your left butt cheek has gone to sleep huh? Mine has. We're almost done here.
45. Go up to the Effects tab, choose Plugins, then choose Eye Candy 5 Impact, then Bevel. In the Basic tab, use these settings:
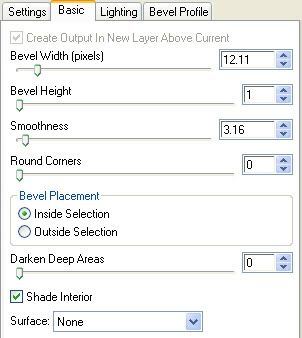
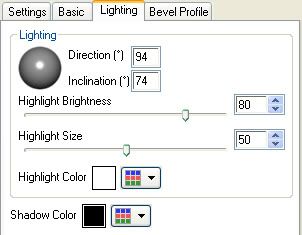
In the Lighting tab use these settings:
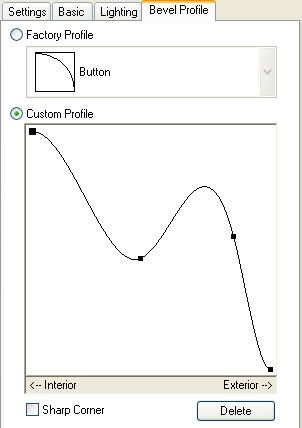
In the Bevel Profile click on Custom Profile and try and get as close as possible to this wonky shaped line. Click with your mouse to get the extra nodes in there.
Before you click on OK, on the Settings tab, down at the bottom click on the Save button and name this Tin Frame so you can use it again on something else. And that's it, you're done :)
TOU:
If you do this tutorial, your end result is yours to do whatever you wish; give it away as a freebie, use it as part of a kit, or sell it for profit. You may not make this into an action or script to give away as a freebie or to sell for a profit. A mention or a link back here would be appreciated but is not mandatory. Please do not share the supplies or tut through email or any other means. If you are using this or any of my tutorials for your groups or as part of your own tutorial, please post a link to the tut on my blog and let your members download the supplies from my blog for themselves.


Thank you for all the wonderful tutorials. I can hardly wait to try them.