


Download Supplies Here
1. Start by opening up the ribbon, buckle and tail images in PSP. Hold down your shift key and hit the D key to duplicate each image and close out the originals.
2. Name your ribbon layer Base Ribbon. Copy and paste your buckle twice onto your base ribbon layer and name these buckle top, and buckle bottom.
3. In your layer palette to the right, arrange the 3 layers like this: buckle top is first, then base ribbon, then buckle bottom is the third layer.
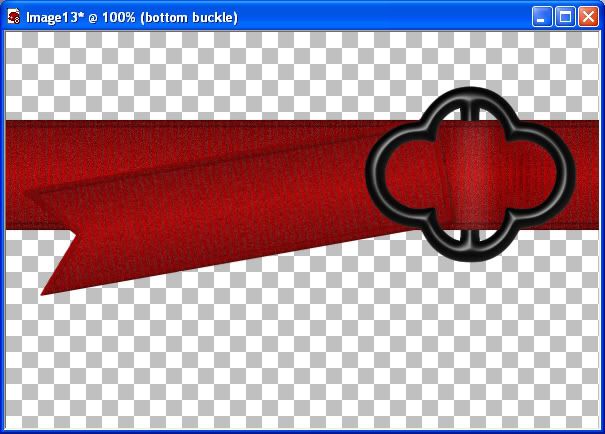
4. Arrange your buckle top and buckle bottom evenly over top of each other and the ribbon (if it isn't already) so it looks like its just one buckle like in the picture below.

Next, we are going to get rid of part of the bar in the middle of the buckle. This next step, there are 2 ways to do this. One is to use your eraser tool, the other is the rectangle tool. I prefer the rectangle tool, because it gives a cleaner line.
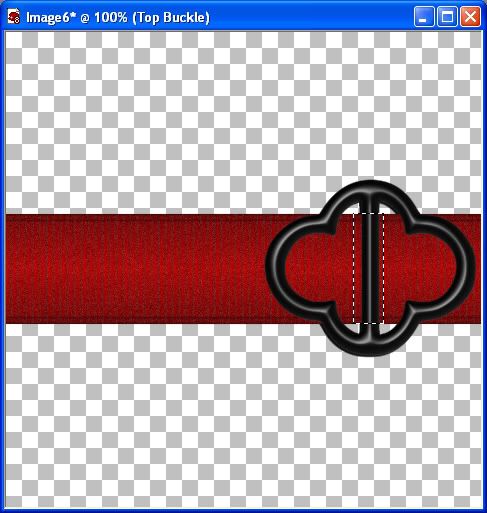
5. Make sure your buckle top layer is active (it should be highlighted in the layer palette to the right), and select your "Selection" tool at the left, set it at "Rectangle", Mode=Replace, Feather=0, Anti-alias is checked, and draw out a rectangle, stopping at the top and bottom of the ribbon. See the picture below.
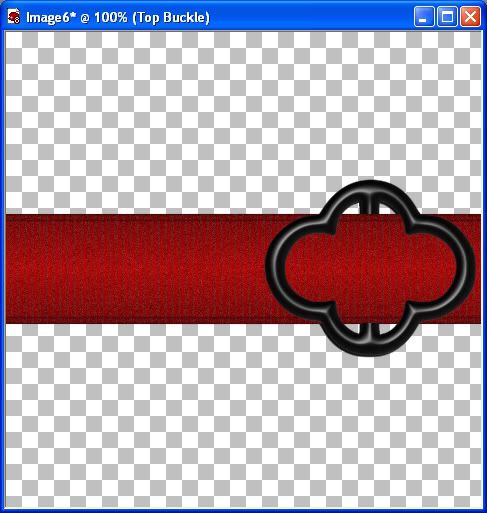
6. Now, hit your delete key, then go up to the "Selections" tab and hit the "Select None" option and look at your image. If you've gone too far up or not far enough, go to the "Edit" tab, click "Undo Select None", back up to the "Edit" tab and click "Undo Clear" and back up to the "Edit" tab, and click "Undo Selection", and then try it again. It should look like the picture below.
Now, we are gonna do some highlights and shadows to make it look more realistic.
7. On your tools palette to the left, click on the drop down arrow on the icon that looks like a black and white octogon
 and choose
 lighten/darken. Change your settings to this: Brush shape is the PSP Default Round, Size is 37, Hardness is 25, Step is 25, Density is 100, Thickness is 100, Rotation is 0, Opacity is 55.
With this Lighten/Darken tool, when you left click on your item, it will lighten the area, when you right click it will darken an area. If this were a real ribbon and buckle, the ribbon in the center of the buckle would be raised up a bit, making it appear lighter in that area, and the areas to the right and left of the highlighted part would appear to be a bit darker. That's the look we want to achieve here with our Lighten/Darken tool.
8. Make sure your Base Ribbon layer is active, hold down your left mouse button, and make one even stroke down your ribbon. You may need to undo and practice a few times to get the look you want. It should look similar to the picture below.

9. Leave your settings the same, except change the Brush Size to about 25. Now, we want to darken the spaces a bit on each side of our newly highlighted middle stroke. With your right mouse button and using the same technique as you did for the lightening stroke, darken it a bit on each side, and then a little bit towards the circular parts of the buckle.
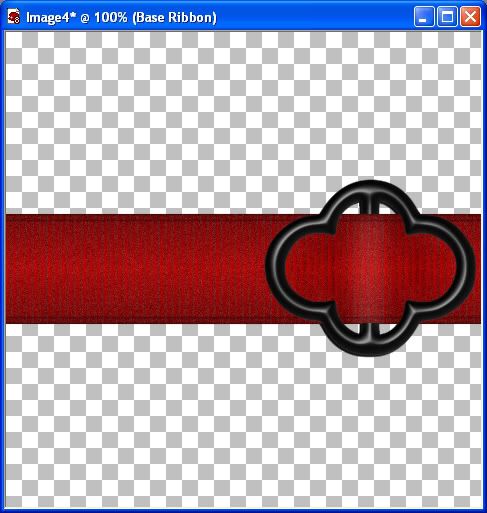
Notice how the ribbon doesn't look so flat and one dimensional anymore?
That part's done. Now, we are going to put on the ribbon tail.
10. Unminimize SK Ribbon Tail. Go up to the "Image" tab at the top, and choose "Rotate" then "Free Rotate". Use these settings: Direction is left, Dot in the word "Free", and put in 10.00 and hit OK. If your tail doesn't seem as sharp, shapen it once under the "Adjust" tab.
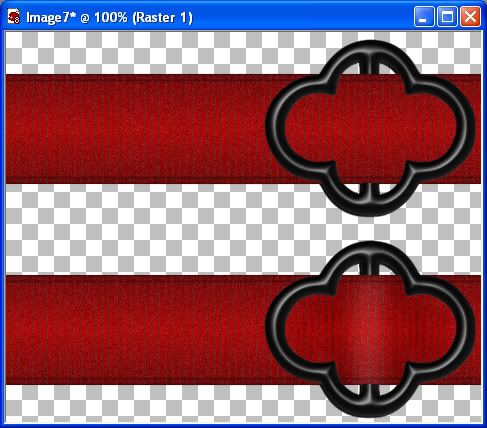
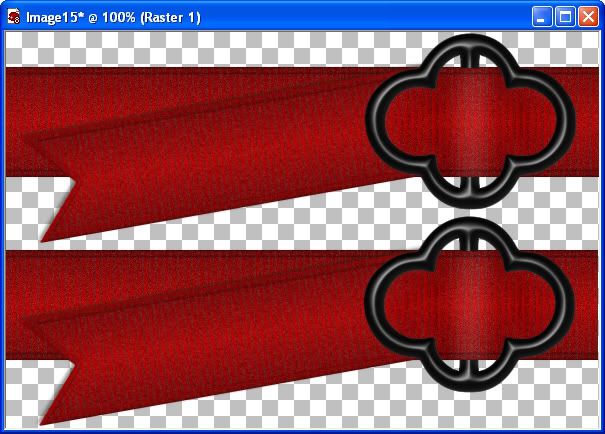
11. Copy and paste your tail onto your other image, and name it tail, and place it under top buckle. This is where you should be at
12. Now we need to erase that visable extra part of our tail. Make your tail layer active, click on your eraser tool, and erase that extra part covering up our middle section in the buckle. Don't worry, you won't affect your buckle if your tail is the active layer.
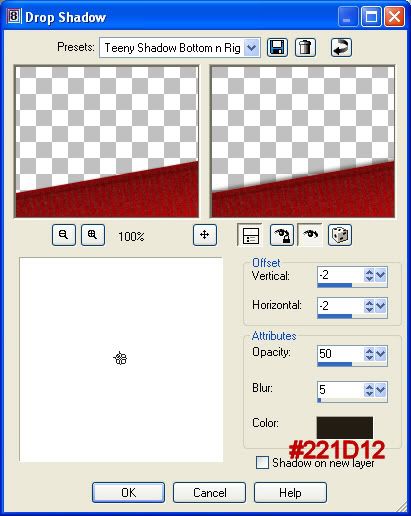
13. The tail kinda blends into the ribbon so we are going to give it a tiny drop shadow to make it stand out a bit more on its own. With your tail layer still active, go up to the "Effects" tab, go to "3D Effects", then to "Drop Shadow". Use the settings below.
14. Merge all visible layers and you are done :-)
Tip: You may want to moosh (yes, moosh is a word lol) it in a bit where the ribbon meets the tail to give it an extra realism effect. On your tool bar to the left, select your "Mesh Warp" tool. Change the mesh horizontal to 28 and mesh vertical to 22, symmetric is unchecked, show mesh is checked. Select one of the little nodes close to the circular part of the buckle, and just slightly push it towards the tail. Do this to a few of them till you have your desired look.
TOU:
If you do this tutorial, your end result is yours to do whatever you wish; give it away as a freebie, use it as part of a kit, or sell it for profit. A mention or a link back here would be appreciated but is not mandatory. Please do not share the supplies or tut through email or any other means, send them here to my blog to get the supplies and tut for themselves.


wow your tuts are awesome, thank you so much for showing me, I hope to create a kit one day and will credit your blog on how it came to be! Hugs Dee