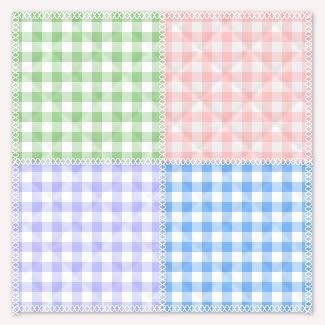
Supplies: Texturizer plugin and my texture swatches. This is optional and only if you want to give your pattern a little bit of texture. You don't need it to make this gingham tutorial. In the example above, I've used a quilted texture, which I've included in the zip, along with another different texture that you will see in the example photo's in this tutorial.
Download these from Download Supplies Here.
Place the texturizer plugin wherever you have your plugin folder on your computer. Also, I use this plugin A LOT, so i've made a folder called texturizer swatches and put it into where i have all of my PSP stuff in My Documents. It just makes it easier to find all my textures if they are in one place.
** When doing this tutorial for the first time, use the same colours and sizes that I do so that there is no confusion in the tut. You can change the colour and size if you want when doing it another time.
1. Start by opening up a 20 by 20 transparent image.
* This will be your main canvas. It's small because gingham is made of tiny check patterns.
2. Set your foreground to white (i'm actually not using white as i think a slightly off white looks better #EFEFEF). Now flood fill your 20 x 20 with this colour.
3. Tiny canvases are hard to work with while they are so small, so lets enlarge it by clicking on your zoom tool on the left and type in 3000 in the percentage box. ( the zoom tool is the icon on the left that looks like a white arrow pointing upward and to the left).
4. Open up a 10 by 10 new transparent image.
5. Flood fill this with your main colour you want your gingham to be. In this case mine is #F8C2C2.
6. Go up to the Edit tab and down to Cut, then click on your main 20 x 20 white canvas to activate it.
7. Go up to the Edit tab again and choose Paste, then Paste as New Layer.
* Your pink square should now be in the middle of your canvas.
8. Click on your Mover tool and move the pink square up and over to the top left of your canvas. If you move it slowly, you will notice that your pink square will snap into place when you reach the top left of your canvas. This is what you should have now:
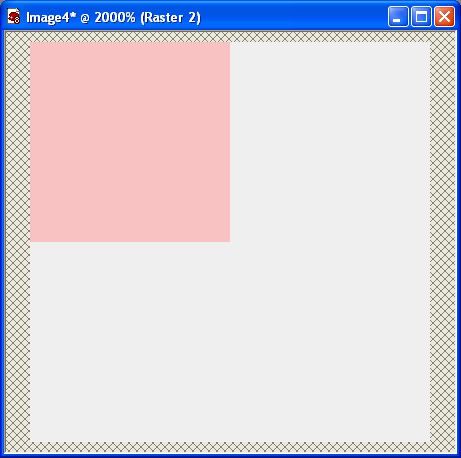
9. In your layer palette on the right, right click on Raster 2 ( which should be your pink square) and choose Duplicate.
10. Now go up to the Image tab and choose Mirror. Your duplicated pink square should have flipped over to the right hand side of your canvas like this:
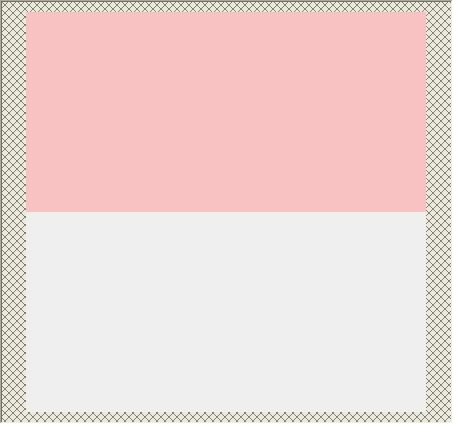
* Now we need this one to be a lighter shade of pink than our first one so...
11. In the layer palette, lower the opacity of your duplicated square to about 52%.
* We need to make a copy of this lighter pink layer and position it in the bottom left hand corner.
12. In the layer palette, right click on your light pink layer and choose Duplicate.
13. Go up to the Image tab and choose Flip then back up to the Image tab and choose Mirror.
Taa Daa, you've got yourself a seamless gingham pattern.
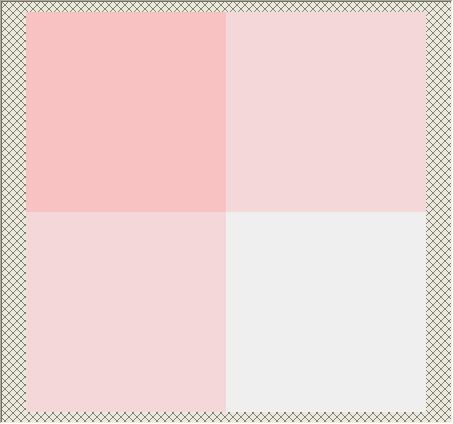
14. Right click on one of the layers and choose Merge then Merge Visable. Save this somewhere on your computer, but don't click it off. We aren't finished yet.
* You can test it out by setting it as your foreground pattern and flood filling a new 200 x 200 canvas.
If you'd like to give it a little bit of a texture, I'm going to show you a couple different ones next if you continue on.
15. OK, you've flood filled a 200 x 200 canvas with your new gingham pattern and you should have this:
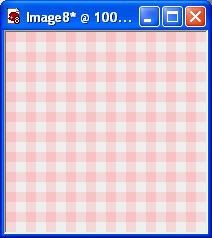
* This 200 x 200 canvas is just a test image we are doing. If you were making an actual page, you would make your canvas whatever size you needed and then did the textures on there.
16. Go up to the Effects tab, down to Plugins, then over to Texture and click on Texturizer. In the dropdown box indicated with the red arrow, click on that and click on Load Texture. Navigate to wherever you saved SK Gingham Texture.psd from the zip, click on it once then click Open and it will load as your chosen texture. Then change the rest of your settings to the one in the picture below and click OK.
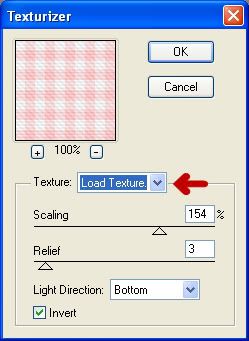
This is what you should have.
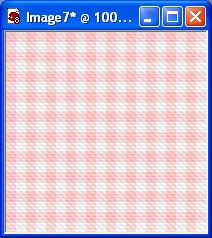
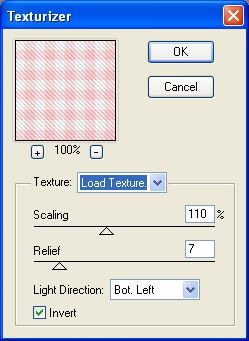
This setting gives you a faint grosgrain look:
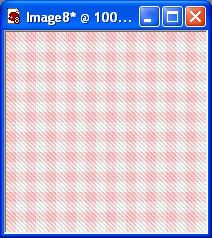
Experiment with the settings and different textures and see what you can come up with.
TOU:
If you do this tutorial, your end result is yours to do whatever you wish; give it away as a freebie, use it as part of a kit, or sell it for profit. You may not make this into an action or script to give away as a freebie or to sell for a profit. A mention or a link back here would be appreciated but is not mandatory. Please do not share the supplies or tut through email or any other means. If you are using this or any of my tutorials for your groups or as part of your own tutorial, please post a link to the tut on my blog and let your members download the supplies from my blog for themselves.


Thank you! Your blog post will be advertised on the DigiFree Digital Scrapbooking Freebie search engine today (look for timestamp: 06 Aug [LA 12:00am, NY 02:00am, UK 07:00am, OZ 05:00pm] ).