


Needed: EyeCandy 5 Impact
Supplies zip you can get HERE. You need to put the 2 Eye Candy 5 glass presets into the Alien Skin EC 5 Impact folder/Settings/Glass
1. Open up a 400 x 400 transparent canvas.
2. Put your foreground colour to #059EE4 and your background colour to #A1E1FF and click OK.
3. Click on your background colour again and then click on the Gradient tab at the top. Change your settings to the ones in the picture below:
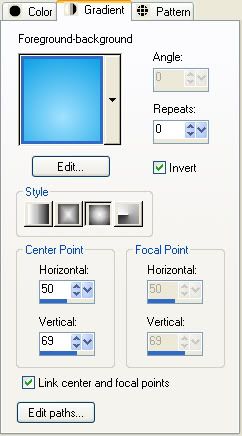 :
:4. Click on your Preset Shapes tool on the left and scroll down till you find the Ellipse. In the options bar at the top:
Anti-alias is checked
Create as Vector is checked
Line Style is Solid
Width is 1
5. Hold down your Shift key and draw out a fair size circle on your canvas.
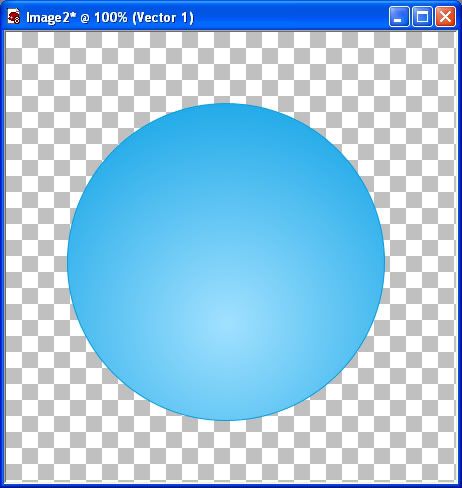
6. In the Layer Palette on the right, right click on Vector 1 and from the flyout choose Convert to Raste Layer.
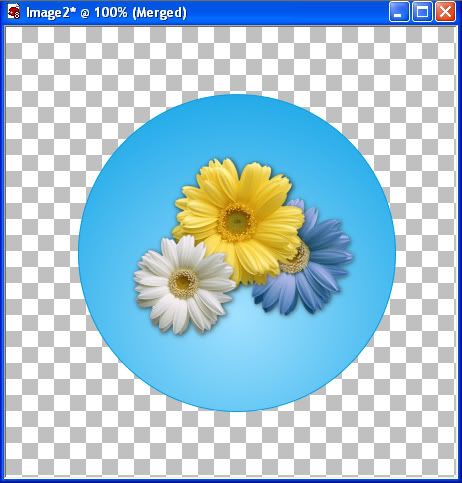
* Decide what you want to put in the middle of your button. It can be text, tube, photo, or whatever you want. In the supplies folder, I've given you a sample flower bunch to use for this tut.
7. Copy and paste your image into the middle of your circle.
8. Now give your text, or tube image a slight drop shadow. Use the settings like in the picture below.

9. In the Layers Palette, right click on one of the layers and choose Merge, then Merge Visable.
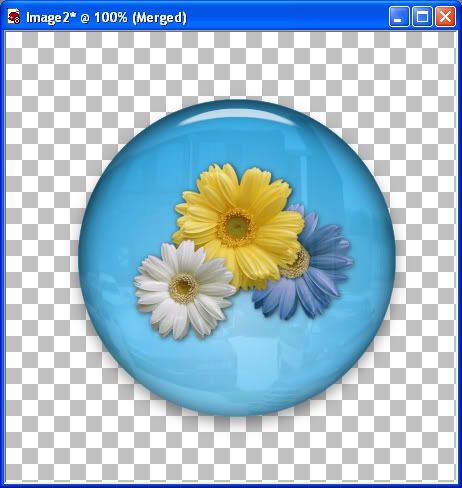
Here's what mine looks like now:
10. Go up to the Effects tab, then down to Plugins, then from the list find Alien Skin Eye Candy 5 Impact, then click on the Glass Option.
11. On the left you will see User Settings. Choose on of the glass presets from the list. I'm going to be using Simple Glass Button 02. Select it then click OK.
Here's mine:
* You can add any extra highlights on it, or when in the EC Glass options, fool around with the different reflections and settings in there to get different looks.
TOU:
If you do this tutorial, your end result is yours to do whatever you wish; give it away as a freebie, use it as part of a kit, or sell it for profit. You may not make this into an action or script to give away as a freebie or to sell for a profit. A mention or a link back here would be appreciated but is not mandatory. Please do not share the supplies or tut through email or any other means. If you are using this or any of my tutorials for your groups or as part of your own tutorial, please post a link to the tut on my blog and let your members download the supplies from my blog for themselves.


Nice tutorial. Could this be accomplished in PSE also?