


Supplies needed: Paint Shop Pro (I'm using version 8), the jpg file called Christmas ball.jpg and a preset called x_glassbutton, if you do not have them already, you can Download Here
I do not remember where I got this preset, so if it is yours, let me know and I will give you credit for it.
Put the .jpg file into your "Environment Maps" folder. It's usually found C:\Program Files\Jasc Software Inc\Paint Shop Pro 8\Environment Maps.
Put the preset x_glassbutton into your folder called "Presets". It's usually found, C:\Program Files\Jasc Software Inc\Paint Shop Pro
8\Presets.
1. Open up a 400 by 400 transparent image. Go up to the "Effects" tab, scroll down to "Artistic Effects", and then choose "Balls and Bubbles".
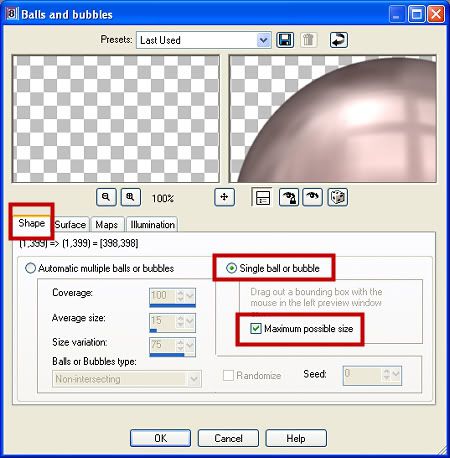
2. On this screen, make sure your "Shape" tab is selected, the green dot is in "Single ball or bubble" and a check mark is in "Maximum possible
size.
3. Next, click on the "Surface" tab. From the "Materials" window, choose the colour that you want your bead to be, (for this tutorial we are using #FFCFCA) and use the settings in the pic below.
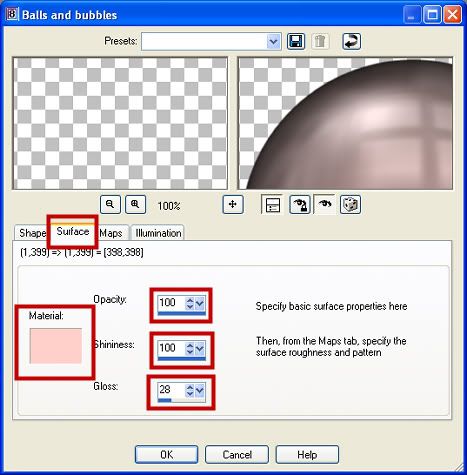
You can see the colour that it will be from the preview window or you can click the small "eye" icon in the balls and bubbles screen and it will put your bead onto your transparent layer. Now, I've never been able to get the particular shade that I want from just using the balls and bubbles option, so let's finish the initial bead and I'll show you how to change it to something brighter and more colourful later on.
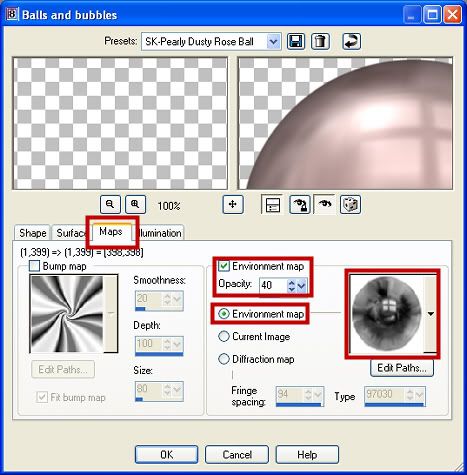
4. Next, click on the "Maps" tab. Use the settings in the picture below.
5. Next, click on the "Illumination" tab, make sure that "Light 1" is highlighted and change your settings to the picture below. If you do not have a "Light 1" in there, click on the add button to the left. If you have more than "Light 1 and Light 2" in there, highlight it and click the delete button.

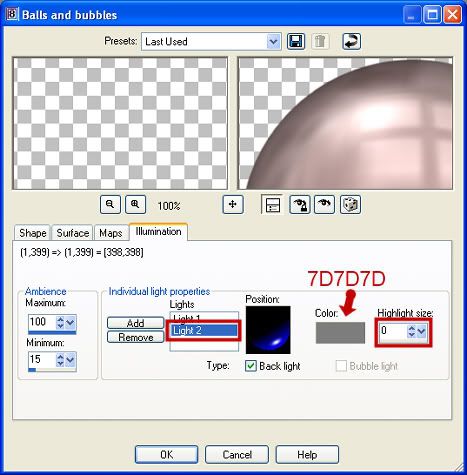
6. Now, click on "Light 2" and change your settings to the picture below.
Click OK. This is your initial bead. If you used the colour that I did in this tutorial #FFCFCA, it's probably kind of a dull rose colour, not very exciting, but I'm going to show you several different ways to change that from a previous tutorial that I had written. Click Here


Wonderful tutorial!! I've already worked it up and I am so tickled at the results! Thanks so much for sharing.