


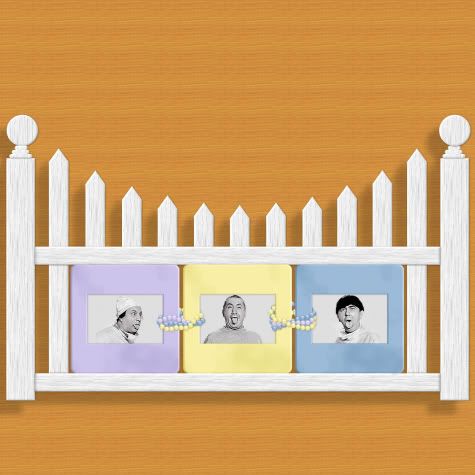
Supplies: 2 wood textures, guide photo, line style, photo slide, Download Here
* The line style amc round ended solid.sld is not mine and I don't remember where I got it from. If it is yours, let me know.
1. Open up a 500 x 800 transparent image. You may want to add a coloured background layer in order too see your fence post better.
* We are going to create just one picket and duplicate that to make our fence, so it's up to you how big or small you want to make this picket, but it does need to be quite long initially because there are 5 different sizes to the pickets in this frame, and we are going to be chopping the bottoms off of some of them, so make this first picket the length you want your longest picket to be. Take a look at #1 in the guide photo in the zip to understand what I mean.
2. Set your forground and background pattern to SK white wood vertical, Angle is 0, and Scale is 100%.
3. Click on your Preset Shapes tool and choose the triangle. Anti-alias and create as vector are both checked.
4. Draw out a small triangle to use as the tip of the picket. Don't make it too long or it will elongate your tip and it won't look right.

5. In the layer palette on the right, right click on Vector 1 and choose Convert To Raster Layer.
6. Click on your Preset Shapes tool again and this time choose the Rectangle. This next part is a little tricky.
7. Draw out a rectangle as long as you want your picket to be, and as wide as the triangle you drew. Make sure it is perfectly even with the width of the triangle and doesn't go past the edges. You may want to zoom in to see it more closely. Use the Object Selection tool to pull or push it in or out a bit.

* Don't worry if your fence pattern isn't lined up, we will fix that too.
8. In the layers palette, right click on Vector 1 and from the flyout choose Convert to Raster Layer.
9. If you've added a coloured background layer, hide it, and right click on either the triangle or rectangle layer and choose Merge Visable.
* You can clearly see that our wood pattern isn't lined up properly, so we need to do a bit of cloning.
10. Click on your Clone tool, Size appropriate to the size of your picket, I'm useing Size 10, Hardness 50, Step 5, Density and Thickness 100% and Opacity 100%.
11. Right click once just under the top line of our rectangle, then Left click several times horozontally directly on the line to clone it out. Then use a few vertical strokes downward to clone any missed parts. This is what mine looks like:

* Minimize this for now, we will use it a bit later on.
* If you take a look at the guide photo from the zip, you'll see that we need 2 end posts, and 2 horozontal slats. First, we'll do the 2 end posts.
12. Open up another 500 by 800 transparent image.
13. Click on your preset shapes too and choose Rectangle, and draw out a long rectangle about the same length as your single picket we just did, but make it a little bit thicker.
14. Right click on Vector 1 in the layer palette and choose Convert to Raster Layer.
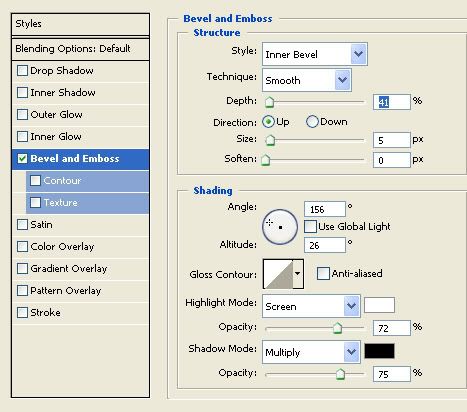
15. Next, we'll give it a bevel. Go up to the Effects tab, and over to 3D Effects, then to Inner Bevel. Use the settings in picture 1 for PSP, and the settings in picture 2 for PS.

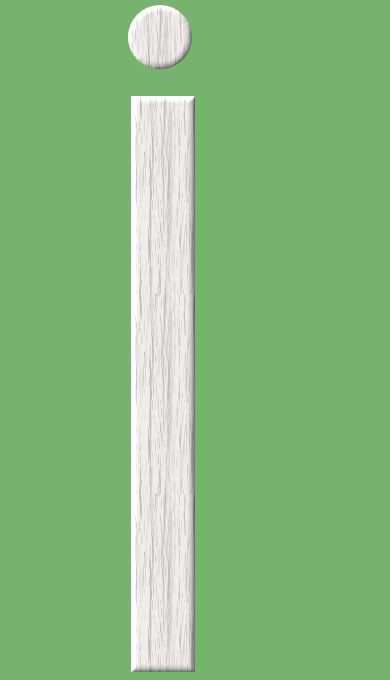
16. Click on your Preset Shapes tool, and choose Ellipse, and draw out a circle for the ball on top of your post.
17. Right click on Vector 1 in the layer palette and choose Convert to Raster Layer.
18. Give it the same bevel as the post in step #15. So far this is what I have:
19. Click on your Pen tool on the left. Create as vector is checked, Mode is drawing mode, Segment Type is Line Segments, Line Style is Amc Round Ended Solid, Width is 11, and Anti-alias is checked. Draw out a straight line not quite as wide as your post. See pic below:

20. Right click on that layer in the layers palette and Convert to Raster Layer.
21. Repeat drawing a line 2 more times with the same settings, but make each line a little smaller than the other, convert each to raster layer.

22. Give each of these 3 lines the same bevel we have been using.
23. Position these lines on top of each other, turn off all other layers and Merge Visable these three lines.
24. Position your 3 pieces one on top of each other to assemble the post and turn off your background layer if you have one and Merge Visable these 3 layers.
* The last 2 pieces are the 2 horozontal slats, but before we do those 2, you need to determine how wide your fence frame is going to be. So, open up a large transparent canvas, big enough to have a bit of room on all sides.
25. Copy and paste your Post onto your new canvas and position it to the far left of your new canvas, and close to the top of your page. We need extra room at the bottom for later.
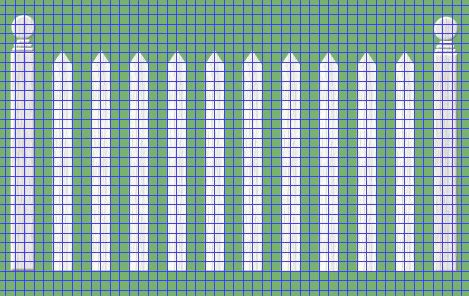
* You may want to turn on your grid (view tab, choose grid) to get these to line up evenly.
26. Copy and paste your post again onto your canvas and position that one over to the right of your page to determine the length of your picket frame.
* I have 11 pickets inbetween my 2 posts, but you don't have to have that many, or you can have more if you choose, but take a look at the guide photo from the zip file. Each numbered picket on the left, has to match up with the length of the same numbered picket on the right. Don't do any cutting just yet. We need to put them in place first.
28. Unminimize your single picket and copy and paste that onto your new canvas and place it beside your post on the left.
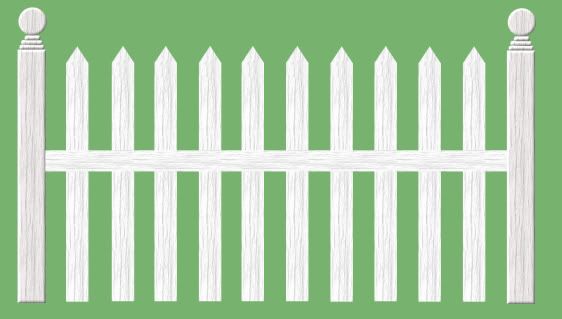
29. Copy and paste the original picket 10 more times ( or less) and place each one evenly with each other inbetween the 2 end posts. Here's what mine looks like
* Now we need to make the last 2 horozontal slats.
30. Set your foreground and background pattern to sk white wood horozontal, Angle 0, and Scale 100%.
31. Working on your canvas with the other pickets, with your preset shapes tool set to Rectangle, draw out a long horozontal rectangle about the same width as your pickets, and to a length that fits in between your 2 end posts.
*You can click on your Object Selection tool on the left and use the nodes to drag the rectangle inward or outward to get the correct length. This is what mine looks like:
32. Right click on the slat layer in the layer palette and choose Convert to Raster Layer, then move that layer to the top of the pile.
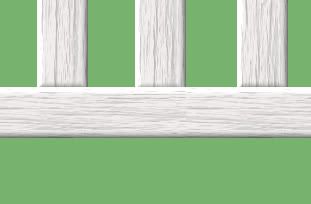
33. Move that slat about half way down your pickets. See picture above.
34. Copy and paste that slat layer onto your canvas and move it down to the bottom of the pickets, leaving just a little bit of space. Here's what mine looks like at this point.

* Now we need to adjust our pickets. Take a look at the guide photo from the zip and look at the placement. Turn on your Grid (View tab, Grid) so you can get these even with each other.
35. Pull the 3 middle pickets down so that just a quarter of the top is showing.
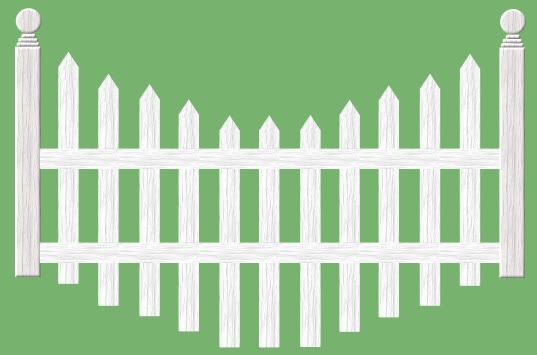
36. There's no way really that I can give you instructions on how to posititon the rest other than to say keep your grid on and just look at the guide photo to help you out with the placement of the others. Here's what mine looks like now:
* You may want to duplicate this and save it just incase you don't like what you've done and you can just start over from here.
* Now we are going to cut away the bottoms of the pickets that are sticking out from our frame. Before we do that though, if you are inserting the 3 slide frames into the fence, you need to move the 2 horozontal slats so that it will fit your slides snuggly. Open up the photo slide from the zip just to get an idea of how big you want those slides to be and move your 2 horozontal slats accordingly.
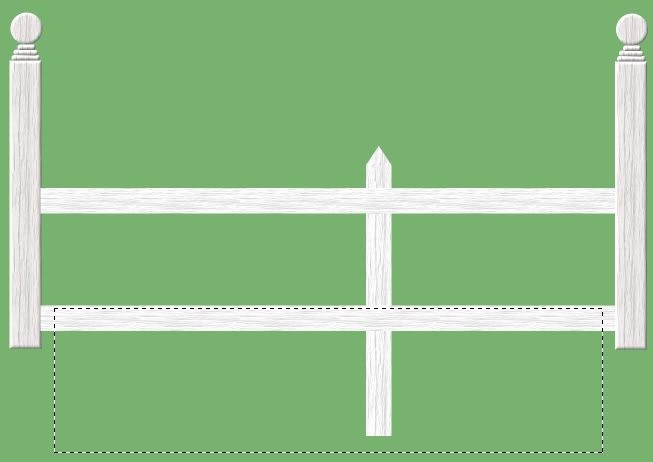
37. Click on your Selection tool on the left and set it to Rectangle. We need to cut away the extra pieces at the bottom, but we also need to make it so that when we bevel our pickets, the bottom of them rest nicely on top of the second horozontal slat. Draw out a rectangle like in the picture below. I've turn off most of the pickets so you can see how close we come to the top of the slat.
38. Now, in the layers palette on the right, select 1 of the picket layers and hit the delete key on your keyboard. The bottom should have disappeared. Repeat this for each of the PICKET LAYERS ONLY. Yours should look like this
Hang in there, we are almost finished. We only have to do some beveling, a bit of burning, and drop shadows and we are done :)
39. Go up to the Selection tab, and click Select None.
40. Now we need to bevel the pickets and the 2 horozontal slats. Click on the first picket on the left in your canvas to select it. Go to the Effects tab at the top, then over to 3D Effects, then to Inner Bevel and give it the same bevel as we used on the 2 posts. Screenshot is below:
41. Click on the next picket on your canvas, ( we're gonna use a shortcut here for the rest of the bevels) hold down the Ctrl key and hit your y key on your keyboard. By hitting Ctrl and y on your keyboard it just repeats the last command you did, which was our bevel. Repeat these steps untill you have beveled all of your pickets, as well as the 2 horozontal slats.
42. We are going to slightly move each picket upward a litlle bit so that the bevel at the bottom is just touching the bottom slat. Select your Mover tool and push each of the 11 pickets up a tad so that the shading from the bevel shows through a little. Here's a closeup of what I mean:
43. Next is the shading part. Select your Lighten/Darken tool on the left. Use the Default soft round brush, select an appropriate size for your project, Hardness is 50, Density and Thickness is 100, and an Opacity of about 20 to 30. We just want to darken in places where the picket meets the slats. Click on each picket one by one, and run your darken tool above and below the first horozontal slat, giving it a little bit of shading. Do this for each one.
44. Next, is our drop shadow. Click on the Post on the Left to activate it. Go up to the Effects tab, over to 3D Effects, then to Drop Shadow and use these settings:

45. Click on the first picket and use our shortcut to put the drop shadow on; Hold your Ctrl key and hit the y key on your keyboard. Do this for each picket, the post on the right and both the horozontal slats.
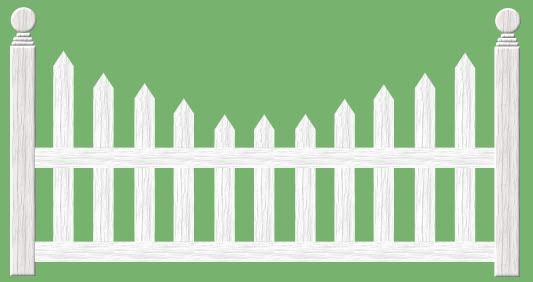
46. If you have a background layer, hide it and right click on one of the files in the layers palette and choose Merge, then Merge Visable.
YAY, we're done.....................
TOU:
If you do this tutorial, your end result is yours to do whatever you wish; give it away as a freebie, use it as part of a kit, or sell it for profit. You may not make this into an action or script to give away as a freebie or to sell for a profit. A mention or a link back here would be appreciated but is not mandatory. Please do not share the supplies or tut through email or any other means, send them here to my blog to get the supplies and tut for themselves.


OMG! It would take me hours and hours to do this tut! :) I am laughing, but I *swear* I will never bitch about the cost of a kit again!