


This tutorial is for PSP users, but if you have a working knowledge of Photoshop, you can do this tut very easily as well. I've included all files needed for you.
Supplies: Star Shape (PSP & PS), my EC5 glass preset, my glitter swatches, my brush (for PSP & PS) Download These Here
The first supplies link seems to be giving some people an invalid link response, so here's a second link to the supplies:
Second Download Link for Supplies
Pracken's Silver SBP Preset from her Heart Jewels Tut: Download Here (This is optional, only if you are going to be using the SBP plugin) Link is posted with permission.
Super Blade Pro Demo:Download Here (this is optional)
Eye Candy 5 Impact: EC 5 Impact Trial
*Place the 2 EC 5 Impact Glass presets into the glass presets folder of your EC5 wherever you have it installed on your computer.
*Place the file for the PSP star shape into your preset shapes folder wherever it is on your computer.
*Place the 2 PSP files for the brush into your brushes folder wherever that may be on your computer.
*There is also a png file of the brush for those needing it.
*Feel free to recolour the glitter swatches to whatever colour you wish.
I'm going to be using a simple star shape for this tutorial, but you can use any shape you choose. If you want to use the same star shape that I am, I've included a PSP and PS shape in the zip.
1. Start by opening up a 400 x 400 transparent image.
2. Set your forground colour to #E4E0E0, and turn off your background colour. (under your background colour box, hit the circle with the line going through it to turn it off)
* By turning off the background colour, when we draw out our star shape, it will just give us an outline and the shape will not be filled with colour.
3. Click on your Preset Shapes tool on the left and find your star shape. Settings are Anti-alias is checked, Create as vector is checked, and use a width of 11. You can make this larger or smaller depending on your preference.
* I'm using a light grey colour instead of white (which is normally what you use when applying Super Blade Pro afterwards) because it is easier to see. If you are not using SBP, set your foreground to whatever colour you want.
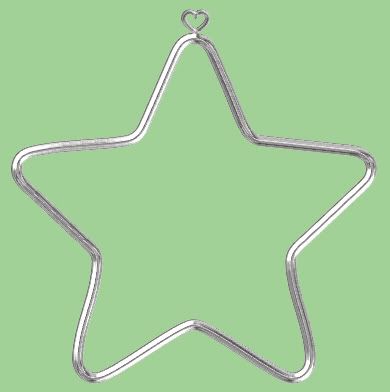
4. Draw out your star shape. It should look similar to this:

* If you want a thinner or thicker border, in the layer palette on the right, click on the + sign next to Vector 1. Double click on SK Christmas Cookie Star and a box will pop up. Increase the Stroke Width to make it thicker, or decrease the Stroke Width to make it thinner.
5. Right click on Vector 1 and choose Convert to Raster Layer.
6. Click on your Preset Shapes tool again, and choose a shape for the ring that goes on the top. Normally you'd see a circle, but I'm going to use a heart shape.
7. Decrease your Width to somewhere around 3 or 4, and draw out your shape. Right click on Vector 1 and Convert to Raster Layer, and move it so that it is centered on the top point of your star. Make sure it is touching the star so that when we merge the two together there will be no spaces. Here's what mine looks like so far:

8. In the layer palette on the right, right click on one of your layers and choose Merge, then Merge Visable.
* This next part requires Super Blade Pro. If you are not using SBP for this, you can apply whatever plugin you wish and skip to step #11
9. Go up to the Selections tab, choose Select All, Float, then Defloat.
10. Go up to the Effects tab, down to Plugins, and find Flaming Pear's Super Blade Pro.
* You can choose any preset that you wish from here. I am going to be using a silver preset called pracken_heartsilver.q5q. This is not my preset, so I can't include it in the supplies, but the link to the preset is at the beginning of this tutorial. Here's what mine looks like so far:
11. Click on your Magic Wand tool, and click inside your star shape.
12. Go up to the Selections tab, down to Modify, then over to Expand and put in the number 3 and hit OK.
13. Go up to the Layers tab, and choose New Raster Layer.
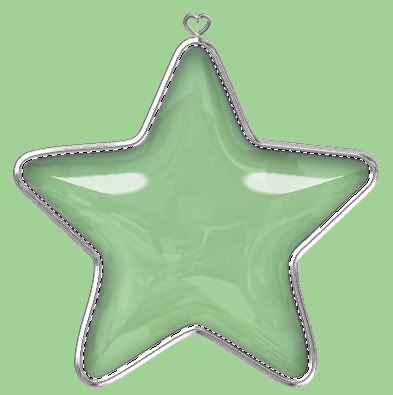
14. Next, go up to the Effects tab, down to Plugins, and over to Eye Candy 5 Impact, then to Glass. Find SK Glass Star w Reflection in the User Settings, click it once to select it, then click on OK.
*I've also included the same glass preset without the reflection if you'd prefer that one. You should have what looks like this:
15. In the layers palette on the right, move your glass layer down below your silver star layer.
16. Go up to the Layer tab, and choose New Raster Layer. Move this layer down below your glass and your silver star layer.
* We aren't going to deselect to make our marching ants go away because when we fill our new layer, the marching ants will keep the shape of the star and prevent anything from going outside of it.
18. Working on your new blank layer, open up one of the glitter swatches from the zip and set it as your forground pattern.
* If you want to fill the entire star shape with glitter, just click on your Flood Fill tool and click once on your new blank layer. Your entire star will be filled with glitter.
* if you want only part of your star shape to be filled up with glitter then click on your Freehand Selection tool on the left. It may be hidden behind your Magic Wand tool.
19. Go up to the Selection tab at the top and choose Select None.
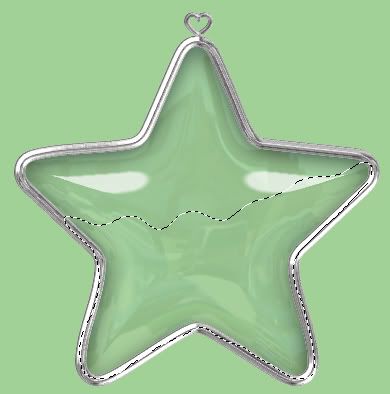
20. Make sure you are on your blank layer, take your freehand tool and draw an outline over the silver border of your star shape and down across the middle and then back to your starting point. Try and make sure you don't go outside of your star shape or inside the border of your shape or you will have blank spaces when we fill. This is what mine looks like:
21. Click on your Flood Fill tool on the left and then click once on your blank layer with the marching ants.
22. Go up to the Selections tab at the top and choose Select None.
* Now, you can leave it like this if you like how it looks, or you can use a brush to paint on some extra dabs of glitter to obscure the even line across the middle and make it look more jagged.
23. Click on your Brush tool, and in PSP find SK Rough Brush, in PS load SK Rough Edges of Square.abr. It's the same brush, just different names. Leave it at the default settings except change the brush size to somewhere around 43.
24. Go up to the Layers tab and create a new raster layer and place it above your glittered layer in the layer palette.
25. Using short clicks, click a few times along the smooth glittered edge to roughen it up a bit.
26. When you are satisfied with how it looks, turn off all layers except your 2 glittered layers. Right click on one of them, from the flyout choose Merge then Merge Visable. Make all other layers visable again by clicking the eye icon next to each one.
27. We need to give our glitter layer a slight drop shadow to give it a bit of depth so, make sure your glitter layer is active, go up to the Effects tab, then over to 3D Effects, then to Drop Shadow and use these settings:
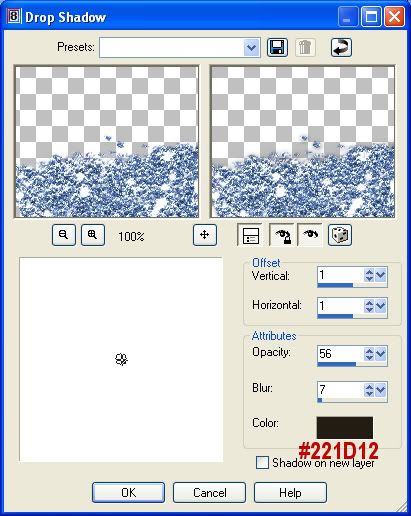
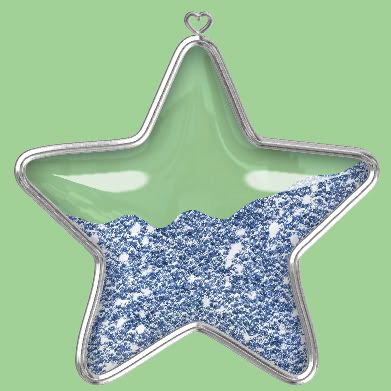
This is what mine looks like at this point:

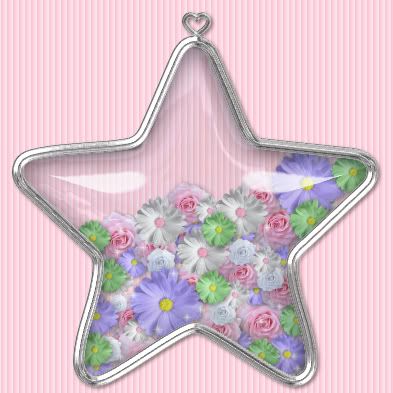
All that's left to do is make sure your silver star layer is first, your glass layer is second and your glitter filled layer is below those two in the layers palette, right click on one of them and merge visable and you are done :)
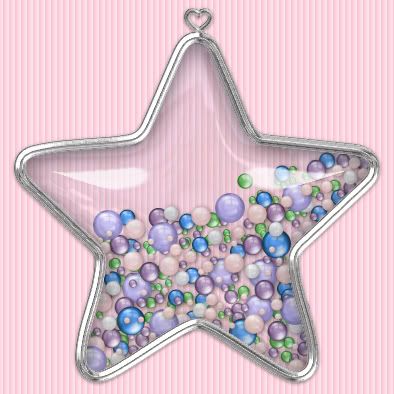
Here's a couple examples of other things you can fill shapes with:
*** A great little program to make glitter and sparkles is one called ArtRage2. You can make regular coloured sparkles, or metalic ones. It also has a stencil feature that you import any design you want into artrage, and you can then fill it with regular or metalic paint, sparkle and glitter ect..... It's also great for making textured papers. You can import any texture you wish, or use the may that come with the program. Here's the link if you are interested in it ArtRage 2
*** Note There is a free version you can download, but the glitter/sparkles option is not available for use with the free one. Here's a link to what the free version and the full version will do Feature Comparison
TOU:
If you do this tutorial, your end result is yours to do whatever you wish; give it away as a freebie, use it as part of a kit, or sell it for profit. You may not make this into an action or script to give away as a freebie or to sell for a profit. A mention or a link back here would be appreciated but is not mandatory. Please do not share my supplies or tut through email, groups or any other means, send them here to my blog to get the supplies and tut for themselves.


Thank you so much for the tutorial. All your tuts are wonderful actually. You are the best around. Thank you again...