Supplies Needed:
MuRa's Meister Copies which you can download Here.
1. Start out by opening a 200 x 200 transparent image.
2. Choose a colour for your background. I'm going to use Pink #FED2E1, and flood fill your canvas with it.
3. Next, choose a colour for your polka dots. I'm going to use white. Set your foreground and background to your chosen polka dot colour.
4. Click on your preset shapes tool, and set it to ellipse, and draw out one single dot.
5. When you get it to the size you like, right click on Vector 1 in the layer palette to the right and choose Convert to Raster Layer.
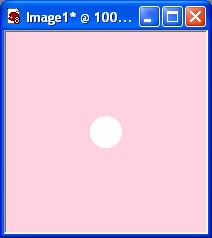
6. Now, we need this dot to be exactly in the center of your canvas, so make sure your dot layer is active (highlighted blue), and go up to the Edit tab, choose Cut, then choose Paste, then Paste as New Layer. It should now be in the exact middle of your canvas like this:

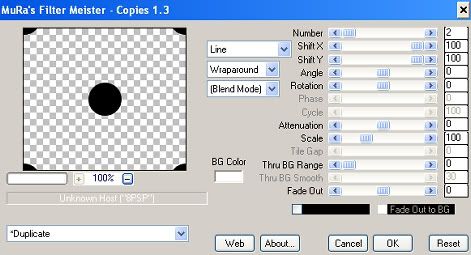
7. Make sure your Dot Layer is active, go up to the Effects tab, choose Plugins, then find MuRah's Meister and choose Copies. Put your settings like the one in the picture below. I've changed my dot to black so you can see it better in the preview pic.

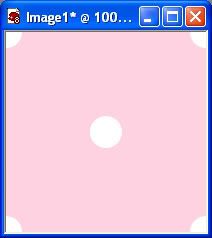
8. You should now have on your canvas a full dot in the center, and a partial dot in each of the 4 corners like below.

9. In your layer palette to the right, right click on one of the layers and from the flyout choose Merge, then Merge Visable.
10. Set your new polka dot pattern fill as your foreground pattern and fill a 500 x 500 transparent image as a try out. Keep in mind, that you don't have to use just polka dots, you can use pretty much any shape you like. Now on to the Overlay part.
Overlays:
This is very simple. Follow the steps 1 through 8 from the above tutorial. Don't Merge the layers. All you do is delete every layer EXCEPT the polka dot layer. Just set that as your foreground pattern and fill as many pages as you like. Simple huh :) Save it as a .psp file and use it as a template for other projects.
TOU:
If you do this tutorial, your end result is yours to do whatever you wish; give it away as a freebie, use it as part of a kit, or sell it for profit. A mention or a link back here would be appreciated but is not mandatory.


Great Tutorial! Thanks for sharing :)
Dew