


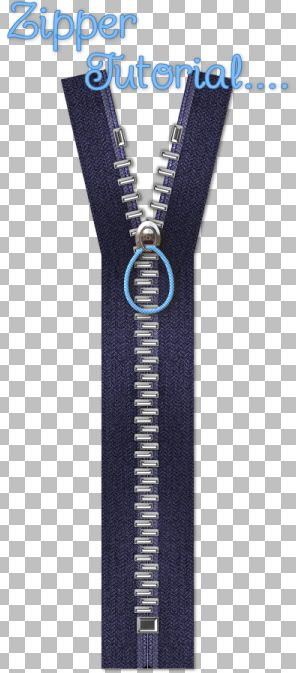
Supplies Needed:
My Supplies: SK Herringbone Dark Blue, SK Silver Top Stop, SK Bottom Stop, SK Pulls, SK Teeth, SK Teeth Lines, Greg's Pool Shadow plugin. Download Here
Mura's Meister Copies: Download Here
Optional: Super Blade Pro Trial
* I cannot include the silver preset that I used becaue it is not mine, and I don't have permission to use it in this tutorial, but just do a google search and you will find hundreds of them.
* I have also included in the zip file a few different zipper teeth, pulls, and stoppers in silver that I made for those that don't have or don't want to install SBP.
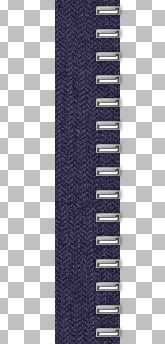
There are a few different kinds of teeth that zippers use, but I'm going to show you the easiest rectangle tooth first, then get into the other 2 another time.
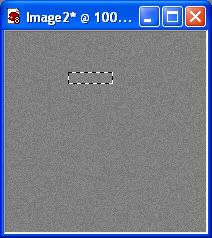
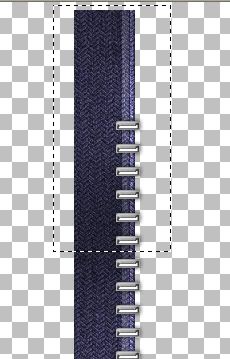
1. Open up a 200 by 200 transparent image.
* To get a silver/chrome or gold tone to your zipper teeth, the easiest plugin to use is Super Blade Pro. The link to a trial version is in the Optional section above.
2. Click on your Selection tool on the left and set it to Rectangle, Anti-alias is checked and Feather is 0.
3. Draw out a small rectangle for the first tooth, size appropriate to the size of zipper you want to create.
4. Go up to the Layers tab at the top and choose New Raster Layer.
* If you are not using Super Blade Pro, and just want a coloured tooth, fill with desired colour, give it a slight bevel and skip to step #7.
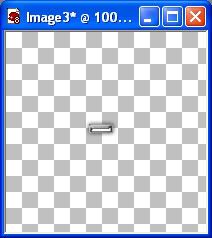
5. Fill with white. Don't deselect yet.
6. Go up to the Effects tab, down to Plugins, over to Flaming Pear, then to Super Blade Pro. Find a silver preset you like and apply it. Here's what mine ended up looking like. I have a slight drop shadow on mine, but because we are using such a dark fabric for this tut, the shadow will not have much of an impact, so you don't have to put one on if you don't want.
7. Open up an 400w by 800h transparent image.
8. Copy and paste your single silver zipper tooth onto your new canvas.
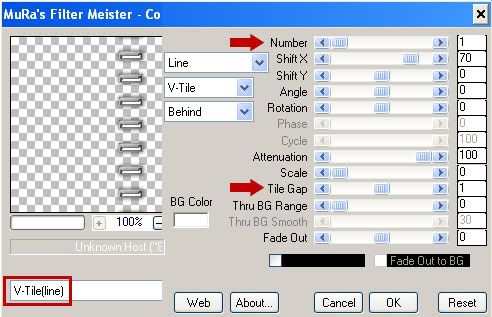
9. Go up to the Effects tab, down to Plugins, then find Mura's Meister and select Copies. Change your settings to the ones in the picture below.
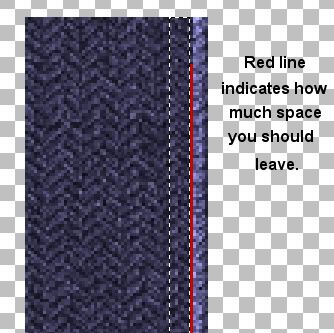
* I first tried a Tile Gap of 2, but when I put my 2 lines of teeth overlapping each other, the space inbetween was to large, so I clicked Undo, went back to Mura's Copies and tried a Tile Gap of 1 and it was perfect. Depending on the size of tooth you made, you may need to adjust yours as well, so that there isn't a noticable amount of space between the right side of the zipper teeth when you put the together.
This is how the spacing should look when we put them together. They should fit snuggly into each other, so adjust your tile gap accordingly.

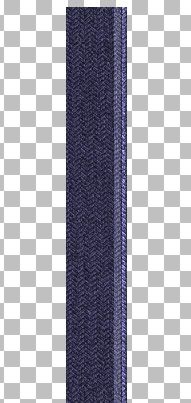
This is what mine looks like now:

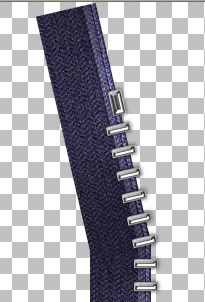
10. Rename this layer Zipper Teeth Left.
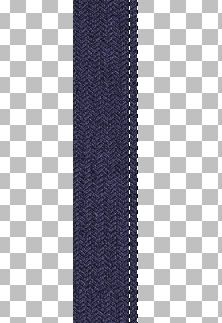
11. Open up the SK Herringbone fabric swatch from the zip file and set it as your foreground and background material pattern. Angle 0, Scale 100.
12. Click on your Preset Shapes tool on the left and set it to Rectangle. Anti-alias and Create as Vector are checked, Line Style is Solid, Width is 1.
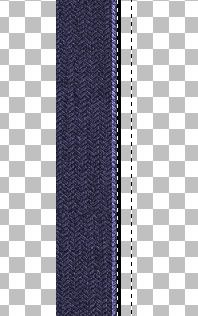
13. Draw out a long rectangle the entire length of your canvas, and a little bit wider than twice the width of your zipper teeth. See pic below for example:
14. In the layer palette on the right, right click on Vector 1 and choose Convert to Raster Layer.
15. Rename that layer Material Left.
* Our fabric kind of looks plain and flat to me so we're gonna give the inside a very slight bevel.
16. Make sure your Material Left is highlighted in the layer palette. Click on your Selection tool on the left and set it to Rectangle, Feather is 0, Anti-alias is checked.
17. Draw out a very small rectangle the entire length of your material left section. Turn off your zipper teeth line so you can see the material layer better. ( click the eye icon beside zipper teeth left in the layer palette) See picture below for example:
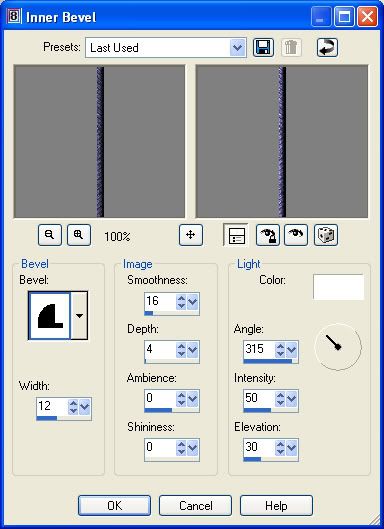
18. Go up to the Effects tab, over to 3D Effects, then to Inner Bevel and use these settings:
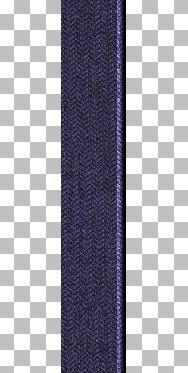
* Don't deselect yet, we are going to do that same bevel again.
19. Repeat the inner bevel one more time, then go up to the Selections tab at the top and choose Select None. You should have what looks like this now:
* Now we are going to cut away that small flat part to the right of the bevel.
20. Select your Selection tool, set it to rectangle if it isn't already and draw out a small long rectangle like in the picture below:
21. Hit your Delete key on your keyboard, then go up to the Selections tab and choose Select None.
* Next we want to make a slightly bigger seam but we aren't going to use the bevel funtion this time, we are just going to lighten it.
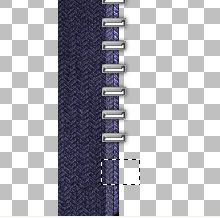
22. Click on your Selection tool again, rectangle. Draw out another long rectangle, slightly bigger than the first one we did. Zoom to about 200% and get close to the edge of the first seam, but leave a very small space inbetween the two. The reason being, when we lighten our section here, that very small space we left will still appear dark, and will give the look of a seam separating the two. See the picture below:
23. Click on your Lighten/Darken tool on the left. Size is 17, Hardness is 50, Step is 5, Density and Thickness is 100, Rotation is 0, and Opacity is 60.
* Since our selection has marching ants around it, you don't have to worry about lightening the wrong part of the material. The marching ants will prevent that. I've found that it is easier to use this tool on a zoomed out, smaller looking canvas because then you can just do one long short stroke and get it very even, rather than doing one stroke then scrolling down and continuing on. So......
24. Click the Pan tool on the left. It looks like and arrow pointing upwards and to the left. Change the number in the Zoom % section up top to about 60%. Then using your Lighten/Darken tool, make one long, continuous stroke all the way down your selection. Keep your mouse cursor inside the marching ants selection.
25. Go up to the Selections tab, choose Select None. This is what yours should look like at this point. See why now you left a tiny space in between our 2 lightened sections? It looks like there is a dark seam there.
* Our zipper is looking good, but it looks a little flat to me so we're going to give it a bit of shadowing. And, since this is a long tut, I'm gonna do a quicky shortcut for shading and use a plugin.
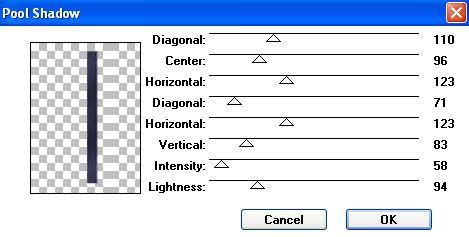
26. Go up to the Effects tab, down to Plugins, and find Greg's Pool Shadow and use the settings in the picture:
* You should now have some wave and darkening to your left material.
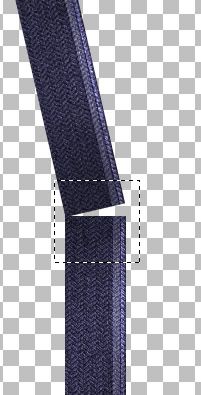
* Next, we are going to give the top a little bit of a V opening, so we need to slant part of our zipper to the left and then make the material match up.
27. Unhide your zipper teeth left layer and click it once to make it the active layer. (click on the eye icon next to it in the layer palette to unhide it).
* There's too many teeth near the top, so we need to get rid of a few of those first.
28. Click on your Selection tool, set it to Rectangle. Draw out a rectangle on the first 4 top teeth and then hit delete on your keyboard.
29. In the Layer Palette, right click on your Material Left layer and choose Duplicate. Then hide Copy of Material Left layer for now.
30. Click on your Material Left layer, and draw out a rectangle from the top, and stopping halfway inbetween the 6th and 7th tooth.
31. Go up to the Edit tab, select Cut, back up to the Edit tab, select Paste as New Layer.
32. Go up to the Selections tab, choose Select None.
33. Right click on your cut section and rename it Left Top Piece.
34. Go up to the Image tab, choose Rotate, then Free Rotate. The green dot is beside the word Left, the green dot is beside the word Free and type in the number 13 in the box. Make sure All Layers and Rotate single layer around canvas center are both unchecked, and hit OK.
* Rotating makes our image slightly fuzzy so we are going to sharpen it with the Unshapr Mask option.
35. Go up to the Adjust tab, choose Sharpness, then choose Unsharp Mask. Radius is 1.00, Strength is 47, and Clipping is 0. Hit OK.
36. Move Top Left Piece over the bottom half of your Material Left and line up the edges evenly like in the picture below:

37. In the layer palette, click on Copy of Material Left to make it active but don't unhide it yet.
38. Click on your Selection tool, rectangle again, and make a selection like in the picture below:
39. Go up to the Selections tab, click on Invert and hit the Delete key on your keyboard.
40. Go up to the Selections tab and choose Select None.
41. Unhide your Copy of Material Left in the layer palette and move it below your Material Left layer.
* Just to make sure, you should have in the layer palette, zipper teeth left, then left top piece, material left, copy of material left on the bottom.
Yours should look like this, with a small piece sticking out. We need to get rid of that.
42. Click on your Eraser tool, and with very small short clicks, erase out that corner point, being carefull not to erase too far or you will get a gap.
43. In the layer palette, right click on one of your visable layers ( your teeth layer should be turned off) and choose Merge then Merge Visable, and rename it Left Material.
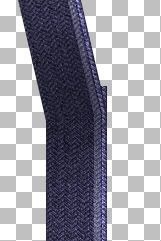
* Now we need to rotate our teeth to match up with our material.
44. Turn on your teeth layer and click it once to make it active.
45. Click on your selection tool again, rectangle and drag it out over the first 6 teeth to select them.
46. Go up to the Edit tab, choose Cut, back up to the Edit tab, and choose Paste, then Paste as New Layer.
47. Go up to the Selections tab, choose Select None.
* You can move those up a bit to a blank space but don't get too close to the top. We need to rotate these too and we don't want them going off the page.
48. Go up to the Image tab, choose Rotate, then Free Rotate and use the exact same settings we used before. They should still be there when the box pops up so just hit OK.
49. Again, use the same settings for sharpening that we used in step #35, then move those 6 teeth into place like in the picture below. Place the 6th tooth over the bended part to hid any flaws:
50. If they aren't already, even out your 2 sections of teeth, then turn off your Left Material layer in the layer palette and Merge Visable your 2 teeth layers.
51. Rename that layer Left Teeth.
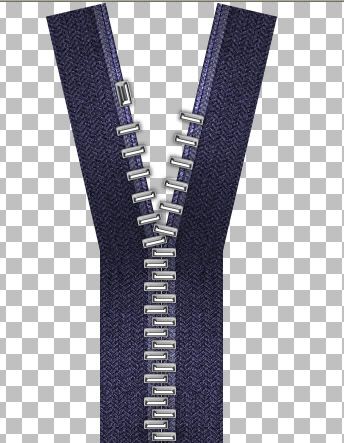
* We still need to make a top stop, a bottom stop and a slider, so let's start on the top stop.
52. It's basically a silver rectangle shape, same as the teeth, only a little fatter. So once again, draw out a small fatter rectangle and use Super Blade Pro on this, or whatever plugin you used to make your teeth.
* I've included a silver top stop in the supply zip.
53. Rotate it so it matches up with our line of teeth and if necessary, use the Unsharp Mask on it as well. Here's what mine looks like now:
54. We need to make room for the bottom stop, so click on your Left Teeth layer, and with your rectangle selection tool make a selection around the bottom 2 teeth and hit Delete on your keyboard to get rid of them.
55. Go up to the Selections tab and choose Select None.
56. Now for our bottom stop. That is just a small silver square. Draw that out about the same size in the picture below, and use SBP or whatever plugin you used.
* Ive also included one of these in the zip.
57. Rename that layer Bottom Stop, and place it at the bottom of your zipper.
* Now we need to duplicate our left material and our left teeth layer for the other side.
58. Click on your Left Material layer to make it active. Right click it in the Layer Palette and choose Duplicate.
59. Go up to the Image tab and choose Mirror.
60. Click on your Left Teeth, then right click it and select Duplicate.
61. Go up to the Image tab and choose Mirror.
* You'll need to do a bit of shifting here. Move your Right Material layer over a bit to the right, then line up your teeth so they intersect with the other side of teeth. Here's what mine looks like:
62. In the layer palette, click on your Left Topper to make it active, right click it and choose Duplicate.
63. Go up to the Image tab and choose Mirror and move it into its place.
64. At the bottom of your zipper, move the bottom stop over so it's evenly placed.
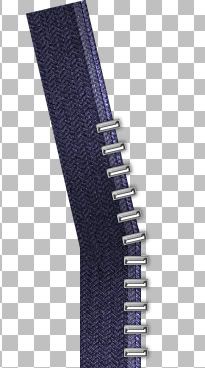
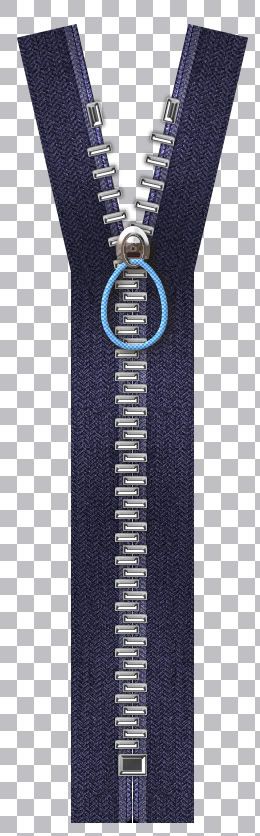
65. I've made and included a few zipper pullers in the zip, but feel free to make and use your own. All that's left to do is copy and paste a puller onto your canvas, move it in place and merge visable your layers and you are done :)
TOU:
If you do this tutorial, your end result is yours to do whatever you wish; give it away as a freebie, use it as part of a kit, or sell it for profit. You may not make this into an action or script to give away as a freebie or to sell for a profit. A mention or a link back here would be appreciated but is not mandatory. Please do not share the supplies or tut through email or any other means, send them here to my blog to get the supplies and tut for themselves.


I so love your tutorials. I am trying to learn scrapping and your tuts are the best i have seen or in my opinion they are. Thank you so much for sharing your talent with us.