


Supplies need for this tutorial: 1 target picture, and 3 filters.
Picture: Get It Here
Filter: Birgit's Chaos - Embroidery Get It Here
Filter: Simple - Diamonds - Get It Here
Filter: Simple - 4 Way Average - Get It Here
1. Open up target image SK Target Plaid Pic.jpg in PSP, or one of your own choosing. Your image must be square for this to work correctly.
2. This one is already resize 200 x 200 for you, but if yours is not, resize it now by going to the "Image" tab, then to "Resize". In the "Pixel Dimensions" change the width and height each to 200 pixels, "Resolution" is 300, and you may need to uncheck "Lock Aspect Ratio".
3. Go up to the "Effects" tab, and then to "Plugins", and from the flyout choose "Birgits Chaos", then choose "Embroidery". The picture below shows the settings we are using.
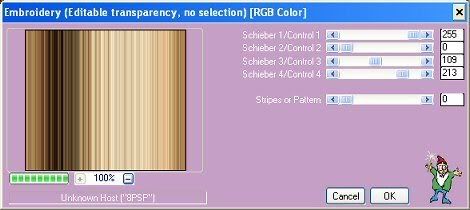
For a closer look at what your pattern will look like, change the picture preview too 100%.
If you are doing this tutorial with a different picture than the one provided, you may need to change the sliders to something other than what I have given you. Also, if you want a smooth look to your plaid, or a slight pattern, move the "Stripes or Pattern" slider to the right or left.
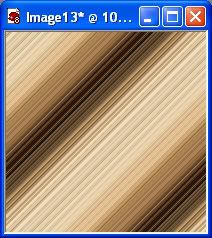
4. Go up to the "Effects" tab and then to "Plugins". From the flyout
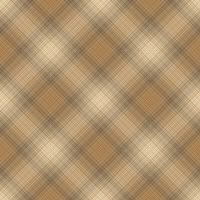
choose "Simple" then "Diamonds". Your picture should have turned into this
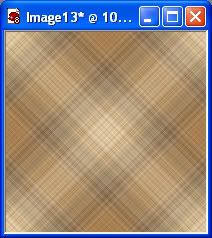
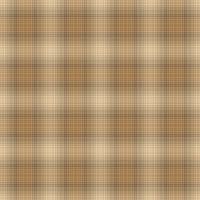
5. Next, go back to the "Effects" tab, then to "Plugins", then choose "Simple" then "4 Way Average. Your picture should look like the one below
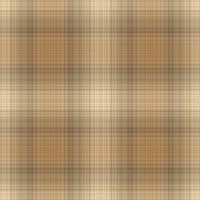
That's it. You're done. Try applying the "Diamond" filter once or twice more to get a different effect.
Once:
Once Again:
One More Time:
TOU:
If you do this tutorial, your end result is yours to do whatever you wish; give it away as a freebie, use it as part of a kit, or sell it for profit. A mention or a link back here would be appreciated but is not mandatory. Please do not share the supplies or tut through email or any other means, send them here to my blog to get the supplies and tut for themselves.


I absolutely love how easy you made this! Thank you for sharing your tutorials with us....