


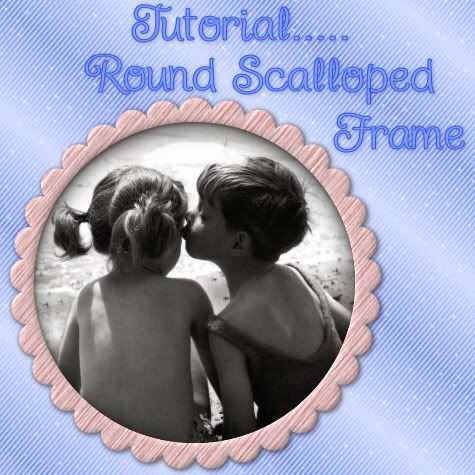
In this tutorial, I'll show you how to make a round scalloped frame with mura's meister copies. I will be doing another tut some time soon to show you how to scallop other shapes such as squares, triangles, or just about any shape you can think of.
Supplies Needed: Mura's Meister Copies plugin Download Here
1. Start by opening up a transparent image slightly bigger than the size you want your scalloped frame to be.
2. Set your Foreground and Background colour to black.
3. Click on your Preset Shapes tool on the left and set it to Ellipse. Anti-alias and Create as Vector are both checked, Line Style is Solid, and Width of 1.
4. Hold down the Shift key and draw out a small circle, the size you want your scallops to be. (Holding down shift keeps the circle from going into an oval shape) Here's what my circle looks like.
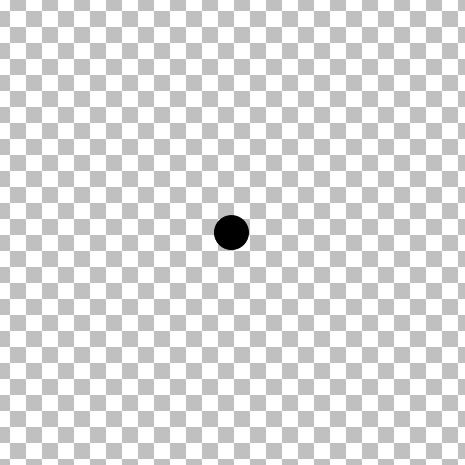
5. In the layer palette on the right, right click on Vector 1 and choose Convert to Raster Layer.
6. Now, we need our single circle in the middle of our page for this next plugin to work, so the easiest way to do that is to go up to the Edit tab, choose Cut, then back up to the Edit tab, and choose Paste, then Paste as New Layer.
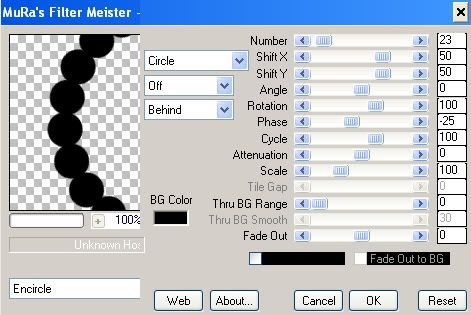
7. Next, go up to the Effects tab, down to Plugins, find Mura's Meister, and choose Copies.
8. At the bottom left, change whatever you have in there to Encircle, then make sure the rest of the settings are the same as in the picture below.
* Depending on the size of circle you made, you will have to adjust the Number section so that your dots line up with each other. My circle may not be the same size as yours, so my number will be different but the rest should remain the same.
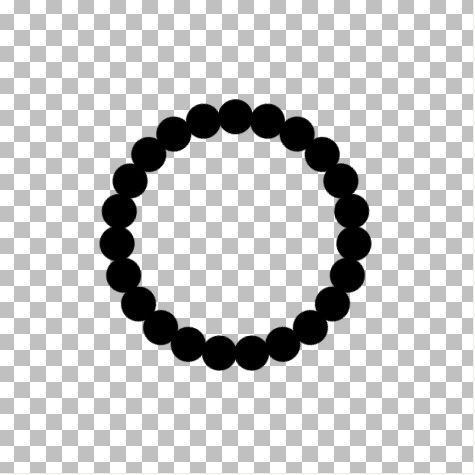
Here is what mine looks like now:
* If your result is smaller than you want it to be, go to the Edit tab and click Undo. You will revert back to your single dot. In order for your frame to increase in size, you need to increas your canvas size. Go up to the Image tab at the top, then down to Canvas Size.
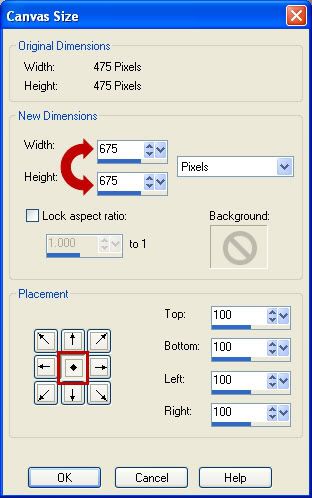
Your original height and width of your canvas is at the top. Try increasing your canvas by a few hundred pixels at a time to get the desired size. You will need to then go back and repeat steps #7 and #8 to redo the circle frame. Don't forget to change the Number section to get your dots to line up properly again.
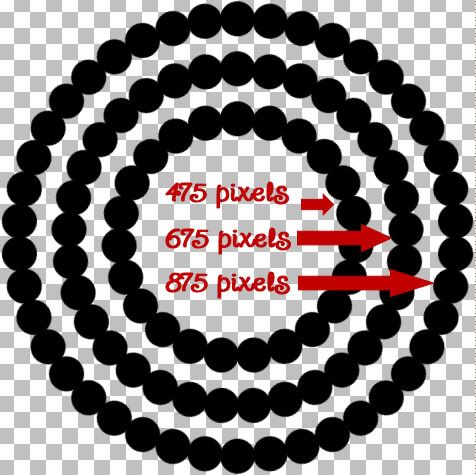
* The smallest middle section is my original canvas of 475 pixels, the second one is my result after increasing my canvas from 475 to 675, and the third I increased my canvas to 875. You decide how much you want yours to increase.
9. Now we need to fill in the middle. Click on your Magic Wand tool on the left. Mode is Replace, Match Mode is RGB, Tolerance is 30, Feather is 0, Anti-alias is checked. With your circle layer active (highlighted blue in the layer palette on the right), click once in the center.
* You will have marching ants all around the bottoms of your circles.
10. Go up to the Selections tab, choose Modify, then Expand. In the Number of Pixels section, type in 5 and hit OK.
11. Go up to the Layers tab, choose New Raster Layer.
12. Flood fill your new layer with black.
13. Go up to the Selections tab and choose Select None.
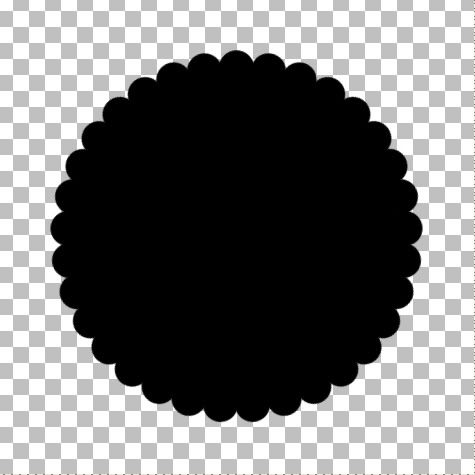
14. In the Layers Palette on the right, right click on one of the layers and from the flyout choose Merge, then Merge Visable. You should now have this:
15. Change both your Foreground and Background to white.
16. Click on your Preset Shapes tool on the left and choose Ellipse.
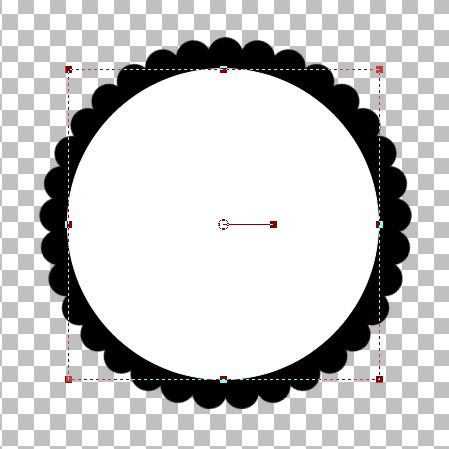
* This next step we are going to draw out a circle that will represent the hole we will cut out for the middle of your frame. Draw it out so that it is smaller than your frame and doesn't cover any of the outter scallops. It must be a perfectly round circle, but the size doesn't have to be exactly the size you want the middle of your frame to be. We will fix that too.
17. Hold down the Shift key and draw out a circle. Here's my example:
18. We need both the black circle template and the white circle to be exactly in the middle of our canvas, so click on the black circle template to activate it, go up to the Edit tab, choose Cut, back up to the Edit tab and choose Paste as New Layer. Do the same to the white circle.
* Now, It looks like I'm going to have too much of a black inner border on my scalloped frame, so I'm gonig to increase the size of my white circle just a bit to make my black border smaller.
* If you like the way yours looks now, just leave it and skip to step 21.
The white circle is a vector shape still, so we can just pull the nodes to increase the circles shape without getting any jagged edges. Click on the Object Selection tool on the left. It looks like a square with an arrow in the middle and it is probably the last tool in your toolbar.
* You will get what looks like a dotted line square with a smaller square at each corner.
19. Now, to keep this circle in perspective while we pull the node to make it bigger, you need to use your Right Click mouse button this time. Put your cursor on the bottom right square, hold down your Right Click mouse button and pull out slightly.
20. We need to center it perfectly again, so go up to the Edit tab, choose Cut, back up to the Edit tab and choose Paste as New Layer.
* You can click the Mover tool button to get rid of that dotted square so you can see how it looks without that being in the way. If you think your black border is still to big, repeat steps 19 and 20.
21. I like mine the way it is, so in the Layers Palette on the right, right click on your White Vector Circle and from the flyout choose Convert to Raster Layer.
22. All that work and now we are going to delete the white circle. Go up to the Selections tab, choose Select All, back up to the Selections tab, choose Float, up to the Selections tab again and choose Defloat.
* You should now have marching ants all around your white circle.
23. Hit the Delete button on your keyboard, and the white circle will disappear.
24. In the Layer Palette on the right, click on your black scallop layer to select it. Now hit the Delete key on your keyboard again.
* Your middle should now be transparent.
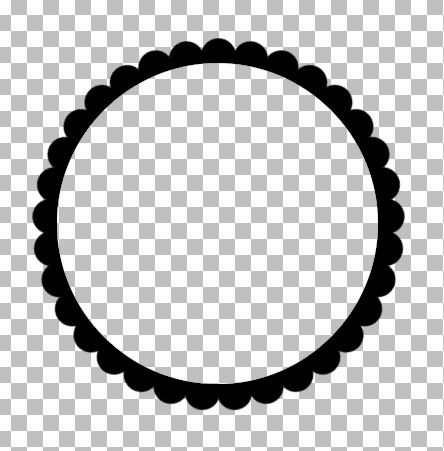
25. Go up to the Selections tab, choose Select None. Here's mine:
* Delete all layers except the black scalloped layer and save this as a .psp file so you can use it as a template again.
*Now all you need to do to colour it is, go up to the Selections tab, choose Select All, Float, then Defloat.
*Create a new layer from the Layers tab.
*Flood fill with whatever you want.... a colour, paper, gradient, pattern.......
*Delete the black template
TOU:
If you do this tutorial, your end result is yours to do whatever you wish; give it away as a freebie, use it as part of a kit, or sell it for profit. You may not make this into an action or script to give away as a freebie or to sell for a profit. A mention or a link back here would be appreciated but is not mandatory. Please do not share the supplies or tut through email or any other means. If you are using this or any of my tutorials for your groups or as part of your own tutorial, please post a link to the tut on my blog and let your members download the supplies from my blog for themselves.


Thanks for the great Tutorial and free plug-in! I will use this a BUNCH!