


I'm using PSP8 for this tutorial. No outside filters or plugins are needed.
1. Open up a new transparent image. We are going to be using 1800 by 230 for this. Take your selection tool, and draw out a long rectangle shape to whatever size you want your ribbon to be.
2. Set your foreground colour to C00000, and flood fill your rectangel with it.
3. In your layer palette to the right, right click on raster 1, and from the flyout choose "Duplicate". You should now have another layer on the top called "Copy of raster 1".
4. Change your foreground colour to black and your background colour to white. Now go back to your foreground materials paletter and click on the gradient tab and choose the gradient "Foreground-background". Use these settings: Angle= 0, Repeats= 40, Style= Linear, click ok.
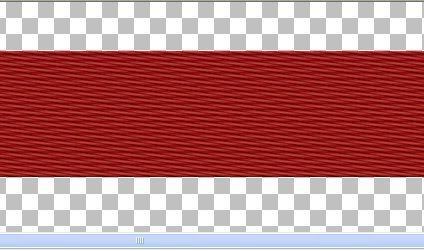
5. Make sure that "copy of raster 1" is highlighted in your layer palette. Flood fill that layer with your foreground stripes. Your image should now look like this.

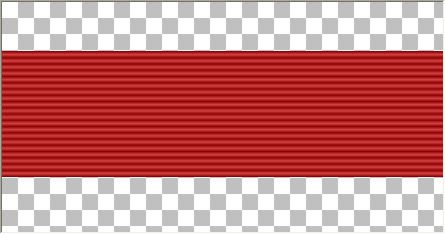
6. In your layer palette to the right, lower the opacity of "copy of raster 1" to 26. Your image should look like this now

7. Right click on raster 1 and from the flyout choose "merge", then "merge visable". At this point, if you are going to be doing the second ribbon tutorial as well, push shift and D to make a duplicate of this image, and minimize it for the next ribbon.
8. Go up to the "Effects" tab, choose "Artistic Effects", then "Halftone". Change your settings to the picture below

TIP: With your selection tool set to rectangle, select a small portion of the top of the ribbon and run it the entire length of your ribbon. Go to the Effects tab, 3D Effects, then to Outter Bevel and play around with the different settings to give your ribbon a beveled edge.
Ribbon #2
If you did not make a duplicate of the ribbon in step 7 of the above tutorial then, repeat steps 1 to 7 from that ribbon tut.
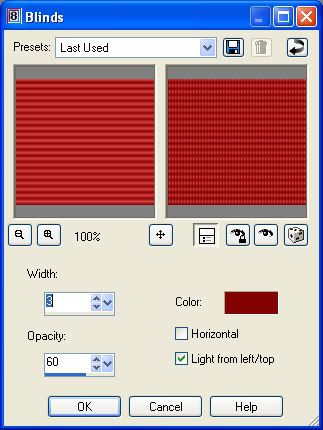
Starting out with your duplicated ribbon from the above tutorial, go up to the "Effects" tab and choose "Texture Effects", then choose "Blinds". Use the settings in the picture below.
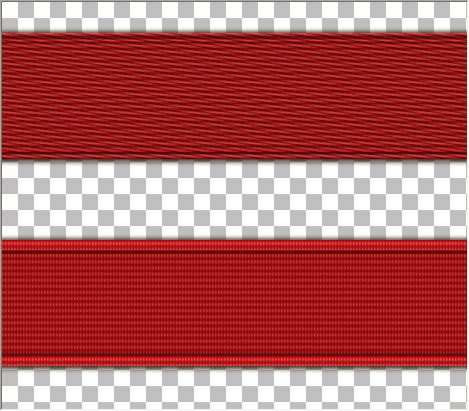
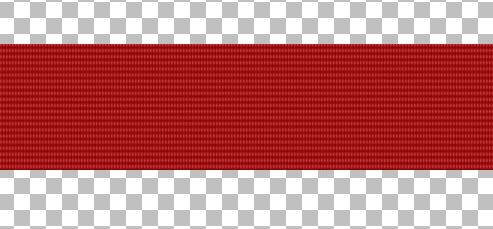
Your finished ribbon should look like this
TOU:
If you do this tutorial, your end result is yours to do whatever you wish; give it away as a freebie, use it as part of a kit, or sell it for profit. You may not make this into an action or script to give away as a freebie or to sell for a profit. A mention or a link back here would be appreciated but is not mandatory. Please do not share the supplies or tut through email or any other means, send them here to my blog to get the supplies and tut for themselves.


You are BRILLIANT! Thanks for the great tutorial! :-)