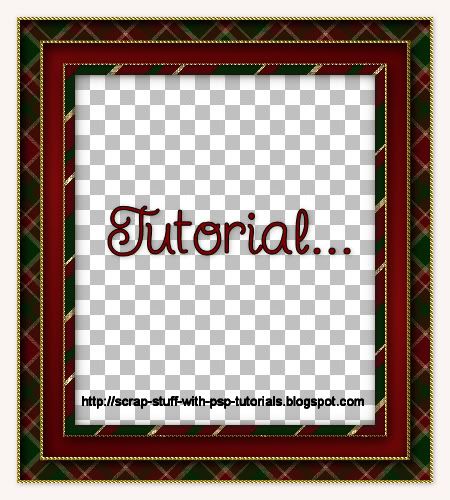
Supplies: Download Here
Needed: Simple filter 4 way average. Get it Here Click on the photo icon to download it. Unzip it and copy and place it into the plugins folder wherever you have yours saved on your computer.
1. Open up a new transparent image about 400 pixels wide by 450 pixels long.
* This will be the size of your picture you are going to insert later on. You can make this any size you want when redoing this tutorial, but for now, keep to the same size I'm using.
2. Open up from the supplies folder one of the swatches. I'm going to be using SK Christmas Frame 02. Set it as your foreground pattern, Angle 0, and Scale 100.
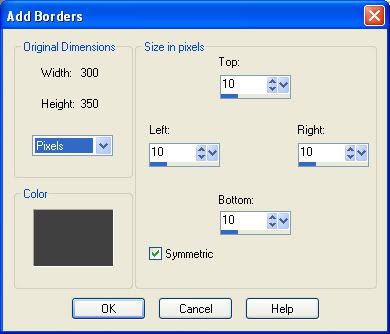
3. Go up to the Image tab and choose Add Borders.
* You might get a popup message saying something like the image must be flattened into a single background layer. Click OK.
4. Change your settings to the same as the picture below. If you colour swatch is white, change that to a darker shade of grey instead. Since our canvas has now been flattened, it has a white middle, so if you add a white border as well, we aren't going to be able to select it with the magic wand later on, so change your colour to some shade of grey.
5. Click on your Magic Wand tool on the left, Mode is replace, Match Mode is RGB Value, Tolerance is 30, Feather is 0, and Anti-alias is checked. Click once on your grey border. You should have marching ants all around your border.
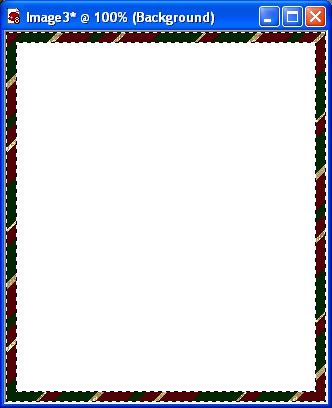
6. Click on your Flood Fill tool on the left and then click once on your grey border to fill it with the stripes from your foreground pattern. You should now have this:
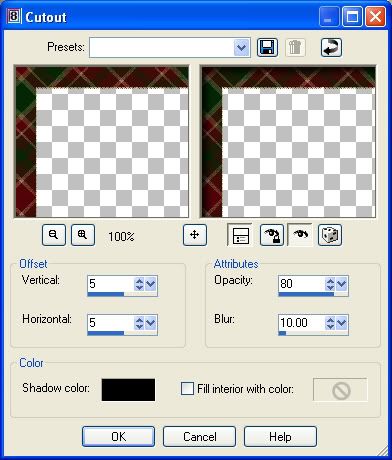
7. Now, go up to the Effects tab, over to 3D Effects, and then to Cutout and use these settings:
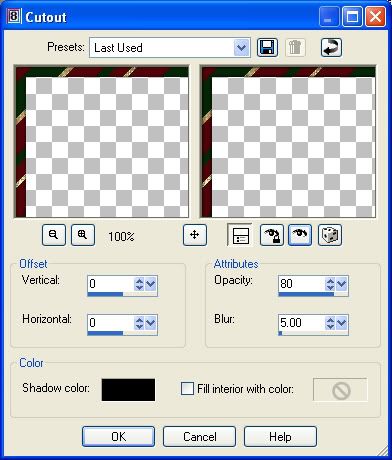
8. Go up to the Selections tab and choose Deselect.
* Now to add some small coloured beads.
11. Go up to the Image tab and choose Add Borders. Change you pixles to 2 and your colour to white. Since we have a dark frame, we need a light colour for the border so that it doesn't blend into the frame's colours and we can select it easily with the magic wand.
* You should now have a 2 pixel white border around your canvas.
12. From the supplies folder, choose one of the coloured bead patterns and set it as your background. I'm going to use the gold pattern.
13. Click on your Magic Wand tool on the left and click once on your outter white border to get the marching ants. If you find it hard to see, you can zoom in to make your canvas appear bigger for better viewing.
14. Click on your Flood Fill tool on the left and then click once inside the marching ants to fill it with your bead pattern.
15. Go up to the Selections tab and choose Select None. This is what you should have so far:
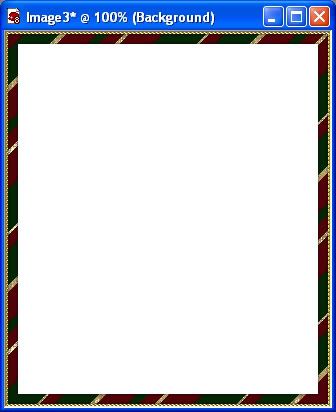
16. Next, set your foreground colour to #570101 and your background colour to #8B0B0B.
17. Click on your background swatch again and click the gradient tab. From the gradient dropdown list, find foreground-background and select that. Set it to Linear, Angle at 20 and Repeats at 1.
18. Go up to the Image tab and choose Add Border again. Leave the colour as white but change your pixels to about 20.
19. Click on your Magic Wand tool and then click once on the new 20 pixel white border to select it.
20. Click on your Flood Fill tool on the left and with your RIGHT mouse button, click once inside the marching ants to fill it with your background gradient.
19. Go up to the Effects tab, over to 3D Effects, then to Cutout and use these settings:
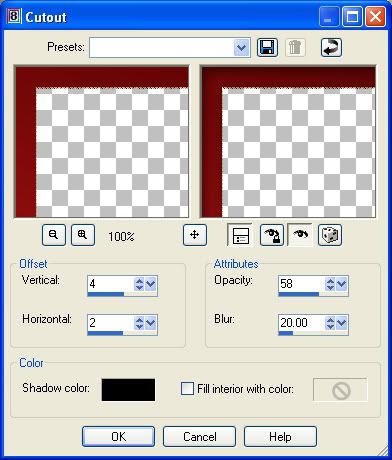
20. Repeat step #19 again, but this time change the Opacity to 40.
21. Go to the Selections tab and choose Select None. This is what you should have:
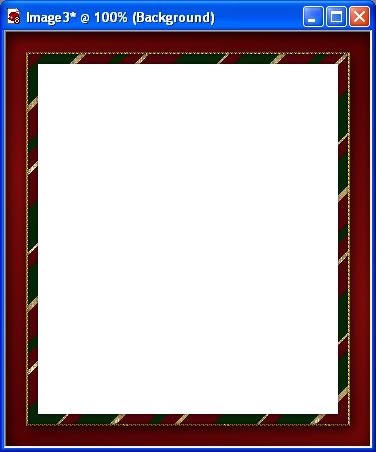
22. Go up to the Image tab and click on Add Border. Change the pixels to 3.
23. Click on your Magic Wand tool on the left and then click once on the white border.
24. Set your foreground to one of the bead patterns, I'm still using the gold.
25. Click on your Flood Fill tool and then click once inside the marching ants to fill it with your beads.
26. Go up to the Selections tab and choose Select None.
27. Click on the Image tab and choose Add Border. Change the pixels to 20.
28. Click on your Magic Wand tool and click once on your white border.
29. Set your foreground pattern to SK Christmas Frame 02, Angle is 0 and Scale is 100.
30. Click on your Flood Fill tool and then click once inside the marching ants to fill it with the diagonal pattern.
31. Go up to the Effects tab, down to Plugins, then find Simple and from the flyout choose 4 way average.
* Your diagonal stripes should have turned into a plaid pattern. See picture below:
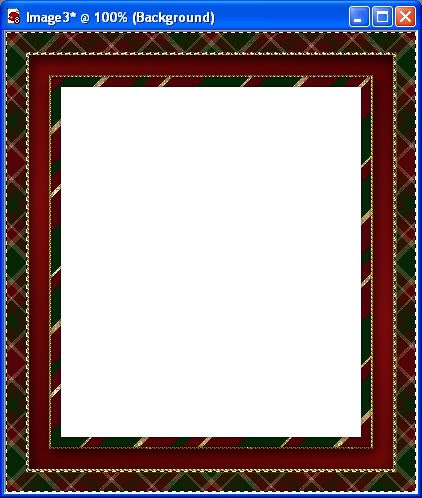
32. Go up to the Effects tab, over to 3D Effects and choose Cutout and use the settings below:
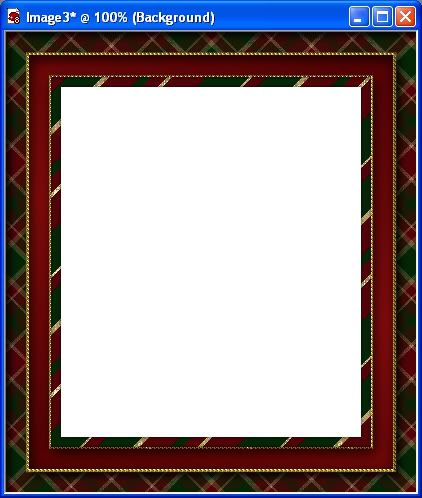
33. Go up to the Selections tab and choose Select None. Here's mine so far:
34. Go up to the Image tab and choose Add Border. Change the number of Pixels to 3.
35. Click on your Magic Wand tool, then click once on your white border.
36. Set your coloured beads as your foreground pattern.
37. Click on your Flood Fill tool on the left and then click once inside the marching ants to fill it with your beads. Here's what mine looks like so far:
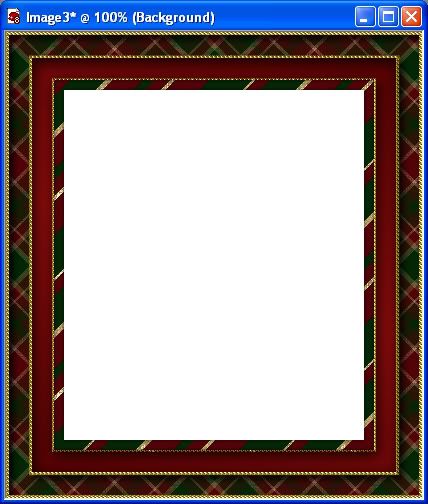
* We're almost done. Now to get rid of the white middle.
38. In the layer palette, right click on Background and choose Promote Background Layer.
39. Now click on your Magic Wand tool, click once on the white part in the middle of your frame. Marching ants should be all around the white middle square.
40. Go up to the Edit tab and then down to Clear and click on it. Your white should have disappeared leaving you with a transparent middle.
41. Go up to the Selections tab and choose Select None. And we are done :) Save it as a .png file or .psp file to preserve the transparency in the middle.
TOU:
If you do this tutorial, your end result is yours to do whatever you wish; give it away as a freebie, use it as part of a kit, or sell it for profit. You may not make this into an action or script to give away as a freebie or to sell for a profit. A mention or a link back here would be appreciated but is not mandatory. Please do not share the supplies or tut through email or any other means. If you are using this or any of my tutorials for your groups or as part of your own tutorial, please post a link to the tut on my blog and let your members download the supplies from my blog for themselves.


going to have a go. I'm been doing pretty good with your tuts. thanks I been learning a lot. each time I do one of your tuts I learn a little more about PSP.I'm not a great lover of plugins but simple is one I already have and use.
Didomum