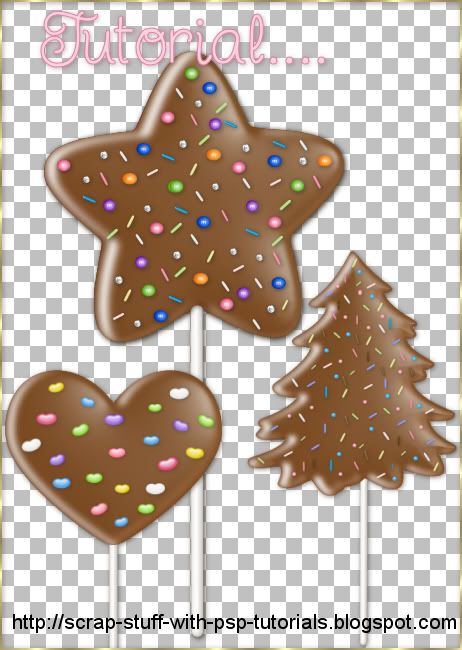
Supplies: Download Here
Plugin Needed: EyeCandy 5 Imapct Free Trial Here
1. Start by opening up a 400 by 400 transparent image.
2. Set your foreground and background colour to #7F5026.
3. Click on your Preset Shapes tool on the left and find SK Fat Baby Star from the list and double click it to select. Anti-alias is checked, Create as Vector is checked, line style is Solid, and a Width of 1.
4. Drag out your shape onto your canvas, about the same size as the one in the picture below:
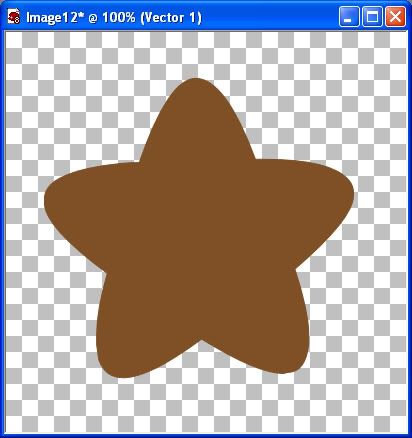
5. In the layer palette on your right, right click on Vector 1 and choose Convert to Raster Layer.
6. Go up to the Selections tab and choose Select All, then up to the Selections tab again and choose Float, then back up to the Selections tab again and choose Defloat.
* You should have the marching ants all around your star.
7. Go up to the Selections tab again, and this time go to Modify then to Contract and in the Number of Pixels section type in 3.
8. Make a new layer by going up to the Layers tab at the top, then to New Raster Layer.
9. Change your foreground colour to #8D5F39 and flood fill your new layer with this colour. (flood fill is the paint bucket on the left)
* What we are going to do here is.... fill the star with a slightly lighter shade of brown. We are going to use part of this second lighter layer as our shadow.
10. Click on your Mover tool on the left. Place your cursor on the lighter brown layer on your canvas and move it to the right and downwards just a bit like in the picture below:
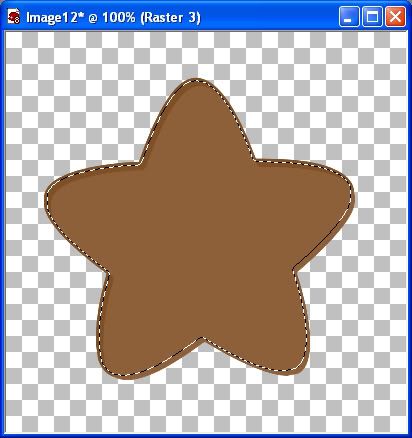
* Your marching ants will stay in place, but the lighter brown that is OUTSIDE of the march ants is going to be our shadow.
Look at the picture below. It shows you how much I've moved my lighter brown layer outside of the marching ants:
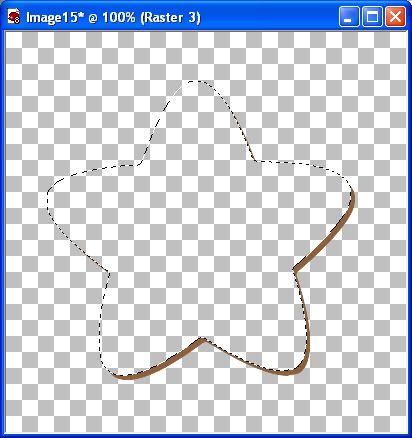
11. Now hit the Delete key on your keyboard. The only thing left of that layer should be the small outter layer of your light brown star.
12. Go up to the Selections tab at the top and choose Select None.
13. Click on your Mover tool and push the thin shadow layer back into place in the star. Because we've contracted the image by 3 pixels, it will be slightly smaller than the darker star, so place it like in the picture below, leaving a bit of darker brown showing around the edges.
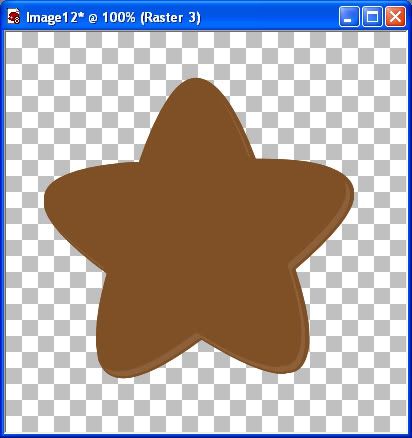
14. Go up to the Adjust tab, then down to Blur, then over to Gaussian Blur and set the radius to 2.50
* Now we are going to repeat all those steps again, but this time we are going to use white instead of brown for our highlight.
15. Click on your original brown star layer, and go up to the Selections tab, choose Select All, then Float, then Defloat.
16. Go back up to the Selections tab, choose Modify, then Contract, then set the pixels to 4 this time.
17. Make a new layer by going to the Layer tab, then New Raster Layer, and move it to the top of the pile in the layer palette.
18. Change your foreground colour to White and flood fill this new layer with white.
19. Click on your Mover tool, and move this white layer up and towards the top left. Move this one out a little more than we did for the light brown shadow. We want our highlight to be a little thicker than the shadow was.
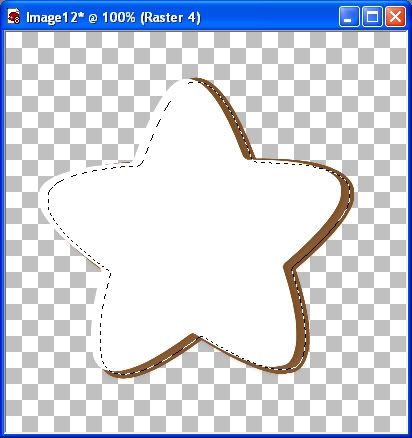
20. Hit the Delete key on your keyboard when you are satisfied with how it looks.
21. Go up to the Selection tab, and choose Select None.
22. With your mover tool, move it back into place inside the brown star.
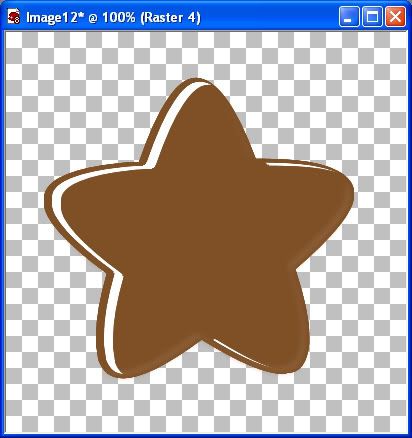
23. Go up to the Adjust tab, then to Blur, then to Gaussian Blur and set the Radius to 3.75. Here's what mine looks like now:
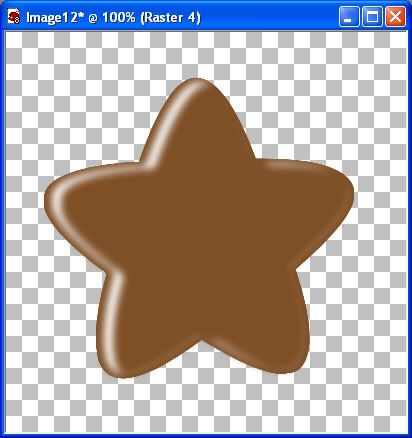
24. Click on your original brown star in the layer palette to make it the active layer.
25. Go up to the Effects tab, then down to Plugins, and find Alien Skin Eye Candy 5 Impact and from the flyout choose Bevel.
26. From the User Settings on the left, find SK Chocolate Pop, click it once to select it, then click OK. Here's what mine looks like now:
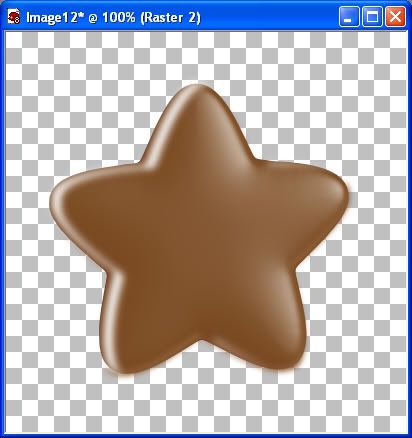
27. You'll notice from the picture above that we have some blured edges outside of our star. We need to get rid of those so...
28. Click on your original brown star in the layer palette ( if it isn't already selected)
29. Go up to the Selections tab, choose Select All, Float, then Defloat.
30. Go back up to the Selections tab and choose Invert.
31. Now in the layer palette, click once on the white and or brown highlight layer, then hit the Delete key on your keyboard.
32. Next, click once on your thin brown outline layer and then hit Delete on your keyboard.
33. Now go up to the Selections tab and choose Select None.
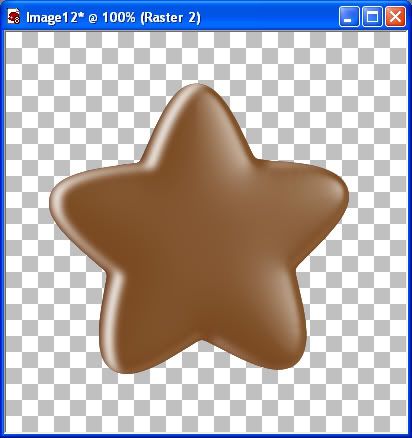
34. Right click on one of the layers and choose Merge, then Merge Visable.
* Now to make the stick for it.... We need to increase the canvas height first...
35. Go up to the Image tab, then to Canvas Size. In the New Dimensions section type in 400 width and 700 Height and set it to Pixels.
36. Move your star up so there's room below to make the stick.
37. Set your foreground to white and click on your Pen tool on the left. Create as Vector is checked, Mode is Draw, Segment Type is Line Segments, Line style is Rounded End, Width of about 13, and Anti-alias is checked.
38. Draw out a straight line the length you want your stick to be.
39. In the layer palette, right click on Vector 1 and choose Convert to Raster Layer.
40. Go up to the Effects tab, down to Plugins, then find Alien Skin EyeCandy 5 Impact, then to Bevel. Under the User Settings, find SK Sucker Stick, click it once to select it, then hit OK.
41. Move the stick behind the star layer in the palette.
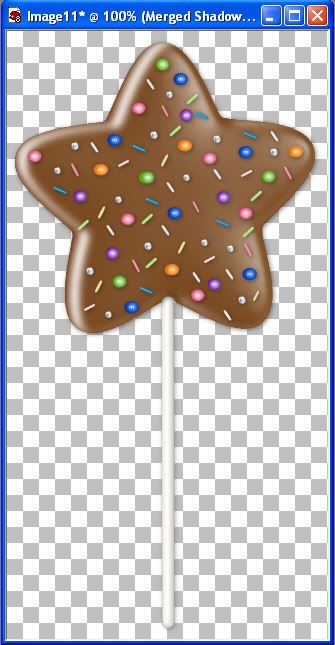
42. Right click on one of the layers and choose Merge, then Merge Visable. Decorate with the candy of your choice.
TOU:
If you do this tutorial, your end result is yours to do whatever you wish; give it away as a freebie, use it as part of a kit, or sell it for profit. You may not make this into an action or script to give away as a freebie or to sell for a profit. A mention or a link back here would be appreciated but is not mandatory. Please do not share the supplies or tut through email or any other means. If you are using this or any of my tutorials for your groups or as part of your own tutorial, please post a link to the tut on my blog and let your members download the supplies from my blog for themselves.


Thank you :)