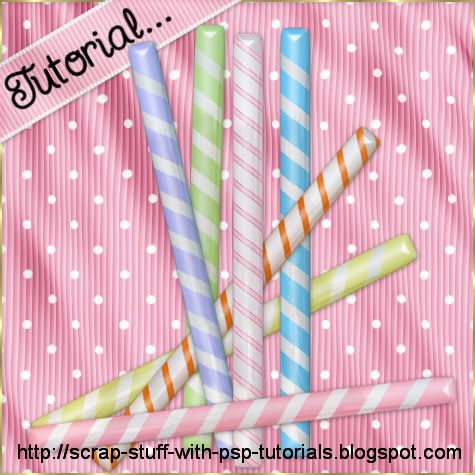
Needed: EyeCandy 5 Impact. Free Trial Here
Supplies Zip: My bevel and glass settings, which you can find Here
1. Open one 600 x 600, and one 400 x 400 transparent canvas.
2. Set your foreground to whatever colour or gradient you want your candy stick to be. I'm going to be using #9FA1FD.
* We first need to make our pattern for our candy, so....
3. Flood fill the 400 x 400 canvas with the colour you chose.
* Now you need to choose a colour for your stripes.
4. I've chosen to use a silky white gradient for my stripes. It's called Snow and you can find it Here
Angle is 40
Repeats are 0
Style is Linear
Set this as both your foreground and background gradient.
5. Click on your Preset Shapes tool on the left and set it to Rectangle.
Anti-alias is checked
Create as Vector is checked
Line Style is solid
Width is 1
6. Drag out across your canvas 1 long rectangle the size you want your stripes to be. Make sure it reaches to the edges of both sides with no spaces. Here's what mine looks like:
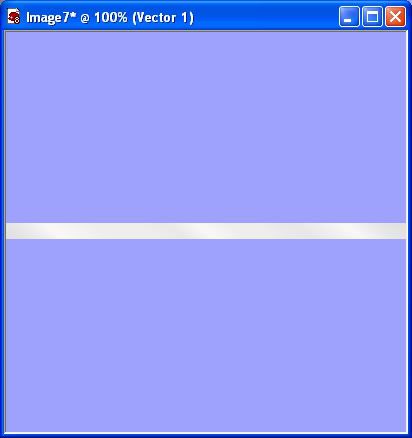
7. In the layer palette, right click on Vector 1 and choose Convert to Raster Layer.
* Now, we need to duplicate this strip as many times as needed to fill your canvas up evenly. This will depend on the width you've chosen and on your preference of how many stripes you want. I've got 10 for mine.
8. Right click on your strip layer and choose Duplicate. Then repeat the same step, as many times as needed, each time right clicking on your original stripe to duplicate.
9. Now, with your Mover tool, drag one of the stripes up to the top of your canvas like in the picture below. Make sure it covers the top edge, but doesn't go over.
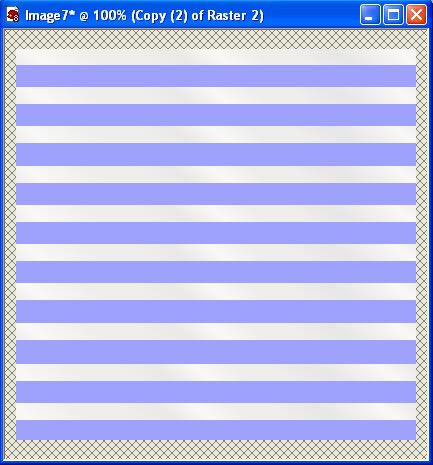
10. Move the rest of the stripes out evenly like in the image above. Notice that there is a white strip at the very top and it ends with your purple colour at the bottom and does not have a stripe touching the bottom edge. Your canvas should begin with a stripe and end with a colour.
11. Once you have that done, Right click on one of the layers in the palette on the right and choose Merge Visable.
12. Set your new pattern as both your foreground and background pattern in the materials palette.
Angle is 40
Scale is 100
13. Click on the Preset Shapes tool on the left and set it to Rounded Rectangle.
Anti-alias is checked
Create as Vector is checked
Line Style is solid
Width is 1
14. Drag out your candy stick shape onto your canvas. Here's what mine looks like:
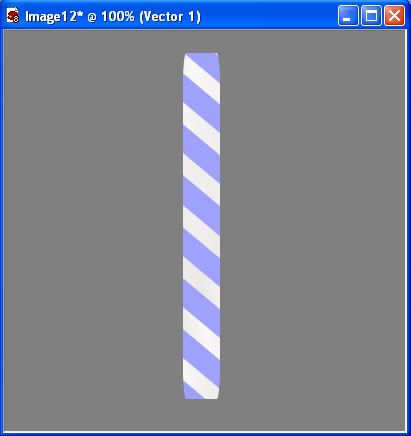
15. In the layer palette, right click on Vector 1 and choose Convert to Raster Layer.
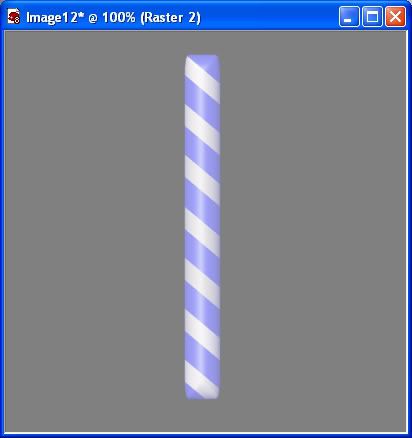
16. Go up to the Effects tab, then down to Plugins and find your EyeCandy 5 Impact and choose Bevel. Find SK Candy Stick from the list on the left and click it once to select it, then click the OK button.
** When doing this tut with any colour other than purple, when you are in the EC 5 Imact Bevel section, click on the Lighting tab at the top. Where it says Shadow Colour, you will need to click on that purple square and change it to a slightly darker shade of the candy stick colour that you chose. Leave everything else the same.
* Your image should look like this:
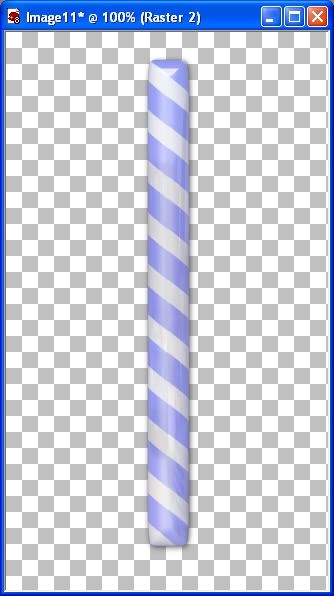
17. Next, go back up to the Effects tab and to EyeCandy again but this time chose Glass. On the left, look for SK Candy Sticks Shine, click it once to select it, then click the OK button.
* Yours should look like this:
** You can make these any size you want, fat or skinny, with gradients or multi coloured stripes. Experiment and have fun :)
TOU:
If you do this tutorial, your end result is yours to do whatever you wish; give it away as a freebie, use it as part of a kit, or sell it for profit. You may not make this into an action or script to give away as a freebie or to sell for a profit. A mention or a link back here would be appreciated but is not mandatory. Please do not share the supplies or tut through email or any other means. If you are using this or any of my tutorials for your groups or as part of your own tutorial, please post a link to the tut on my blog and let your members download the supplies from my blog for themselves.


Thank you :)