


Preset shapes are made out of vector pictures or dingbats found around the net, or if you are really good at drawing your own vector objects (which I totally suck at), but they cannot be just a regular image, it must be a vector image. The first thing you need to do is find a dingbat you want to use as a preset shape. If you go to google and type in dingbats, you'll find a lot of sites to download them for free. Here's a few that I've used:
House of Lime
Dingbats UK
Once you've found one that you like, you don't need to install it into your font directory. Just double click it to open it, minimize it and it will be in your list of fonts when you open up PSP. Open up a new 700x700 transparent image. If you haven't already, double click your dingbat font file to open it, minimize it, then click on your text tool and find your dingbat among the fonts. I usually set my font size fairly large ( about 100) so I can see the entire character clearly. Use these settings: Create as "vector" Stroke Width "1.0" Anti-alias is "checked" Line style "solid", and set your foreground and background colour to black. Go ahead and type out the alphabet onto your transparent image. When you see a picture you want as a preset shape, take note of the letter it corresponds with on your keyboard and write it down for later.
Close out the 700x700 image, we no longer need it. Open up a 200x200 transparent image and type out your single dingbat. We're using a simple christmas stocking for this tutorial.
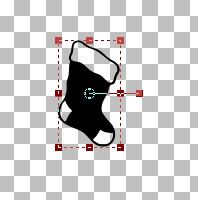
Go up to the Objects tab at the top and choose "Convert Text To Curves" and from the flyout choose "As Single Shape". At the right in the layers palette, click on the plus sign next to "Vector 1".
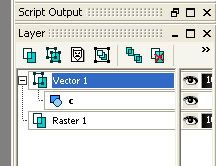
Double click on the highlighted Vector 1 name and the layer properties box will open up.
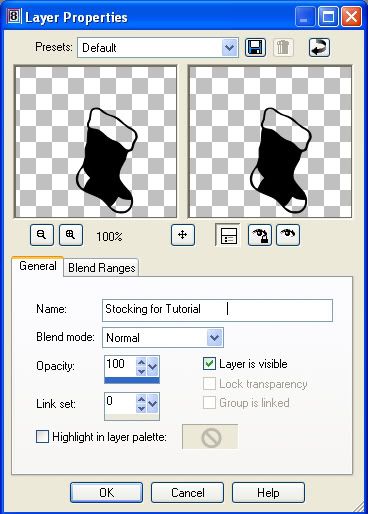
Leave everything as is, except in the "Name" box where it says Vector 1, change that, and click ok. Next, double click on the letter under your newly named layer. The Vector Property box will pop up.

Again, leave everything as is, except in the "Name" box where it has the letter, change that to what you want your shape to be called, and click ok. Make sure to name it something unique because you cannot have 2 shapes with the same name or psp will reject it. Crop the excess space from around your image. Go to the "File" tab, then to "Export" and from the flyout choose "Shape". Name your shape whatever you named it in the "Vector Properties" in the above picture and hit ok. Your shape should now be available for you to use.
Tip: When you use your new shape, click the plus sign beside the "Vector1" at the right, then double click the name of your shape under that. In your "Vector Properties" box you can change the colour, pattern, texture, or line style and width of your shape.