SK Tag 14.pspshape: place this into your Preset Shapes folder.
SK Eyelet: Tube this yourself if using PSP.
Texturizer.8bf: Place this into your Plugins folder.
1. Start out by opening a new transparent image, 600 by 600 pixels.
2. Set your foreground and background to black. Although it doesn't matter what colour it is set to, black is just the easiest to see against the background of your transparent image.
2. Click on your preset shapes tool, and choose SK Tag 14. Line Width is 1, Anti-alias and Create as Vector is checked, and draw out your tag shape. Leave space at the top, bottom and sides.
3. In the layer palette to the right, click on Vector 1 and choose Convert to Raster Layer, and rename it to Black.
4. Go up to the Selections tab, choose Select All, up to the Selections tab again, choose Float, then back up to the Selections tab and choose Defloat.
Your tag image should now have marching ants all around it.
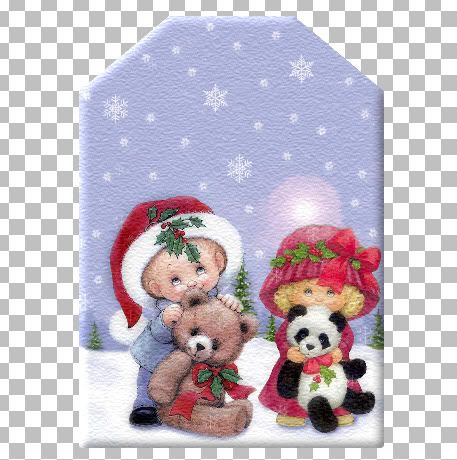
5. Open up your Christmas Kids.jpg from the zip file. Go up to the Edit tab, and choose Copy.
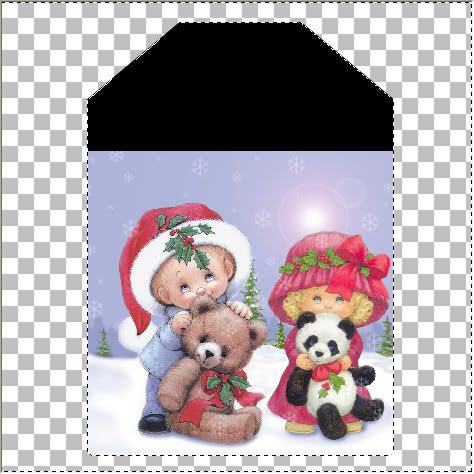
6. Click on your canvas with the tab shape to make it active and go up to the Edit tab and choose Paste, then Paste As New Layer. Name this layer Kids 1. Your canvas should look like the picture below
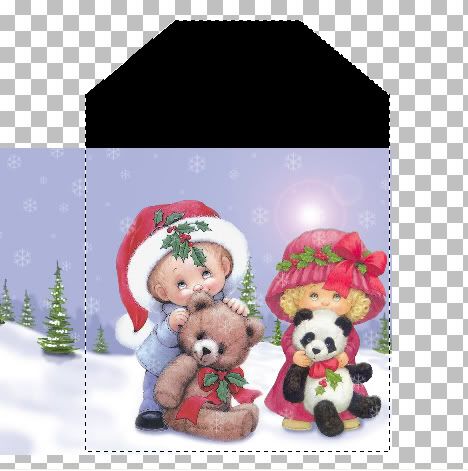
7. Use your Mover tool to position the kids picture evenly inbetween the marching ants, making sure to leave a little bit outside the marching ants on the right side and bottom. See above picture.
8. Go up to the Selections tab, and choose Invert. Your marching ants should still be all around your tag, but now, they also should appear all around the border of your canvas as well.
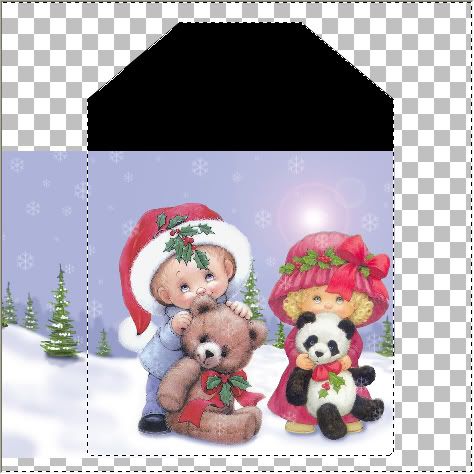
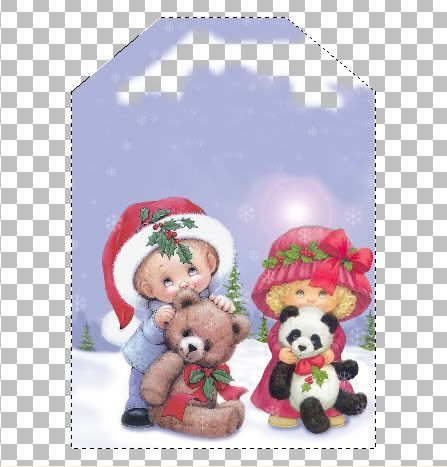
9. On your keyboard, hit the Delete Key. Those extra parts of the Kids picture should have now disappeared like in the picture below.
10. In the layer palette to the right, click on the layer named Black to make it the active layer. Go up to the Selections tab and click on Select All, up to the Selections tab again choose Float, then back up to the Selections tab and choose Defloat. The marching ants should now appear all around the black tag image only.
11. Click on the Kids 1 layer in the layer palette, then go up to the Layer tab at the top, and choose New Raster Layer. Name this layer Kids 2.
12. In the layer palette, click on the small eye icon next the the layer named Black to turn it off, and merge visable the 3 remaining layers.
You should have only 2 layers in the layer palette now. Merged and under that should be Black (which is still turned off). You can turn this layer back on if you like, it doesn't really matter. Now, we need to use the clone tool to fill in the empty space at the top of the tag.
13. Click on your Clone tool and use these settings: Brush is Default Round, Size is 40, Hardness is 50, Step is 25, Density, Thickness, and Opacity are 100.
We want to fill in the top of the tag with just the plain purple with the small white snowflakes, so the best place seems to be on the left where I've indicated with the red circle.
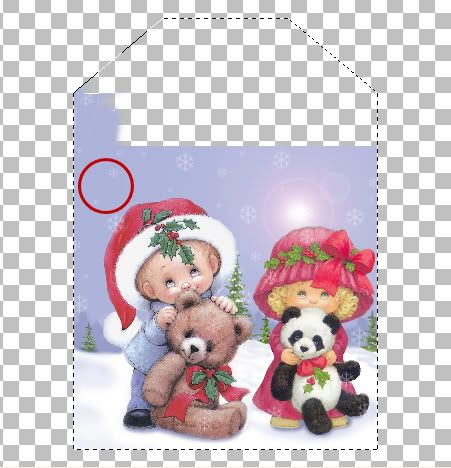
14. Make sure the layer called Merged is highlighted and active. Right click in our selected space (doing this tells psp to use this section as our fill pattern), then using your left mouse button, click and drag upwards, filling in your empty portions.
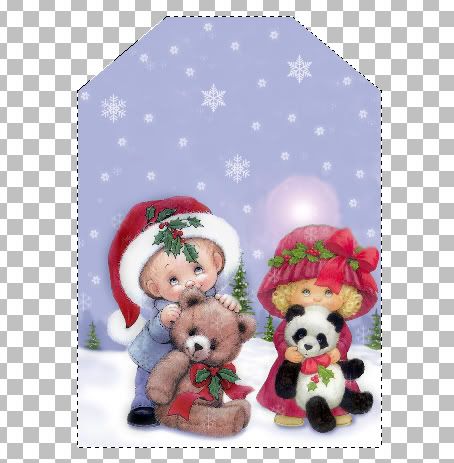
You will need to right click, then left click and drag upwards several times to fill the entire top portion. Make sure you go around the edges of the tag a few times to be sure that there are no missed spaces. And don't worry, the marching ants will prevent you from putting colour outside of your tag shape. When you get to the part where the little girl has the glow above her head, make your brush smaller, right click on a target section then left click in small spots all around her glow so it does not show visable darker shades of colour. You can also turn down the opacity to about 50% for that part, and use the Soften tool to blend around it. Don't worry if you can't blend it perfectly. When we add a texture to it, you won't even notice.
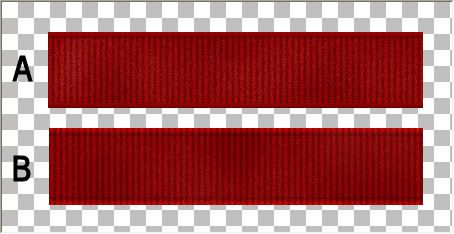
Use your imagination. Add some snowflakes of your own, some stars or sparkles ect.... One of my favourite tools is the Lighten/Darken tool. Activate the Lighten/Darken tool. Set your brush at an appropriate size for your tag, Hardness and Step are 25, Density and Thickness 100%, Opacity at about 80%. Right Click and drag on portions of your picture such as the red on the little boys hat, the little girls dress and hat, and the black on the panda bear and boys shoes. The Darken tool just brings out the colour so much more. Look at the difference in colour between the picture above and the one below.
15. In the layer palette, delete the layer named Black, then go up to the Selections tab and select Select None.
Texture and Bevel:
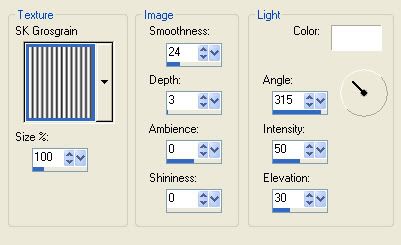
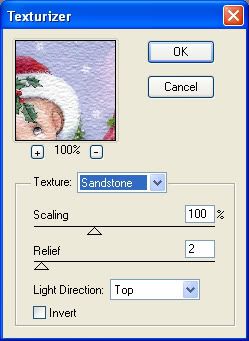
PSP and Photoshop have built in texturizer features for you to use, but I mainly use an additional plugin called Texturizer. I don't remember where I got this from, but I've included it in the zip if you would like to try it. It has 4 main textures, brick, burlap, canvas, and sandstone, but you can import your own textures that you've found on the net or that you've made yourself. Handy little plugin to have.
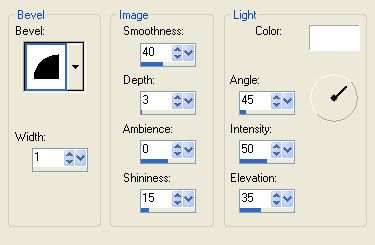
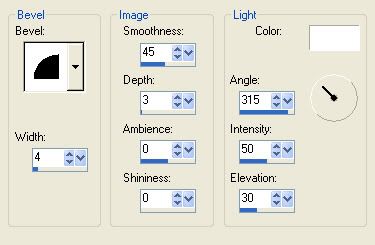
Same goes for the Bevel. PSP has tons of settings to choose from, you just need to play around and find one that suits your needs. In the picture below I've used the Texturizer plugin and a PSP bevel.
Next, we are going to make the eyelet: (my eyelet used is included in the zip)
1. Change your foreground and background to white. Click on your Preset Shapes tool and set it to Ellipse. Hold down your shift key and draw out a small circle the size you want your eyelet to be.
2. In the layer palette, right click on Vector 1, and choose Convert to Raster Layer.
3. Go up to the Selections tab, choose Select All, up to the Selections tab again and choose Float, then back up to the Selections tab and choose Defloat. Marching ants should now be all around your white circle.
4. Go up to the Selections tab again, then choose Modify, then Contract. Set the number of pixels to 10 and click ok. Now hit your Delete key. Go to the Selections tab and Select None.
At this point, it's up to you how you want to design your eyelet. You can use Super Blade Pro, or some other plugin to create it.
5. I've just used a simple silver eyelet that I made with SBP. Once you've done that, postion your eyelet evenly onto your tag, and click on the Tag layer itself. Activate your Eraser tool and set the brush size to about the same size as the middle of your eyelet and just start erasing.
I've put a very small drop shadow under my eyelet as well. V and H is 1, Opacity is 32, Blur is 7, Colour is #221D12. That's pretty much all there is too it. I've showed you a few key points in this tut such as the Lighten/Darken aspect, Cloning, Trim off the excess to shape around a tag ect...... You can apply these to other projects as well. And don't forget to USE YOUR IMAGINATION!!!