Sunday, May 18, 2008
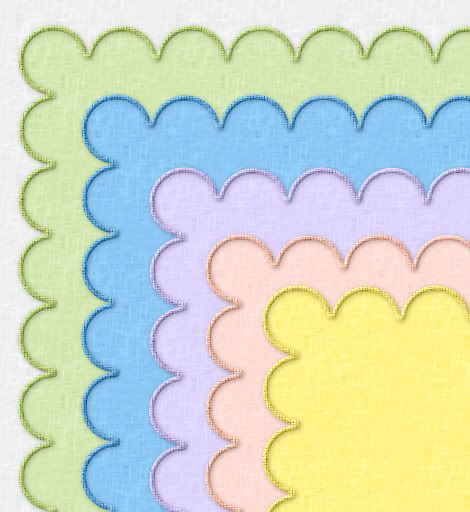
Scalloped Linen Fabric with Border
Photobucket


Supplies: SK Scalloped Background, White Linen Solid.png and White Linen Rough.png all of which you can download HERE

* I was at an event last week and I was wearing a cream coloured linen blouse, which is where I got the idea for these papers. They turned out really great, so I thought I'd share the tut.

* All supplies are in .PNG format

1. Open up SK Scalloped Background from the zip. This image is about 1800 x1800. You can resize it to whatever dimensions you want.

2. Go up to the Selections tab at the top, choose Select All, then Float, then Defloat. You should have marching ants all around your scalloped image.

3. Next, go up to the Layers tab, and choose New Raster Layer.

4. Open up White Linen Solid from the zip and set it as your foreground pattern. Angle 0 and Scale 100.

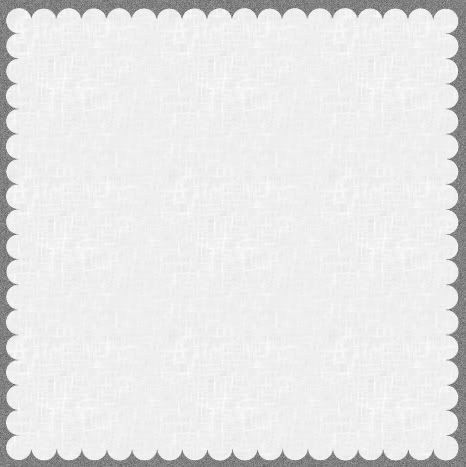
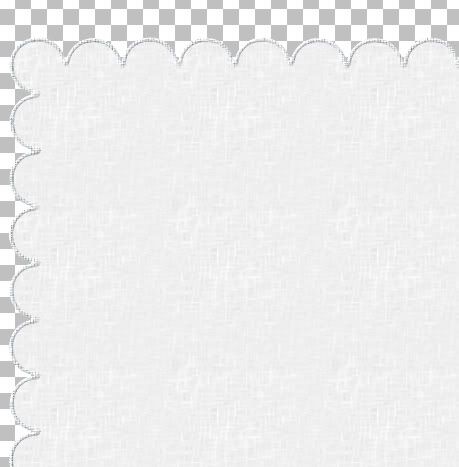
5. Click on your Flood Fill tool on the left and fill your blank layer. You should have this now:

Photobucket

6. Go up to the Selections tab and choose Select None.

7. In the layers palette to the right, right click on your black scalloped image and choose delete.

8. Open up White Linen Rough from the zip and set that as your foreground pattern, Angle 0, Scale 100.

9. Go up to the Selections tab, Select All, then to Float, then down to Defloat. You should have marching ants all around your scalloped image.

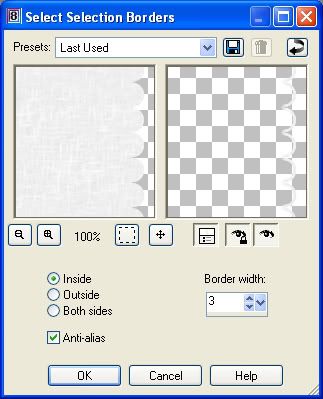
10. Go back up to the Selection tab, down to Modify, then down to Select Selection Borders. Change your settings to the ones below in the picture.

* Depending on the number you type in, this will automatically give you a border around your image. Take a look at my preview window picture below to see what I mean. I've chosen a border of 3 pixels. Look on the right of the preview and it will show you the 3 pixel outline that we will be putting over the background linen layer. You can increase this number if you want a thicker border.

** Edit: I think I changed my mind and used a border of 4 or 5 after I had already taken the screenshot, so if you want the same thickness of border as in my preview pic, choose 4 instead of 3 for this part.

Photobucket

11. Go up to the Layers tab at the top and choose New Raster Layer.

12. Flood fill it with the foreground pattern White Linen Rough.

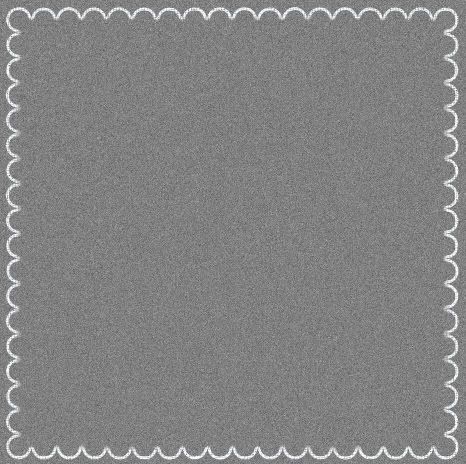
13. Go up to the Selections tab and choose Select None. You should now have an even 3 pixel border around your linen background, but on a new layer. I've turned off my linen layer so you can see the outline better.

Photobucket

* Now we are going to give it a bevel.

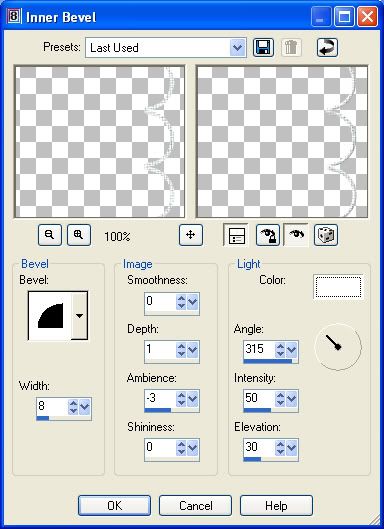
14. With your border layer active, (highlighted blue in the layer palette) go up to the Effects tab, then to 3D Effects, then over to Inner Bevel. Use these settings:

Photobucket

Here's what mine looks like after the bevel:

Photobucket

* I want my border to have a little bit of depth to it, so I'm going to put a slight drop shadow under it.

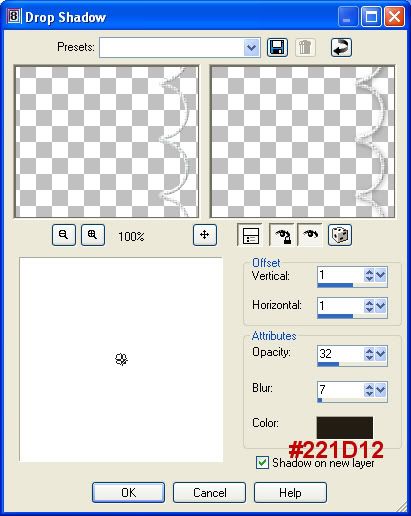
15. With your border layer active, go up to the Effects tab, over to 3D Effects, then to Drop Shadow and use these settings:

* I like to put my drop shadow on a new layer so that when I recolour it, I can turn off my shadow, recolour it, then turn it back on, but you don't have to have yours on a new layer if you don't want to.

Photobucket

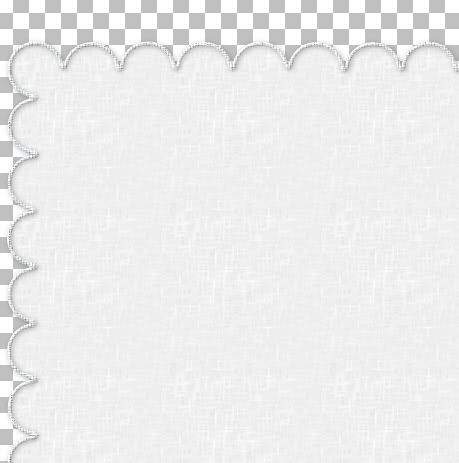
Here's mine after the drop shadow:

Photobucket

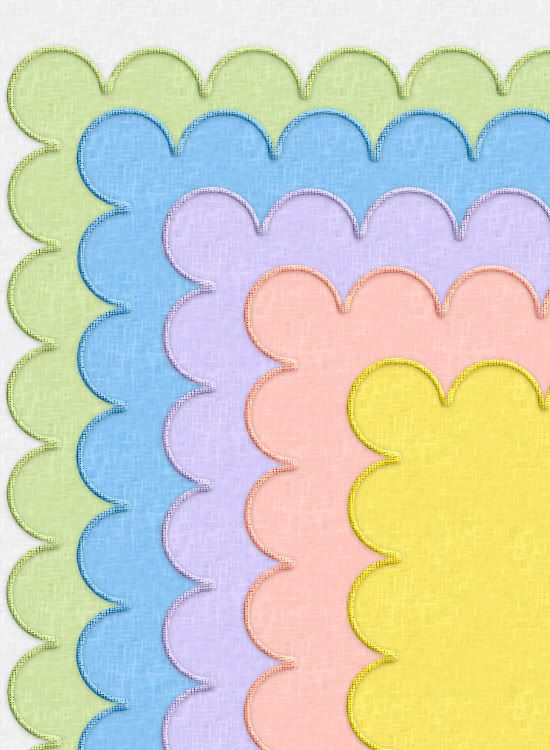
That's pretty much it. Save this file as a PSP file with the layers intact so when you want to recolour it, you can do them separately.

Photobucket


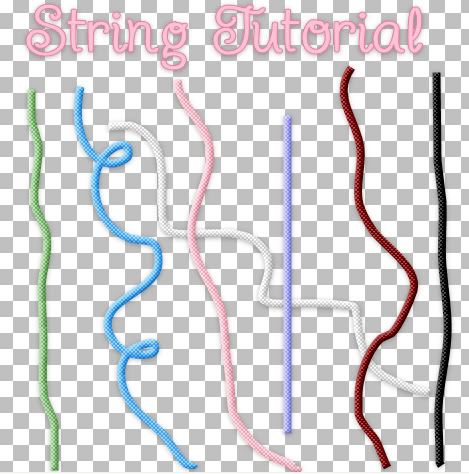
If you don't know how to recolour images, go to my String tut HERE and near to the end of the tut it will tell you how to recolour images using the Manual Colour Correction option.

TOU:

If you do this tutorial, your end result is yours to do whatever you wish; give it away as a freebie or sell it for profit. You may not make this into an action or script to give away as a freebie or to sell for a profit. A mention or a link back here would be appreciated but is not mandatory. Please do not share the supplies or tut through email or any other means, send them here to my blog to get the supplies and tut for themselves.
 
posted by Scrap Stuff by Shawna at 2:00 PM | Permalink | 42 comments
Let's Make Some String
Photobucket


Supplies: SK String.png Download Here

A few days ago, I was working on a Father's Day kit and was trying to make a very small texture for a frame I had just made. Well, it turned out kinda ugly on the frame and I decided not to use it, but I found out that it makes some pretty darn great looking string. I love creating things by accident lol.

This tut is written in PSP 8 but can be done in any version of PSP, or if you have a basic knowledge of PS or PSE, this is pretty simple to do in those graphic programs as well.


1. Start out by opening up a transparent canvas of about 800 x 800 or whatever size you want your string to be.

2. Open up SK String.png from the zip and set it as your foreground pattern. Angle is 0, and Scale is 100. Turn off your background materials box. ( click on the black circle with the line going through it that's under your background box)

* Disclaimer: Don't get your face too close to the screen trying to see my pattern, you might bang your eyeball on your monitor lol. There really is a pattern there.

3. Click on your Pen Tool on the left and use these settings:

create as vector is checked
mode is drawing
segment type is freehand
line style is solid
width is 8
anti-alias is checked

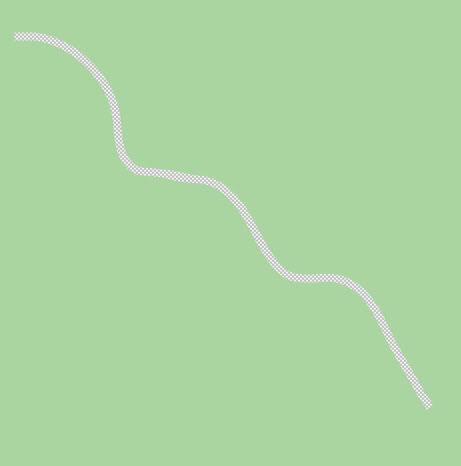
4. Draw a squiggly line. Here's what mine looks like

Photobucket

5. In the layers palette on the right, right click on Vector 1 and choose Convert to Raster Layer.

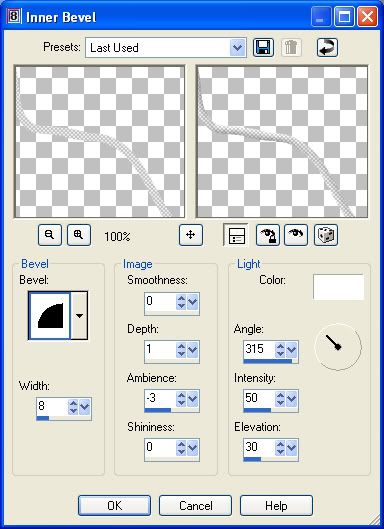
6. Go up to the Effects tab at the top, over to 3D Effects then to Inner Bevel and use these settings:

Photobucket

* It's looking a little to greyish for me so I'm going to lighten it up a bit using the Brightness/Contrast option.

6. Right click on your string layer in the palette and choose New Adjustment Layer, then choose Brightness/Contrast.

7. On the Adjustment tab, change the Brightness to 27 and the Contrast to -6 and hit OK.

8. In the layers palette on the right, right click on one of your layers and from the flyout choose Merge, then Merge Visable.

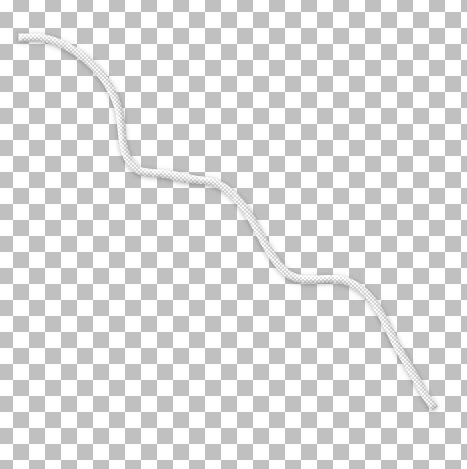
Yours should look like this: I also gave mine a small drop shadow.

Photobucket

* If you want different colours of string, here's a quick way to change them to the exact colour you want.

* I prefer not to have a drop shadow before I recolour but it still works if you have one on there.

1. Click on your Eye Dropper tool on the left. Hold it over your string image and find a medium shade of grey and click once to set it as your foreground colour. Mine turned out to be #E7E7E7. ( remember your number)

2. Make sure your string layer is active, go up to the Adjust tab, over to Colour Balance, then down to Manual Colour Correction.

Photobucket

Where it says Source, that is where you type in your number from step one above. ( click on the colour to get the colour box to pop up and type it in)

Where it says Target, that is where you type in or click on whatever colour you want your string to change too. Click OK when done.


TOU:

If you do this tutorial, your end result is yours to do whatever you wish; give it away as a freebie, use it as part of a kit, or sell it for profit. You may not make this into an action or script to give away as a freebie or to sell for a profit. A mention or a link back here would be appreciated but is not mandatory. Please do not share the supplies or tut through email or any other means, send them here to my blog to get the supplies and tut for themselves.
 
posted by Scrap Stuff by Shawna at 1:52 PM | Permalink | 75 comments
Wrap a Ribbon Curl Around a Frame
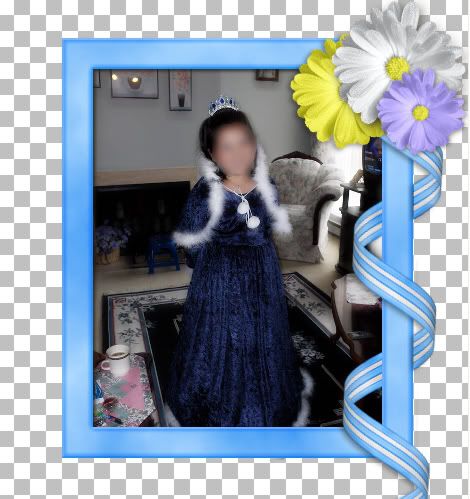
Photobucket


Supplies: 1 frame, 1 ribbon, 4 straight eraser brushes. Download these HERE

I have provided a curled ribbon for the purpose of this tutorial, but if you are wanting to make your own ribbons curled around a frame at another time, you will need either AV Bro Page Curl or another plugin or program that will make the curls.

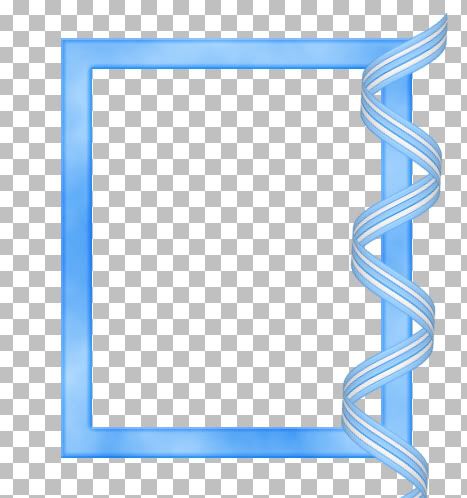
1. Start by opening SK Blue Frame for Tut and SK Blue Ribbon for Tut.

2. Copy and paste the ribbon TWICE onto your frame layer.

* This can get a little confusing, so I suggest you name your layers as Frame, Top Ribbon, and Bottom Ribbon.

3. In your layers palette on the right, place your 3 layers as: top ribbon is first, then frame, then bottom ribbon.

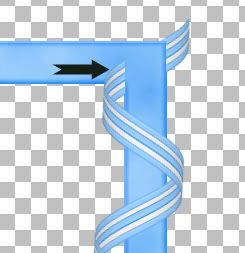
4. Drag your top ribbon over to the right and position it like in the picture below:

Photobucket

5. Drag your bottom ribbon over to the right and line it up perfectly with the top ribbon so it looks as though there is only one ribbon there like in the picture above.

6. In the layers palette, click on your top ribbon to make it active.

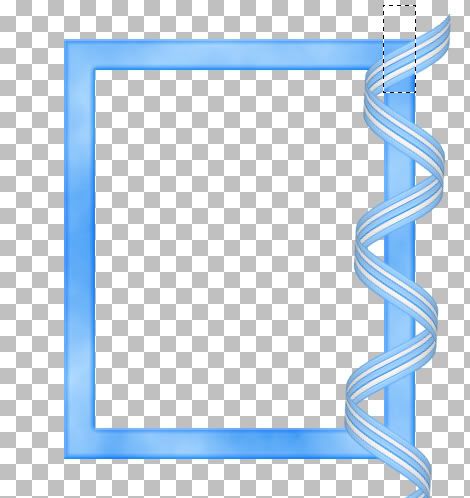
7. On the left, click on your Selection tool, set it to Rectangle, mode is replace, feather is 0, and anti-alias is checked.

* This is where it can get a little confusing. You need to decide what part of the ribbon is going to go over and what part is going to go under the frame.

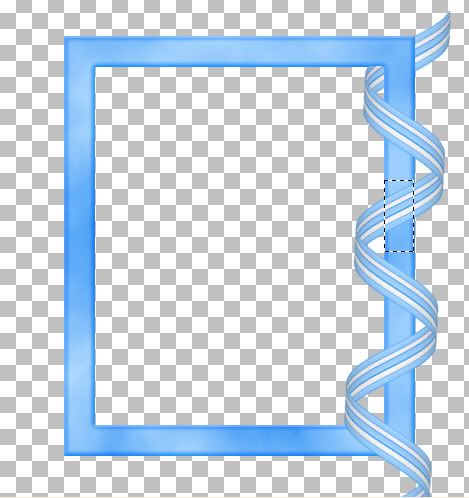
8. I've decided the top portion is going to go under my frame, so with your rectangle selection tool, draw out a small rectangle and try to come as close to the edge of the frame as possible. See my example below:

Photobucket

9. Hit the Delete key on your keyboard, then go up to the Selections tab at the top, and choose Select None.

* You can see that the top portion of the ribbon we selected was cut away and it looks like part of the ribbon is now behind our frame. You can also see that there is a section of it still needing to be deleted.

Photobucket

10. Use your Rectangle selection tool again to get rid of that tiny piece. Select None from the Selection tab.

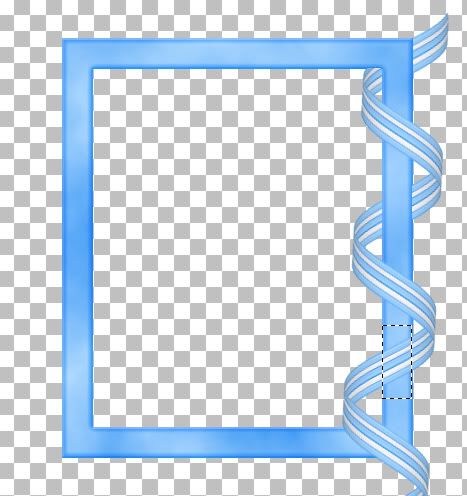
11. The next piece that needs to be deleted is right here:

Photobucket

12. Use your rectangle tool again to select this portion and hit Delete on your keyboard. Select None from the Selections tab.

Photobucket

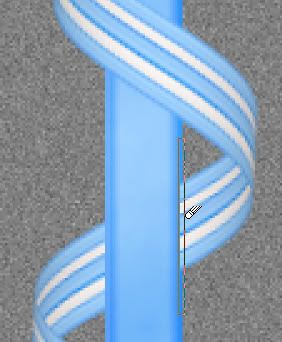
* I'm going to zoom in really close so the picture is going to be blurry, but as you can see, I didn't get close enough to my outter edge of my frame when I erased my ribbon, and it will make a difference when you put on a drop shadow. It will be noticable and make it look unrealistic.

Photobucket

Here's where I like to use the eraser tool. You should have these brushes already in your brush dropdown list because they are PSP default brushes, but if you don't, I've included 4 .png files of the same brushes of my own in the zip.

13. Click on your Eraser tool on the left and find either the Line Vertical psp default brush, or if you are using mine, find SK Ribbon Erase 01. Leave it at it's default settings, but make sure the opacity is set to 100.

14. Make sure you are on your Top Ribbon layer, zoom into your image and position the brush as close to the outter edge of the frame as possible. Line up the outter edge of the straight brush with the outter edge of the frame and click once.

Photobucket

15. Do the same for the other secion of ribbon as well.

* We now have a ribbon swirling in and out of our frame. One important thing to remember is, do not merge anything untill the very last step. We still need layers to work with for putting the drop shadow down on both the front and back ribbons.

* I happen to like how the bottom ribbon comes out of the frame and hangs down over it so I'm going to leave it just like that. The top ribbon sticking out of the back of the frame is kind of hanging in limbo up there, so you can just cut it away using either the eraser brush or your rectangular tool, or give it an embellishment. I'm going to smack a couple flower up there. Next you need to shade it a bit.

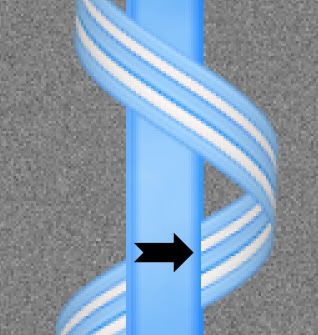
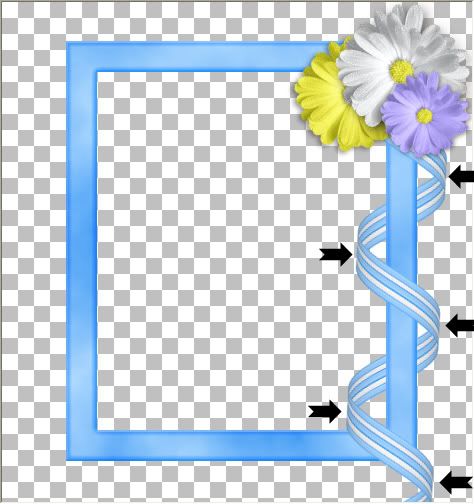
16. Working on your Top Ribbon layer, click on your lighten/darken tool, or your dodge/burn tool. Size about 30, hardness 50, opacity about 20. The black arrows indicate where you should darken the rounded part of the ribbon. It's up to you how much or how little you want the shading to appear. I've used just a few short clicks on each section.

Photobucket

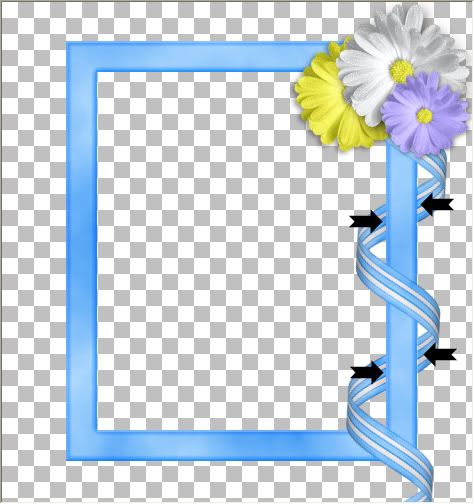
* I also like to shade just a bit where the ribbon meets Under the frame.

17. Using the same settings you used to darken the top curves of the ribbon, do the same for these next parts.

Photobucket
.

* You can also decrease the brush size to about 10 or smaller and do a bit around the edges of the ribbon as well.

* Your drop shadow will depend on what picture you are going to be using in your frame, so that part is up to you, but I would suggest always putting your shadow on a new layer so you can erase or delete it completely if you don't like it at some point. That way, you won't have to redo your entire frame over again.

* Also, save this as a .psp image with the layers intact so you can make changes at a later date.

TOU:

All supplies provided in this tutorial are for learning and personal use only. They serve the purpose of aiding you in doing this tut and are not to be used for commercial, monetary gain. You may use them for personal projects for yourself, but do not give them away as part of a kit or freebie, or share through email, groups ect......
 
posted by Scrap Stuff by Shawna at 1:34 PM | Permalink | 28 comments
Tuesday, May 13, 2008
Glitter Filled Shapes-Requested Tutorial
Photobucket


This tutorial is for PSP users, but if you have a working knowledge of Photoshop, you can do this tut very easily as well. I've included all files needed for you.

Supplies: Star Shape (PSP & PS), my EC5 glass preset, my glitter swatches, my brush (for PSP & PS) Download These Here

The first supplies link seems to be giving some people an invalid link response, so here's a second link to the supplies:
Second Download Link for Supplies

Pracken's Silver SBP Preset from her Heart Jewels Tut: Download Here (This is optional, only if you are going to be using the SBP plugin) Link is posted with permission.

Super Blade Pro Demo:Download Here (this is optional)

Eye Candy 5 Impact: EC 5 Impact Trial

*Place the 2 EC 5 Impact Glass presets into the glass presets folder of your EC5 wherever you have it installed on your computer.

*Place the file for the PSP star shape into your preset shapes folder wherever it is on your computer.

*Place the 2 PSP files for the brush into your brushes folder wherever that may be on your computer.

*There is also a png file of the brush for those needing it.
*Feel free to recolour the glitter swatches to whatever colour you wish.


I'm going to be using a simple star shape for this tutorial, but you can use any shape you choose. If you want to use the same star shape that I am, I've included a PSP and PS shape in the zip.

1. Start by opening up a 400 x 400 transparent image.

2. Set your forground colour to #E4E0E0, and turn off your background colour. (under your background colour box, hit the circle with the line going through it to turn it off)

* By turning off the background colour, when we draw out our star shape, it will just give us an outline and the shape will not be filled with colour.

3. Click on your Preset Shapes tool on the left and find your star shape. Settings are Anti-alias is checked, Create as vector is checked, and use a width of 11. You can make this larger or smaller depending on your preference.

* I'm using a light grey colour instead of white (which is normally what you use when applying Super Blade Pro afterwards) because it is easier to see. If you are not using SBP, set your foreground to whatever colour you want.

4. Draw out your star shape. It should look similar to this:

Photobucket

* If you want a thinner or thicker border, in the layer palette on the right, click on the + sign next to Vector 1. Double click on SK Christmas Cookie Star and a box will pop up. Increase the Stroke Width to make it thicker, or decrease the Stroke Width to make it thinner.

5. Right click on Vector 1 and choose Convert to Raster Layer.

6. Click on your Preset Shapes tool again, and choose a shape for the ring that goes on the top. Normally you'd see a circle, but I'm going to use a heart shape.

7. Decrease your Width to somewhere around 3 or 4, and draw out your shape. Right click on Vector 1 and Convert to Raster Layer, and move it so that it is centered on the top point of your star. Make sure it is touching the star so that when we merge the two together there will be no spaces. Here's what mine looks like so far:

Photobucket

8. In the layer palette on the right, right click on one of your layers and choose Merge, then Merge Visable.

* This next part requires Super Blade Pro. If you are not using SBP for this, you can apply whatever plugin you wish and skip to step #11

9. Go up to the Selections tab, choose Select All, Float, then Defloat.

10. Go up to the Effects tab, down to Plugins, and find Flaming Pear's Super Blade Pro.

* You can choose any preset that you wish from here. I am going to be using a silver preset called pracken_heartsilver.q5q. This is not my preset, so I can't include it in the supplies, but the link to the preset is at the beginning of this tutorial. Here's what mine looks like so far:
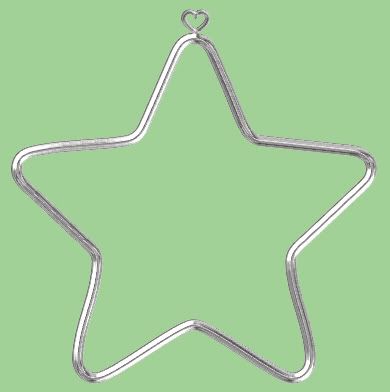
Photobucket

11. Click on your Magic Wand tool, and click inside your star shape.

12. Go up to the Selections tab, down to Modify, then over to Expand and put in the number 3 and hit OK.

13. Go up to the Layers tab, and choose New Raster Layer.

14. Next, go up to the Effects tab, down to Plugins, and over to Eye Candy 5 Impact, then to Glass. Find SK Glass Star w Reflection in the User Settings, click it once to select it, then click on OK.

*I've also included the same glass preset without the reflection if you'd prefer that one. You should have what looks like this:
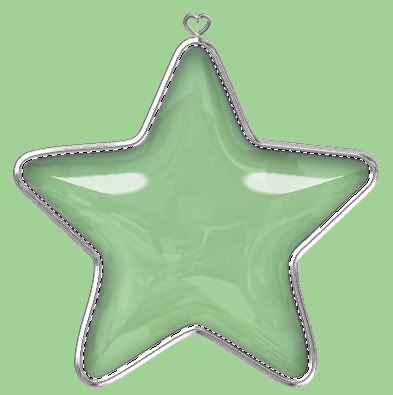
Photobucket

15. In the layers palette on the right, move your glass layer down below your silver star layer.

16. Go up to the Layer tab, and choose New Raster Layer. Move this layer down below your glass and your silver star layer.

* We aren't going to deselect to make our marching ants go away because when we fill our new layer, the marching ants will keep the shape of the star and prevent anything from going outside of it.

18. Working on your new blank layer, open up one of the glitter swatches from the zip and set it as your forground pattern.

* If you want to fill the entire star shape with glitter, just click on your Flood Fill tool and click once on your new blank layer. Your entire star will be filled with glitter.

* if you want only part of your star shape to be filled up with glitter then click on your Freehand Selection tool on the left. It may be hidden behind your Magic Wand tool.

19. Go up to the Selection tab at the top and choose Select None.

20. Make sure you are on your blank layer, take your freehand tool and draw an outline over the silver border of your star shape and down across the middle and then back to your starting point. Try and make sure you don't go outside of your star shape or inside the border of your shape or you will have blank spaces when we fill. This is what mine looks like:
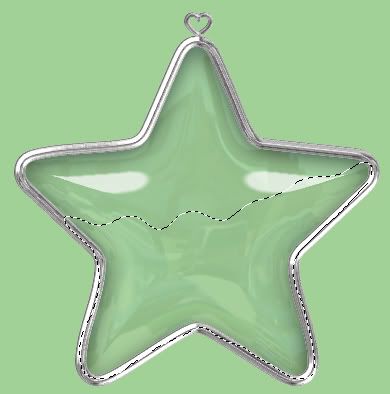
Photobucket

21. Click on your Flood Fill tool on the left and then click once on your blank layer with the marching ants.

22. Go up to the Selections tab at the top and choose Select None.
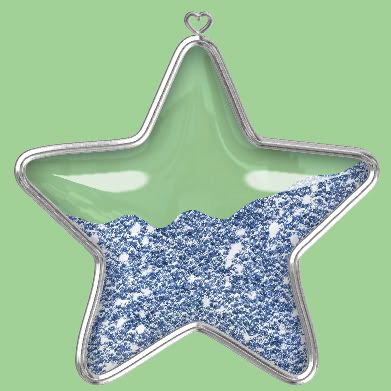
Photobucket

* Now, you can leave it like this if you like how it looks, or you can use a brush to paint on some extra dabs of glitter to obscure the even line across the middle and make it look more jagged.

23. Click on your Brush tool, and in PSP find SK Rough Brush, in PS load SK Rough Edges of Square.abr. It's the same brush, just different names. Leave it at the default settings except change the brush size to somewhere around 43.

24. Go up to the Layers tab and create a new raster layer and place it above your glittered layer in the layer palette.

25. Using short clicks, click a few times along the smooth glittered edge to roughen it up a bit.

26. When you are satisfied with how it looks, turn off all layers except your 2 glittered layers. Right click on one of them, from the flyout choose Merge then Merge Visable. Make all other layers visable again by clicking the eye icon next to each one.

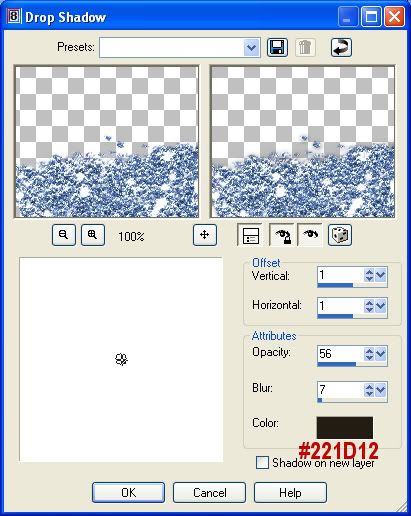
27. We need to give our glitter layer a slight drop shadow to give it a bit of depth so, make sure your glitter layer is active, go up to the Effects tab, then over to 3D Effects, then to Drop Shadow and use these settings:
Photobucket

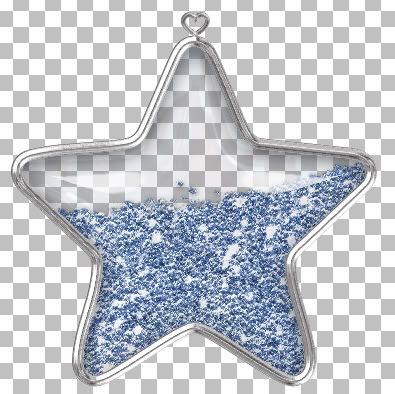
This is what mine looks like at this point:
Photobucket

All that's left to do is make sure your silver star layer is first, your glass layer is second and your glitter filled layer is below those two in the layers palette, right click on one of them and merge visable and you are done :)

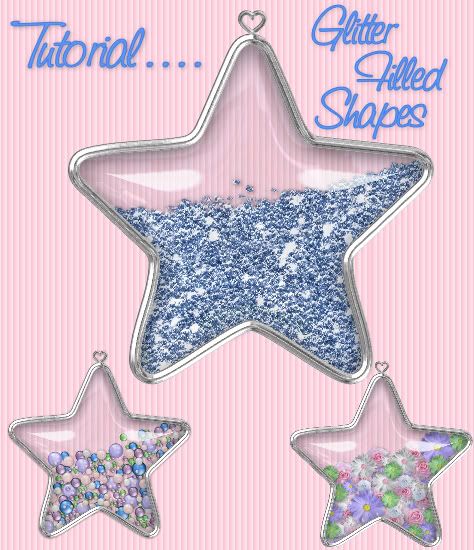
Here's a couple examples of other things you can fill shapes with:

Photobucket

Photobucket


*** A great little program to make glitter and sparkles is one called ArtRage2. You can make regular coloured sparkles, or metalic ones. It also has a stencil feature that you import any design you want into artrage, and you can then fill it with regular or metalic paint, sparkle and glitter ect..... It's also great for making textured papers. You can import any texture you wish, or use the may that come with the program. Here's the link if you are interested in it ArtRage 2

*** Note There is a free version you can download, but the glitter/sparkles option is not available for use with the free one. Here's a link to what the free version and the full version will do Feature Comparison

TOU:

If you do this tutorial, your end result is yours to do whatever you wish; give it away as a freebie, use it as part of a kit, or sell it for profit. You may not make this into an action or script to give away as a freebie or to sell for a profit. A mention or a link back here would be appreciated but is not mandatory. Please do not share my supplies or tut through email, groups or any other means, send them here to my blog to get the supplies and tut for themselves.
 
posted by Scrap Stuff by Shawna at 10:06 AM | Permalink | 93 comments
Snap a Ribbon to a Frame
Photobucket


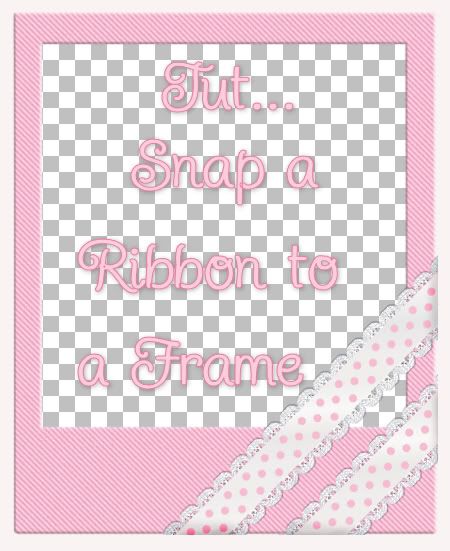
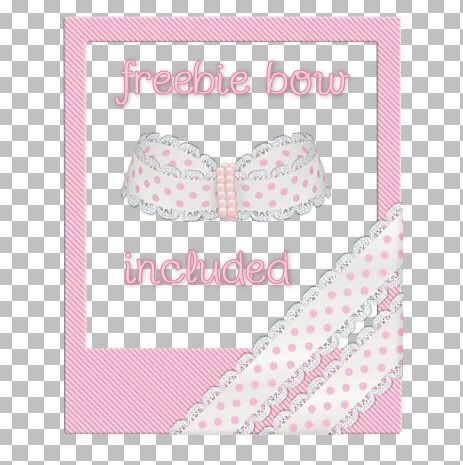
This is a very quick "How To" on getting an even, sharp edge on your ribbons when snapping them to a frame. All supplies included in the zip file are in .PNG format, so i'm assuming this can be done in photoshop as well.


Supplies provided: sample frame, 2 sample ribbons, and a freebie bow. All can be downloaded HERE


* Before we even start, when doing this technique on a different frame, there must be NO DROP SHADOW on the frame or ribbon before snapping it to the frame, or you will not get a sharp even edge.

1. Open up your sample ribbon and your sample frame from the zip.

2. Copy and paste the ribbon on top of the frame layer.

* I've included 2 sample ribbons for you to try out. One is a straight ribbon, the other is a diagonal ribbon. Choose which ever one you want to try out first.

3. Place the ribbon in the direction you want it to appear on your frame, either straight across the bottom, or diagonally.

4. In the layers palette on the right, click on your Frame layer to make it active.

5. Click on your Magic Wand tool and change your settings to the following:

Mode is replace, Match mode is RGB Value, Tolerance is 4, Feather is 0, Anti-alias is checked.

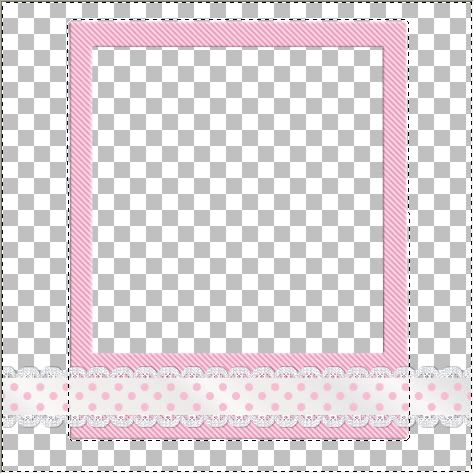
6. Click once with your magic wand somewhere on a blank space OUTSIDE of your frame. You should have what looks like this:

Photobucket

7. In the layers palette on the right, click on your Ribbon layer to make it active.

8. Now hit the Delete key on your keyboard. The extra pieces of ribbon on the sides of your frame should now be gone.

Photobucket

9. Go up to the Select tab at the top, and choose Select None to get rid of the marching ants.

* Darken the edges a bit to make it appear like the ribbon is folding around the sides of the frame. You can use either the Dodge/Burn tool, or the Lighten/Darken tool. I prefer the Lighten/Darken tool.

10. Click on your Lighten/Darken tool on the left. Choose the default soft round brush, size 20 and an opacity of around 38.

11. Make sure your ribbon layer is still selected, and just give the edges a stroke or two. Since our ribbon is mostly white, we don't want it to dark, just something very subtle. Here's mine:

Photobucket

You can also have diagonal ribbons, add a bow or some other elements and you've got yourself a nicely decorated little frame.

Photobucket

TOU:

All supplies provided in this tutorial are for learning and personal use only. They serve the purpose of aiding you in doing this tut and are not to be used for commercial, monetary gain. You may use them for personal projects for yourself, but do not give them away as part of a kit or freebie, or share through email, groups ect......
 
posted by Scrap Stuff by Shawna at 10:01 AM | Permalink | 19 comments
Ribbon Through Eyelet
Photobucket


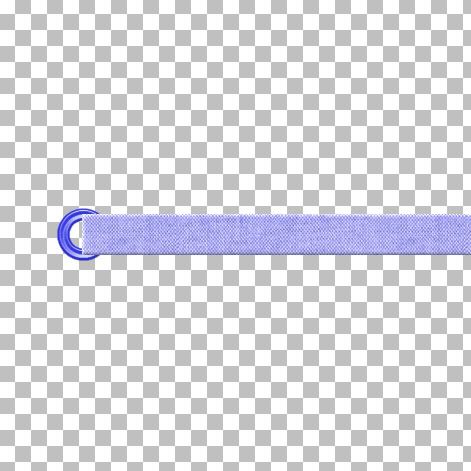
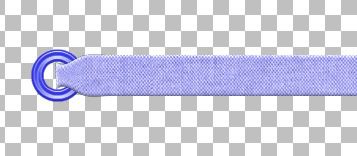
These 2 quick tuts will show you how to use the warp mesh tool to thread a ribbon through an eyelet, with 2 different results.

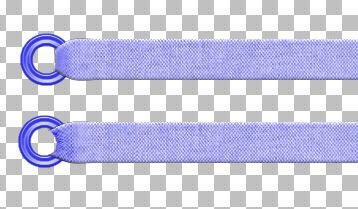
Supplies provided: 1 eyelet and 1 ribbon. You can download those HERE


1. First open up both the eyelet and the ribbon png from the zip file.

2. Create a new transparent image, 500 x 500.

3. Copy both the ribbon and eyelet onto that new canvas.

4. Place the ribbon layer on top of the eyelet and position the ribbon about half way across the eyelet like in the picture below:

Photobucket

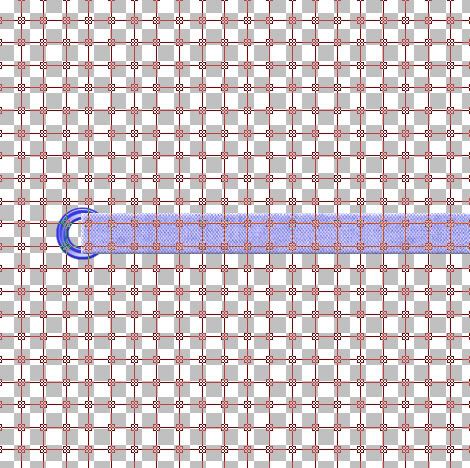
5. Click on your Mesh Warp tool on the left. Change the settings along the top to these:

mesh horozontal is 20
mesh vertical is 20
symmetric is checked
show mesh is checked
edge mode is background
draft quality is high
final apply is best quality

* Yours should now look like this:

Photobucket

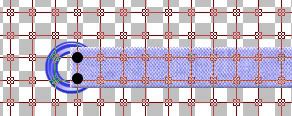
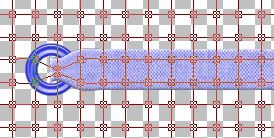
6. Put your cursor on the top node (indicated by the black dots in the example picture below) and pull downward half way down the ribbon. Then put your cursor on the node below that one and pull up to meet the first node. See the 2 example pictures below:

Photobucket

Photobucket

7. Click the Apply button to accept the warping. The apply button is the blue checkmark at the top beside your mesh horozontal setting.

8. Click the Mover tool to get rid of the mesh warp grid on your canvas.

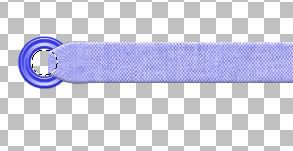
9. You should have something that looks like this:

Photobucket

10. Click on your Selection tool at the left and set it to rectangle.

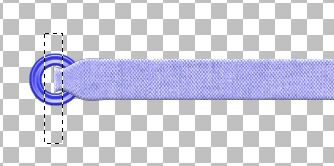
11. Make sure your ribbon layer is the active layer, and draw out a rectangle like in the picture below:

Photobucket

12. Hit the Delete key on your keyboard to get rid of that extra piece.

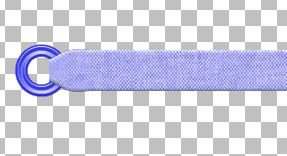
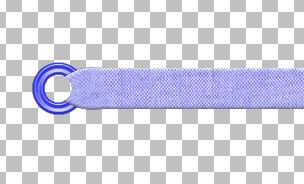
13. Go up to the Selections tab at the top and choose Select None to get rid of our rectanlge. You should have something like this now:

Photobucket

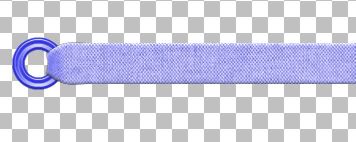
Then just give the cut edge a little darkening with your Burn tool or your Lighten/Darken tool, give it a bit of a drop shadow and you're done :)

Photobucket


Here's a slightly different way to thread your ribbon through an eyelet.

1. Follow the steps 1 through 13 from the above tutorial.

2. Click on your Eyelet layer in the layer palette to make it the active layer.

3. Click on your Magic Wand tool. Mode is replace, match mode is RGB, Tolerance about 4, Feather is 0, and Anti-alias is checked, set it to Outside. Click once on a blank space in the middle of your eyelet. You will see marching ants all around the inside of the eyelet, and they will also be on a section of your ribbon. See picture below:

Photobucket

4. Click on your Ribbon layer to make it active, and then hit the Delete key on your keyboard.

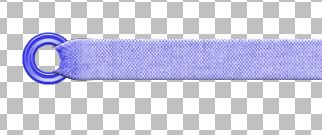
5. Go up to the Selections tab and choose Select None. You should have something like this:

Photobucket

Then you can just use your Warp Brush ( hidden with the paint brush and air brush) not the Warp tool, and smooth out the inside edge a bit and give it a little bit of a burn with the dodge tool or lighten/darken tool, and add a slight drop shadow.

Photobucket


TOU:

All supplies provided in this tutorial are for learning and personal use only. They serve the purpose of aiding you in doing this tut and are not to be used for commercial, monetary gain. You may use them for personal projects for yourself, but do not give them away as part of a kit or freebie, or share through email, groups ect......
 
posted by Scrap Stuff by Shawna at 9:54 AM | Permalink | 17 comments