Friday, January 25, 2008
Downy Furry Fibers
Photobucket


Supplies Needed:

My PSP Brushes: Which you can Download Here. There is an image pack included for those using Photoshop.

1. Open up a 500 x 500 transparent image.
2. Click on your Brushes tool and choose one of the SK Furry Fiber brushes. I'm going to use brush 4. Leave the settings at it's default but, I've resized it down to 43 for a smaller fiber. It just looks better.
3. You need to choose a colour for your fiber. If you want it all one colour, set your foreground to a dark shade and your background to a lighter shade of your foreground. For this tutorial, I am going to use #800000 for my forground and #C00000 for my background. If you want a 2 toned fiber, set your colours to whatever you want.
4. Now we need to change the variance on the brush in order to get it to go right, so hit your F11 key. On the right, your Brush Variance palette should have appeared. Hit the maximize button so you can see all the buttons clearly.(the maximize button is the square right inbetween the minus sign and the x sign)
5. Change your settings to the one's in the picture below and start experimenting on your canvas by dragging your cursor across your page.

Photobucket

*The higher the number you put into the Position Jitter, the more spikey your fiber will become. I like it set at 36 though.
*The first red example is brush 4 with the settings in the above picture.
*The second purple example is brush 3 with a purple gradient set at sunburst.
*The third pink example is brush 2 with a pink gradient set at linear with 1 repeat.
*The fourth green example is brush 1 with a green foreground and white background.
*The fifth orange example is brush 5 with a orange foreground a white background.
*The sixth blue example is brush 7 with a blue forground and lighter blue background.
Photobucket

Play around with the settings and see what you can come up with. Try using gradients as well, and try out different brushes other than the one's I made for you.

When you are done with your brush, in your Brush Variance palatte, in the bottom right hand corner there is a little square with an arrow pointing to the left. Click on that once. It will set your brush back to the default settings so it does not spin the next time you use that brush for something else.
Hit your F11 key to make your Brush Variance palette disappear again also.

TIP: If you want to make a straight line with your brush, click once on a starting point, hold down your SHIFT key and click once at an ending point.

TOU:

If you do this tutorial, your end result is yours to do whatever you wish; give it away as a freebie, use it as part of a kit, or sell it for profit. You may not make this into an action or script to give away as a freebie or to sell for a profit. A mention or a link back here would be appreciated but is not mandatory. Please do not share the supplies or tut through email or any other means, send them here to my blog to get the supplies and tut for themselves.
 
posted by Scrap Stuff by Shawna at 8:56 PM | Permalink | 19 comments
Swirly Suckers
Photobucket


Supplies Needed:

MuRa Meister Clouds:Download Here
Eye Candy 5 Impact: Download Free Trial Here
Rounded End Line Style: Download From Here
Scroll down to where it says Tool Presets, and in the list of Styled Lines download the one called Rounded End.


1. Start out with a 400 x 400 image with a WHITE background.
2. Set your foreground to whatever colour you want your sucker to be. For this I am using this shade of pink #F08CB5.
3. Set your background to the same colour but a few shades lighter. I will be using #F5C8DA.

To give you an idea of the shading difference, take a look at the picture below.

Photobucket

4. Go up to the Effects tab, down to Plugins, choose MuRa's Meister, then Cloud. Use these settings:

Photobucket

Make sure your colours are like the one in the picture; white, then the dark pink, then white again. Hit the OK button when satisfied.

Your canvas should now look something like the picture below. We wanna see some darker shades of pink, some light, and some white all mixed in together.

Photobucket

5. Next, go up to the Effects tab, then to Distortion Effects, then down to Twirl. Set the Degrees Number to 720, and click OK.
6. Repeat step #5 once more.
7. After 2 twirls, your canvas should now look like this:

Photobucket

Now we need to make our circle shape for the sucker.

8. Click on your Selection tool, and change it to Circle. Put your cursor in the middle of your canvas, hold down the shift key and draw out a circle.

Photobucket

Now we need a bigger transparent canvas to paste our sucker onto and long enough to have the stick in there too.

9. Open up about a 800 x 800 transparent canvas.
10. Make your pink sucker image active then go up to the Edit tab and choose Cut, then back to the Edit tab and choose Paste as New Layer and paste it into your 800 x 800 image.

Move your circle near to the top of the page so we have room for the stick. And you can get rid of the layer that we cut the circle out of too.

11. Go up to the Effects tab, down to the Plugins tab, then to Eye Candy 5 Impact, then to Glass.

On the Basic tab use these settings:

Photobucket

On the Lighting tab use these settings:

Photobucket

On the Bevel Profile tab choose Button and hit OK. Yours should now look like this:

Photobucket

12. Now for the stick. Set your foreground and background to white.
13. Click on your Pen tool and use these settings: Segment type is Line Segments, Line Style is amc round ended solid, Width is 13. Depending on the size of sucker you made, your line may need to be bigger or smaller.
14. Put your cursor a quarter of the way up into your sucker, hold down your shift key and draw out your line.
15. In the layer palette, right click on Vector 1 and choose Convert to Raster Layer.

You can bevel this any way you want to, with the bevel option in psp, but I used EC5 Impact Bevel for my sticks.

On the Basic tab:

Photobucket

On the Lighting tab:

Photobucket

In the Bevel Profile tab choose Button.

Center your stick with your sucker and merge visable layers. That's all there is to it. Try cutting different shapes out of the swirly layer other than just circles. Instead of using the selection tool for the circle, choose a preset shape, draw it out on your swirly layer, and position it to whatever looks good to you. In the layer palette, convert it to raster layer. Go up to the Selections tab, choose, Select All, Float, then Defloat. Now delete the preset shape layer in the layer palette. Your marching ants are still holding the shape you chose, so just select Cut from the Edit menu and paste into a new canvas and finish off with the plugin.

TOU:

If you do this tutorial, your end result is yours to do whatever you wish; give it away as a freebie, use it as part of a kit, or sell it for profit. A mention or a link back here would be appreciated but is not mandatory.
 
posted by Scrap Stuff by Shawna at 8:44 PM | Permalink | 23 comments
Monday, January 21, 2008
Tin Frame
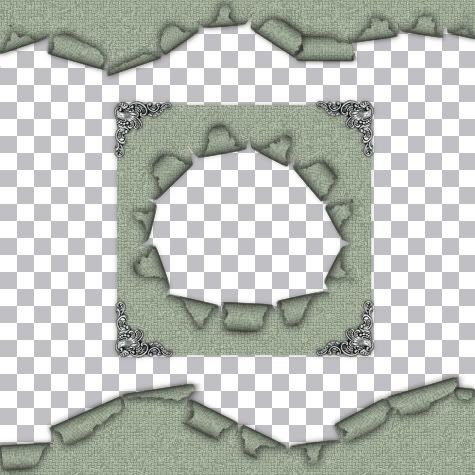
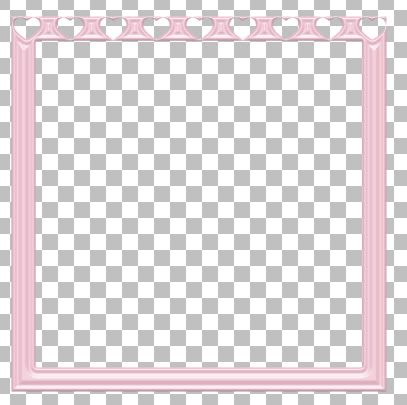
This is what we will be making. A frame that has a tin look to it. Miss Daisy from Scrapped Memories has translated this tutorial into Spanish. You can view it on her tutorial page MissDaisy.blogspot.com/Tutorials
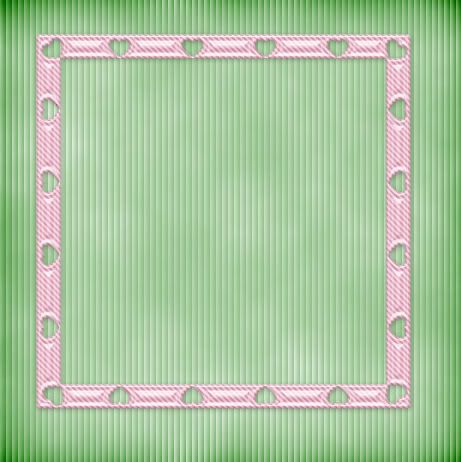
Photobucket

Supplies Needed:

Eye Candy 5 Impact: Download Trial Version Here
MuRa's Copies: (optional) Download MM Copies Here


1. Start out with a 500 x 500 transparent image.
2. Set your foreground and background to #F5C1D2 or whatever colour you choose.
3. Click on your preset shapes tool and choose the rectangle. Create as vector and Anti-alias are both checked, line style is solid, line width of 1.
4. Hold down your shift key and draw out your square.
5. In the layer palette to the right, right click on Vector 1 and from the flyout choose convert to raster layer.
6. Go up to the Selections tab at the top, then to Select all, then to Float and then to Defloat. Marching ants should now appear all around your square image.
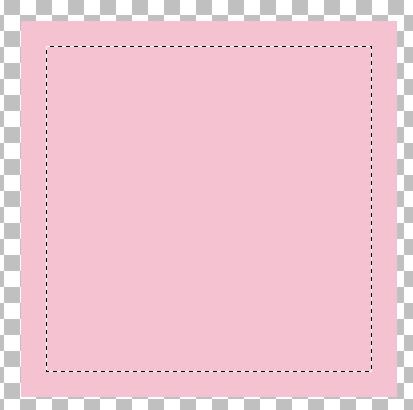
7. Go up to the Selections tab and choose Modify, then Contract, and set the number to about 25. The part of the square that is OUTSIDE of the marching ants is going to be how thick your frame is, so you may want to adjust the number to something higher for a thicker frame or to a lower number for a thinner frame. Yours should look like this so far.

Photobucket

8. Now hit the Delete key on your keyboard. The middle of the square should now be transparent.

Photobucket

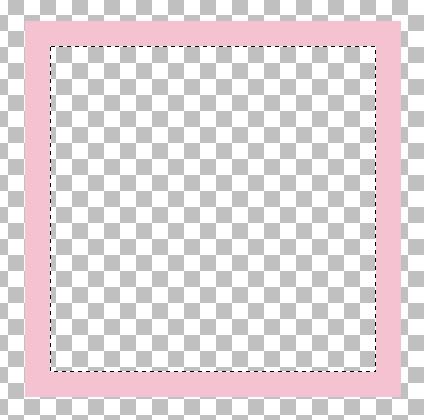
9. Go up to the Selections tab and choose Select None.
10. Set your foreground and background to black.
11. You can use any shape you want here, but I'm going to be using hearts since it's close to valentines day. Click on your preset shapes tool and choose your shape.
12. Hold down your Shift key and draw out your shape. Make sure it isn't too big and doesn't come too close to the top and bottom line of your frame because when we use the plugin on it, it gives it a bevel and the shape will cut right through like in the picture below.

Photobucket

13. Right click on Vector 1 in the layer palette, and choose Convert to Raster Layer.
14. I'm going to use a repeating shape for this. Place your new shape near the center of your canvas so you can see it in the preview window in the next plugin we are going to use.
15. Go to the Effects tab, down to Plugins, and choose MuRa's Meister, then to Copies. These are my settings, yours may be different, depending on what shape you chose to use.

Photobucket

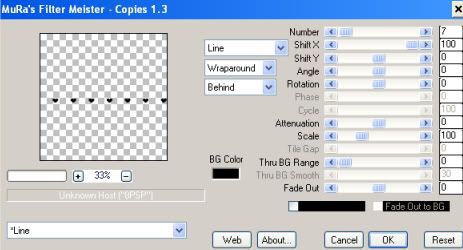
I ended up with a straight line of 7 hearts, but I only want 4 of those in a row, so I took my Selection tool, and drew a rectangle around 3 of the hearts then hit my delete key to get rid of them.

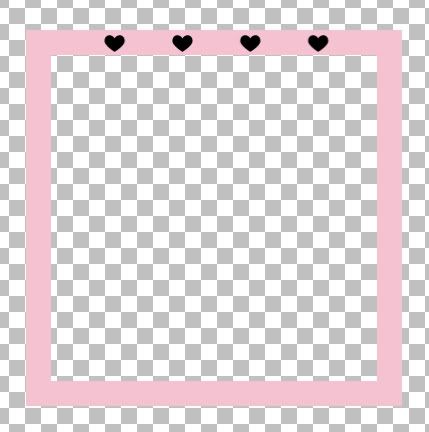
16. Place your 4 hearts centered along the top of your frame like this:

Photobucket

17. Make sure your 4 hearts layer is the active layer and go up to the Edit menu, choose Copy, then choose Paste as New Layer. You should have a second row of hearts on your canvas.
18. Go up to the Image tab, choose Flip. The second row should have now turned upsidedown.
19. Place your second row of hearts evenly along the bottom of the frame. You may want to turn on your Grid to get the top, sides, and bottom even with each other. (View tab, then Grid)
20. Go up the Edit tab again and choose Paste as New Layer. A third set of hearts is now on your canvas.
21. We need to turn these sideways, so now go up to the Image tab, choose Rotate, then choose Free Rotate.
22. Put the green dot beside the word Right, a green dot beside the word Free, and change the number to 90.00. At the bottom, make sure All Layers and Rotate Single Layer Around Canvas Center is not checked off. Now hit OK.
23. Your third layer of hearts should now be running vertical. Place them on the right side of the frame.
24. Go up to the Edit tab, select Copy, then select Paste as New Layer. A duplicate of the third layer of hearts should now be on your canvas.
25. Go up to the Image tab and choose Mirror. Place those hearts on the left side of your frame.

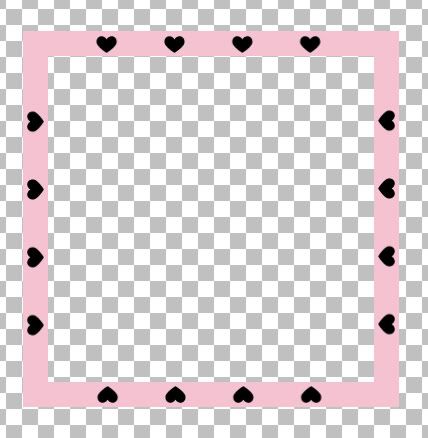
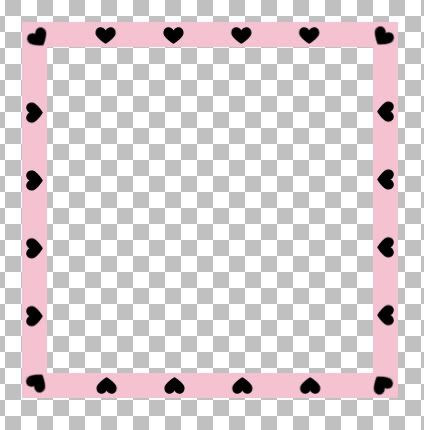
So far you should have something similar to this:

Photobucket

26. The corners look a little bare. Make your heart layer at the top of your frame active. Click on your Selection tool and set it to rectangle.
27. Choose one of the hearts, and make a rectangle selection around it. Don't get any of the other hearts in your selection.
28. Go up to the Edit tab, choose Copy, then choose Paste as New Layer. One single heart should be in the middle of your canvas.
29. Go to the Selections tab and Deselect.
30. Next we need to rotate this to fit into the corners of the frame. Go to the Image tab, choose Rotate then Free Rotate.
31. Leave the settings as they were before but now change the number to 35.00 and hit ok. Move your single heart into the top right hand corner.
32. With that new heart layer active, go up to the Edit tab, choose Copy then choose Paste as New Layer.
33. It should be a duplicate of the heart in the top right of the frame we just did. Go up to the Image tab and choose Flip. Place this heart in the bottom right hand corner of the frame.
34. Go up to the Edit tab, choose Paste as New Layer.
35. Go up to the Image tab and choose Flip, then back up to the Image tab and choose Mirror. Place that new heart into the bottom left corner of the frame.
36. Go up to the Edit tab and choose Paste as New Layer, then to the Image tab and choose Mirror. Place that new heart into the top left corner. You should have what looks like this now:

Photobucket

Now at this point, I would hit your Ctrl and D key to duplicate your image just incase something doesn't go right and you won't have to use your undo key 20 times to get back to this point to fix it. Minimize your duplicate.

37. Now we need to merge all the black hearts together into one layer. Turn off your pink frame layer (hit the little EYE icon next to the pink frame in the layer palette to the right). Make sure you have your hearts placed how you want them.
38. Right click on one of the other layers in the palette and choose Merge, then Merge Visable.

You should now only have 2 layers in there, one called Merged and another called Raster 1 or 2.

39. Make sure your layer named Merged is active, and go up to the Selections tab, choose Select All, then Float, then Defloat.

All of your little black hearts should now have marching ants around them.

40. Hit your delete key, and the little black hearts should now be gone. Don't worry if there's a black outline showing, we will get rid of that soon.
41. Click on your other layer named raster 1 or 2 to make it active in the layer palette. Now hit your delete key again. You should now have all little heart holes in your frame like in the picture below:

Photobucket

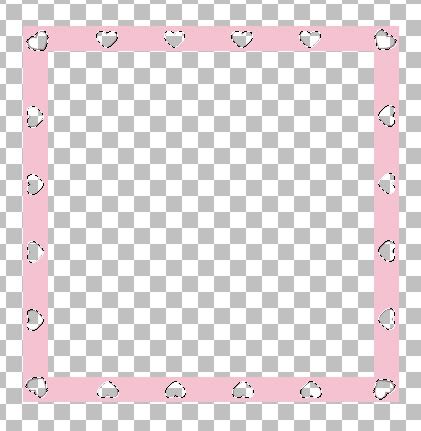
42. Click on the layer named Merged and right above it and to the right is the delete icon (looks like blue square and a white overlapping square with a red X through it). Hit that button to delete the Merged layer. It had those little black outlines on them.
43. Go up to the Selections tab and hit Select None.

Next we are going to put a texture on it.

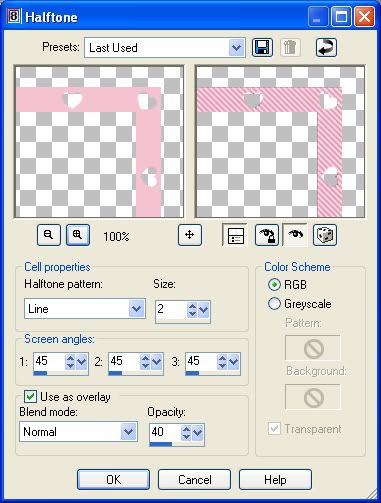
44. Go up to the Effects tab, choose Artistic Effects and then choose Half Tone and use these settings:

Photobucket

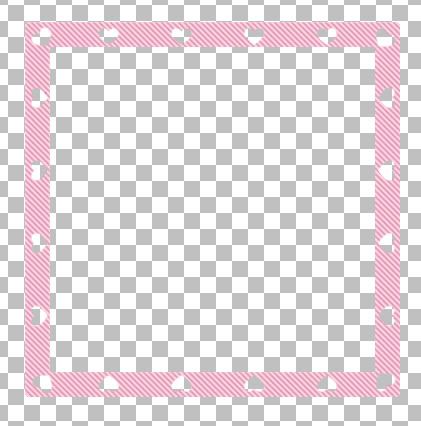
This is where you should be right now:

Photobucket

Now we are going to put the tin effect on it with EC5 Impact. Are you still with me? I bet your left butt cheek has gone to sleep huh? Mine has. We're almost done here.

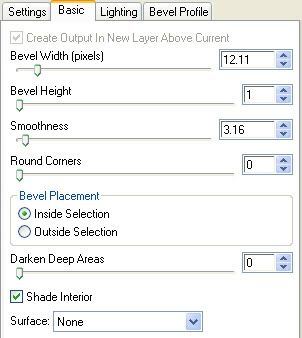
45. Go up to the Effects tab, choose Plugins, then choose Eye Candy 5 Impact, then Bevel. In the Basic tab, use these settings:

Photobucket

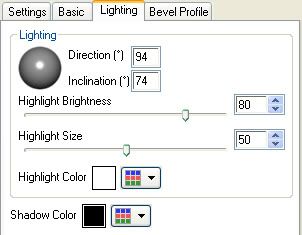
In the Lighting tab use these settings:

Photobucket

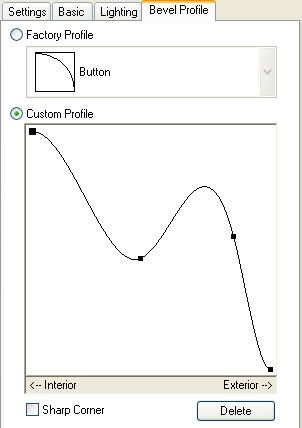
In the Bevel Profile click on Custom Profile and try and get as close as possible to this wonky shaped line. Click with your mouse to get the extra nodes in there.

Photobucket

Before you click on OK, on the Settings tab, down at the bottom click on the Save button and name this Tin Frame so you can use it again on something else. And that's it, you're done :)

TOU:

If you do this tutorial, your end result is yours to do whatever you wish; give it away as a freebie, use it as part of a kit, or sell it for profit. You may not make this into an action or script to give away as a freebie or to sell for a profit. A mention or a link back here would be appreciated but is not mandatory. Please do not share the supplies or tut through email or any other means. If you are using this or any of my tutorials for your groups or as part of your own tutorial, please post a link to the tut on my blog and let your members download the supplies from my blog for themselves.
 
posted by Scrap Stuff by Shawna at 12:52 PM | Permalink | 13 comments
Thursday, January 17, 2008
What Does That Plugin Do????
This page is going to be dedicated to some of the plugins, scripts, and programs that I use often, and what effects you can achieve using them. I will be updating it continously, adding more as I find and use new ones, so check back to see what's new.


Pixara Twisted Brush: View Product Here

This program produces great textured papers. The example below are just a few of hundreds of textures it offers. Just fill your canvas with a colour, gradient, or pattern in PSP or PS then save it as a .jpg. Open it up in Twisted Brush and choose a texture from the Filter menu. There are 4 main texture categories at the bottom of the filter dropdown, and then 4 categories under each of the main ones. The two that I use most is Texture Emboss and Texture Bump. Each texture will produce a different look depending on the colour you've chosen or pattern. If you have a light blue canvas and a dark green canvas and try the same filter on each, it will come out looking different from each other so experiment with all different shades a patterns.

Unfortunately, with the free version of this program, you can't use the texture filter. But I'm sure if you know where to look, you can find a working version.

Photobucket


Redfield: Ripples Magic

This plugin makes some flowers out of any circle shape. You can layer the shapes, use patterns, or gradients, then add embellishments. This is not a free plugin, but again, search and you'll find a working copy. I'm not positive, but I think there is a free demo version in the link above.

Photobucket

It also gives your background papers some quick folds.

Photobucket


Alien Skin Xenofex 2: Fully Functional 30 day Trial

This plugin can do many things, most of which i don't care very much for the reslults, but I do like the Rip Open effect. You can rip holes in things or rip and curl a straight section of paper.

Photobucket


ABR Viewer: Download it Here

This is not a plugin or a filter but a great little program called ABR Viewer. There are tons of great brushes for photoshop out there, and with this program, you can open up the photoshop .abr brush file, and export them to png images, then use those images in PSP to export as brushes. Below is a scaled down image of ABR Viewer

Photobucket

Install the program, then double click the icon to open it up. On the left, where it says thumbnail size, the default is set at 80, which is pretty small for viewing, backspace that out and change it to the maximum size of 270 and then hit Enter on your keyboard.

On the left again where it says File, click that, then scroll to Open Brush Sets. Navigate to where you have saved some .abr photoshop files and click once to select a set and click Open. All the previews of each brush in that set will appear on the right in the preview panel.

To export those brushes into .png files, RIGHT click on the name of the brush file you are viewing, (in the above preview, it is where it says SK Easter Set #2 2008) then click on Export Thumbnails. A "Browse For Folder" popup box will appear. Navigate to where you want to save the images, and click OK.

They will all save as .png images into the file of your choice. All you do next is open up your PSP program, open up one of your new exported .png image files, go to File, Export, then to Custom Brush. Give your brush a name and you are done. Be sure to give the proper credit and name to the original maker of the brush though.


PLUGINS:


Alien Skin Eye Candy 5 Impact:

You can get a free fully functional trial for 30 days here ~Click Here~

EC5 Bevel:

This is great for creating buttons, text or puffy stickers. You can choose any of the preset bevels or make one yourself by playing around with the custom bevel settings.

Photobucket


EC5 Chrome:

This is kind of self explaining. It turns things into silver or chrome creations.

Photobucket


EC5 Glass:

With this glass option, you can create any shape and make it look like a transparent, glass shape so that your background is visable through it, or you can give a solid shape a glass overylay look.

Photobucket


MuRa's Meister:

Copies: Download It Here

This plugin will take a single image, or tube and create duplicates of it in different shapes and designs. Make a single bead wave vertically or horozontally, a single flower petal and duplicate it to form a circle of petals, put a tube into a single line.... You choose the spacing, number of images, angle, rotation, and many more options. These are just a few things that MM Copies can do. Play around in it and see what you can do.

Photobucket


Redfield Jamma 3D: Download It Here

There's a bunch of differnt settings in here, most of which I don't use, but you can poke around in the setting and come up with a few good ones.
I've made one that I use to make parts of my ribbons transparent so the background paper shows through.

Photobucket


Xero Porcelain:


This plugin will make your element have a soft hazy look to it. You can download it for free Right Here

Photobucket


Texturize Plugin:

With this plugin, you can apply a texture to anything you want; tags, ribbons, papers, borders ect..... Place it into your plugins folder. There are 4 default textures that come with this, but you can make your own textures from images or textures found on the net. They must be saved as a .pdf in order for them to work with this plugin. I've already mentioned texturizer in my tutorial "Tag From Images", so rather than uploading it a second time, I'm going to give you the link to those supplies. The texturizer plugin is in that zip. You can Download It Here

Photobucket


SCRIPTS:


Tea Bag Folding Script: SuzShook Tea Bag Folding Script Here

This script takes any square image you choose, it could be patterned or plain, and assembles it into 1 of 7 different shaped designs. It also gives you the option to bevel it during the script run.

Photobucket

Unzip the folder, find ss-TeaBagFolding-00.Pspscript and copy and paste it into your "Restricted Scripts" folder. In PSP, open up a square image you want to use. (There are 7 different designs to choose from, and option 1, 3, 5, and 7 take one image and for options 2, 4, and 6, you must have 2 images open in order for that one to work, so, do a little experimenting first). Go up to the tool bar at the top and find ss-TeaBagFolding-00 from the dropdown arrow. Next, push the single arrow that's pointing to the right to start the script.


Colour Chip Maker Script: SuzShook Color Chip Maker Script Here

This script takes whatever colour you have set as your foreground, and makes a strip of lighter and darker shades for you to choose from for your projects. Place the script into your "Scripts Restricted" folder. See pic below.

Photobucket


Pattern Extend Script: Pattern Extend by Jos Script Here

This script takes any small seamless pattern and extends it horozontally and or vertically to whatever dimensions you want. It saves you a lot of copy and paste work when trying to make a large seamless background or even a repeating ribbon design. See the link for examples and instructions.


Vector Tube Script: This script takes a vector object and paints the outline edges of the object with a TUBE of your choosing. The vector objects can be something drawn with the pen tool, any preset shape, or just some text. You choose a tube, adjust the size and step settings so that the tube is spaced evenly, one after another, then select the vector object that you want to paint and run the script. The picture below is just a heart preset shape drawn out in black on my canvas. Do not convert to raster because the script will not work. I choose a rose coloured bead tube, and ran the script. It outlined my heart with the beads perfectly. The script puts the tube outline on a seperate layer so you can just use the ouline if you want. Unzip the script and place it in your Scripts-Restricted folder. It can be downloaded Right Here

Photobucket


Vector Paint Script: Like the vector tube script, this script takes a vector object and paints the outline edges of the object with a PAINT BRUSH of your choosing. The vector object can be something drawn with the pen tool, any preset Shape, or just text. Just set the paint brush settings how you want, select the vector object that you want to paint and run the script. Unzip the script and place it in your Scripts-Restricted folder. It can be downloaded Right Here

Photobucket


Gingham From Colour: Download Here

This script will give you a 120x120 seamless square of coloured gingham for background fills, ribbons, borders, anything you can think of to use it on. You have the option of choosing up to 3 different colours, or just one or two, your choice. You can also use gradients or patterns instead of just a colour. This script goes into your Scripts Trusted folder in PSP.

Photobucket
 
posted by Scrap Stuff by Shawna at 4:01 PM | Permalink | 37 comments
Tuesday, January 15, 2008
Using EC 5 Impact with Shapes
This tutorial will show you how to get a very pretty smooth plastic look for buttons and buckles.

Photobucket


Supplies Needed:

Eye Candy 5 Impact: Download Trial Version Here
Mura's Meister Copies: Get It Here This plugin is optional. It's used to duplicate the polka dots, but it's not mandatory for this tutorial.
Button/Buckle Shapes: You can download my shapes from my blog:

Buckles Here
Buttons Set #1 Here
Buttons Set #2 Here
Buttons Set #2 Here


1. Open up a 500 x 500 new transparent and set your foreground and background to whatever colour you choose, or you can use a gradient for this as well. I'm going to be using this baby blue #9CDDFE.
2. Click on your Preset Shapes tool, and choose one of the button or buckle shapes. Hold down your Shift Key, and draw out your shape.

Photobucket

It's pretty flat, plain and boring, so I'm gonna spiff it up with some polka dots.

3. In your layer palette, right click on Vector 1 and choose Convert to Raster Layer.
4. Change your foreground to a darker shade of blue. I'm going to be using #1DB6FD. And change your background colour to white.
5. Click on your background colour again, navigate to the Gradient tab, and scroll down till you find Foreground-background and click on that. Set the properties to: Style is Sunburst, Angle and Repeats are both set to 0, Horozontal and Vertical Center Points are both set at 50. Your palette should look like this:

Photobucket

6. Click on your Preset Shapes tool, and set it to Elipse. Draw out a tiny circle (the size you want your polka dots to be) onto your button layer. Move the dot to someplace close to the middle of your canvas, so you will be able to see it in the view tab of this next plugin we are going to use.
7. In the layer palette to the right, right click on Vector 1 and convert it to a raster layer.
8. Go up to the Effects tab, then to Plugins, then to MuRa's Meister and click on Copies. Change the settings to what I have in the picture below. Depending on the size of your button, you can change the spacing of the dots by moving the Number slider up or down.

Photobucket

9. Now you have a perfectly straight line of dots. From the Edit tab, copy and paste the line, as a new layer, over and over onto your button layer as many times as you like to get the look that you want. This is what I ended up with.

Photobucket

10. When you are satisfied with the spacing of your dots, turn off the button layer, (click the tiny Eye icon next the the layer that your button is on in the layer palette), and then right click on one of your dot layers and from the flyout choose Merge then Merge Visable.
11. Turn your Button layer back on. Now, click on your eraser tool, and erase all the extra dots that fall outside of your button. Make sure that the merged dot layer is highlighted blue in your layer palette to the right and not the button layer.
12. When that's done, merge visable all of your layers.
13. Go up to the Effects tab, choose Plugins, then choose Alien Skin Eye Candy 5 Impact, then choose Bevel, and use these settings.

Photobucket

Photobucket

On the last tab labled Bevel Profile, choose Button.

If you like this setting and want to reuse it at another time, on the Settings tab, click the Save button and give your new preset a name.
This is what I ended up with:

Photobucket

This small round button uses EC5 Impact as well, I've just added some ribbon thread to the middle

Photobucket

This is a Christmas charm I made out of a heart shape, one tear drop shape, and an oval shape. I just added some snowflake tubes and some text. The tut I used is called Winter Ice and you can view it Here

Photobucket

TOU:

If you do this tutorial, your end result is yours to do whatever you wish; give it away as a freebie, use it as part of a kit, or sell it for profit. You may not make this into an action or script to give away as a freebie or to sell for a profit. A mention or a link back here would be appreciated but is not mandatory. Please do not share the supplies or tut through email or any other means, send them here to my blog to get the supplies and tut for themselves.
 
posted by Scrap Stuff by Shawna at 9:31 AM | Permalink | 10 comments